Continue to Site

Welcome to our site!

Electro Tech is an online community (with over 170,000 members) who enjoy talking about and building electronic circuits, projects and gadgets. To participate you need to register. Registration is free. Click here to register now.

  • Welcome to our site! Electro Tech is an online community (with over 170,000 members) who enjoy talking about and building electronic circuits, projects and gadgets. To participate you need to register. Registration is free. Click here to register now.

Auto Load Sensing Switch A/C

Status
Not open for further replies.
In another project I added a knee switch to the Delta table saw. With an added feature of a remote On/Off cabled pendent. That was so I could start and stop the saw when I was ripping an 8' piece of material while standing 8' from the knee switch. ;) Now I would use RF wireless.
Its all good as long as we buy American.
I do thank you for the photos. it has made the schematic very clear. Thank you Ken.
 
Years ago I designed a control for starting a ShopVac from my table saw. If I started the ShopVac at the same time as I started the saw the breaker would trip. So I had the circuit delay the ShopVac start about 2 seconds after the saw. I also had a 10 second shutoff of the ShopVac after I shut off the saw, to continue dust pickup until the blade stopped spinning. Worked great and is still in use today. Funny thing is I posted the circuit on an Electronics forum and shortly there after there was a commercial version that popped up on the market. What are the chances that someone would independently come up with a system with the exact same features as mine. iVac was the first. You can also buy them under the name i-Socket from DGC Products. I also see someone has a DIY version: ShopVac control
I made a current transformer in the same way as you did, with a conventional transformer with the secondary replaced, and reversed so the output was the old primary.

I had a single turn input as the current was larger, and all I did was light an LED with it.
 
i thought you might suggest that but i do know things. i just did not understand what your references were. i assure you ive had lots experience with high and low voltage. I was the General Contractor on my own homes construction. I did all the electrical wiring myself. connected hundreds of lights and switches. Installed electrical panels, and was recently the electrician on my own swimming pool. did the high voltage and the low voltage. I programed the pools automation too. and I knew nothing when i began. That is just the kind of person i am. I also have junk bins full of electronics, switches, relays, and now that you have confirmed what T1 is im sure i can find one in my transformer bin. I dont mean to ramble but i also make furniture. Never knew a thing about it a few years ago but ive made some pretty incredible things. And Ive never lost a single digit. ive got tools in my shop that can cause more damage that 110V (lol) What im trying to say is i can learn and be cautious at the same time.

Im not angry or mad by your comments. not one bit. if your still uncomfortable helping me i completely understand.
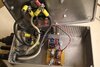
I've done a quite a lot of house wiring, and a lot of electronics.

Home-made electronics may not work first time and may need fault-finding. When doing that it's really easy to leave a multimeter on Amps when measuring voltage, or to touch the wrong pin of an IC when looking at if from underneath, and the IC pins are close together so really easy to get the voltmeter pin to short two together. However, when working on low voltages, it's all safe and it's easy to blow an IC but it's really quite difficult to do real harm to oneself.

House wiring doesn't have nearly as much possibility for subtle mistake. Terminals have big separation, so it's easy to check voltages, and it's all relatively simple, and testing is either measuring voltages, or turning off and measuring resistance.

Your circuit would probably work, but it would be very difficult to fault-find safely. There are lots of ways it could go wrong. For instance, if D3 has a bad connection, IC1 and C1 will probably both explode. So you could leave them out and check the voltage, but you would need the circuit live for that. If your circuit didn't work, you have to ask yourself what would you measure and how would you do it safely.

I have worked on transformerless supplies like that, but they are the ones that make me the most nervous for the reasons I've outlined above.

Several discussion forums ban talking about transformerless supplies, as they are considered dangerous. This forum allows us to discuss transformerless supplies, but we are generally very cautious in offering advice due to the ease of making a big mistake.

K Moffett's circuit is really simple on the 110V side, and the rest is at low voltage, so it's much easier to work on safely.
 
after careful study of your posts, images, and schematic i understand this perfectly.
The component T1 is just a simple DC transformer @ 12v. You have one in each box to power the circuits. The circuit in the Table Saw box uses your modified DC transformer to sense the current from the hot (load) of the saw. (i believe the load wire is just passed through a loop in the #12 wire) this trips the 12V Reed style relay that is sent through a cable to the second box. That circuit (based on R4 & C3 ) delays the vacuum from turning on via the SSR. After the saw is turned off the circuit delays the vacuum from turning off (based on the values of R6 & C4)

in my design all will be in one box so i need just one 12v transformer to power the circuit.if i have anything wrong please correct me.
 
K Moffett's circuit is really simple on the 110V side, and the rest is at low voltage, so it's much easier to work on safely.
I would try to find a way to isolate the low voltage from the high voltage. perhaps two boxes. With only the high voltage load wire to be tested for current entering the circuit side.
 
You really don't need two boxes. One 12vdc supply can supply both portions. The 12vdc's T1 and the SSR isolate the low voltage circut from the line voltage.
Ken
 
You really don't need two boxes.
ok no problem.
About R4 ab R6 ab
R4b & R6A are variable resistors. What range are they?
I am assuming your start/stop delay option values list is referring to R4A and R6B. Yes?
 
Last edited:
I could use a substitute for 1N5918. it is not available.
UPDATE: 1N5819 is a substitute.
 
Last edited:
In my schematic's timing list R4 = R4a + R4b. R6 = R6a + R6b, If R4a is 10K and R4B is 50K the range will be 1 second to ~5 seconds. If R6b is 47K and R6a is 200K the range will be from 4 second to ~15 seconds. Those are standard resistor and pot values. 1N5919 should e OK.
 
Kmoffett.
could you elaborate whats going on in your connections on this SSR. There seems to be more wires connected to the AC side then in your schematic.
 

Attachments

  • RemoteSwitch5-1.JPG
    RemoteSwitch5-1.JPG
    51.2 KB · Views: 198
I realized that I also didn't include the Manual/Auto switch in the schematic. It is just an SPST toggle switch that parallels the Line side of the SSR. Maybe a better view in these photos.


DSC02859.JPGDSC02860.JPG
 

Attachments

  • ShopVac Delay5.bmp
    866.3 KB · Views: 170
ive studied your Table saw images and schematic. wondering if i could use this in place of your modified current sensing transformer with this current sensing switch. here are some of the specs. there are a few others. they are similar. I do have a few 24v transformers i pulled from some Air Conditioner Air Handlers but id rather not alter them if i dont have to.

Current Measurement Range : 0.25 - 200 A
Current Sensor type : Current Switch, AC
Electrical Wiring Size : 24 - 14 AWG (0.2 - 2.1 mm²)
Measurement Type : AC Current
 

Attachments

  • hawkeye_h800$01.jpg
    hawkeye_h800$01.jpg
    33.1 KB · Views: 188
I kinda of like this one:
H300
Amazon

Lower current sense range. .15A-60A
N.O. relay output. This eliminates:RLY1, Q1, R1, R2, C2, D3, D4, andD5. The H300's output is now in place of RLY1's N.O. contacts. Still need a 12VDC supply for the upper delays part of the circuit.
Ken
 
Nope. I finally found the datasheet and installation sheet for the H800. I thought the output was a voltage. The output is relay contacts like the H300. So the elimination of all those components works for the H800 too.
 
Modified schematic
 

Attachments

  • ShopVac Delay6.bmp
    866.3 KB · Views: 172
Modified schematic
How cool. i have been working on what i thought would be a correct drawing myself. I do not have all the components in my library so i subbed where i had to and labeled what they represented. I thought it would be acceptable if my 12V DC power supply remained outside the control box so i can leave it in tact. I just plug it into the wall and use a jack to plug the DC side into the box to feed the circuit board.

In addition to that alteration the design remains the same.
I do have two questions.
Can i use in place of the reed relay a coil relay instead. mainly because i have them. i placed it in this design. if its fine i think i need to place a diode across the 12v side. i dont remember why but ive seen it in many examples.
The other is since the 12V DC supply is outside the box are the 1n4001 diodes still needed. Honestly I do not understand the way the transformer ties into the circuit. if its DC then just two wires should be shown but instead there are 3. I left them in the design so LMK if ive done anything wrong. It does not look logical but i may me misunderstanding the drawing.
EDIT: I just zoomed in on the box with the 25amp relay. (time delay circuit) I see 3 capacitors but in your schematic there are only 2 documented. Two (blue) look like 1000uF 16V and the third (black) i cannot tell.
 

Attachments

  • Auto ON-OFF.bmp
    2.4 MB · Views: 189
Last edited:
i did realize the fuse in my drawing is in the wrong place. And i also forgot to insert the over ride switch.
 
Status
Not open for further replies.

New Articles From Microcontroller Tips

Back
Top