Continue to Site

Welcome to our site!

Electro Tech is an online community (with over 170,000 members) who enjoy talking about and building electronic circuits, projects and gadgets. To participate you need to register. Registration is free. Click here to register now.

  • Welcome to our site! Electro Tech is an online community (with over 170,000 members) who enjoy talking about and building electronic circuits, projects and gadgets. To participate you need to register. Registration is free. Click here to register now.

Junebug Assembly Tips

Status
Not open for further replies.
blueroomelectronics said:
Well I was working on a side project that has a small breadboard, a 40pin PIC (a few choices), 20MHz crystal (deselectable), USB optional, keypad / LCD using up ports D & E
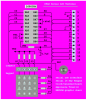
What type of LCD? 4 or 8 pin interface? What type of keypad? If it would help I could show you how I use 12 pins for a 44780 type LCD using the 4 pin interface mode, PWM contrast control, 16 key keypad, and piezo speaker for switch press beep.

Mike
 
It was 4 bit, the trick was to only use port D & E (11bits) for both a 4x4 keypad & an LCD. 7 for the LCD + 4 for the keypad (using 4bits from the LCD too)
Of course I'd like to see your design Mike, that's a lot of stuff for only 12pins.
 
Bill,

Forgive me. I thought you were using up 16 pins but if you're doin' all that with 11 pins then there's no new tricks I can share -- you're already a 'Master'... I'll attach the diagram anyway for anyone who'd care to take a look.

Regards, Mike
 

Attachments

  • K8LH LCD-18 v1.PNG
    K8LH LCD-18 v1.PNG
    50.5 KB · Views: 302
The RS pin as an input is pretty neat :) and you Mike are the master of streching I/O.

I did have the LCD RW pin supported, I could put a jumper for a buzzer there...

Edit: would a 4x4 keypad or a 3x4 with 4 LEDs be more interesting?

Edit2: The Junebug / PK2 have a very handy UART mode... So goodbye serial port, it will have a USB connector.

Something along these lines.
**broken link removed**
 
Last edited:
Updated JuneBug Parts List

I have given up on Octoparts for making a parts list. You can find the current list in spread sheet form at **broken link removed** Parts numbers are shown for Digikey, Mouser, Newark, and a few from Jameco. We could expand that if anyone has about 50% or more of the numbers for another vendor. I understand that what I have is mostly US based suppliers. You can help change that if you are up to it. Still looking for numbers for FB1, VR1, and VR2.
 
That's a nice parts list. I'll locate the part numbers for VRx and the ferrite bead. I did a similar list on Google spreadsheet for Mongoose.
 
blueroomelectronics said:
That's a nice parts list. I'll locate the part numbers for VRx and the ferrite bead. I did a similar list on Google spreadsheet for Mongoose.
Your Mongoose list inspired me to give up on Octopart, at least till they get up to speed on a few issues. I will share the list with you soon. Today I got a 2nd JuneBug working. It was a very clean/easy build.
 
Working JuneBug on small Win98 laptop

Perhaps someone will find this useful.

I just finished setting up MPLAB to work with JuneBug on a old Win98 laptop. No network connection. It is a Toshiba, AMD-K6 with 160Mb of RAM, not sure about the processor speed. The K6 with 3D Now maxed out at 475MHz.

Why? My youngest student travels a lot. The laptop will enable her to work away from home. No big loss if it is lost or broken.

So far it works suprisingly well. With program after build, and run after program enabled, it takes 7 seconds to build, program, and start execution. In this case a simple blink the status LED type program. This is surprisingly fast for this machine. It is an indicator of just how lean the original Win98 was.

The 800x600 screen is the most annoying thing. I did not check for drivers with more resolution because the screen is hard to look at as is.

From memory:
Formated the HD
Fresh OS install, no updates
Installed a USB flash drive driver via floppy (Kingston DataTravler 128)
Used the flash drive to install the rest
7Zip for decompressing files
MPLAB V8 with C18 compiler
DGIPLUS (system file for use with PCM)
CCS PCM
SETUP_MPLAB_PLUGIN (makes PCM work with MPLAB)

When the system powers down by itself (sleep?) it forgets about the JuneBug USB connection. Unplug/replug of the USB cable fixes it.
 
3v0 said:
With program after build, and run after program enabled, it takes 7 seconds to build, program, and start execution.

How do you get it to run after program? This just does not work with V8.0 of MPLAB.

Mike.
 
3v0 said:
but it forgets the setting if you switch to programmer and back.
Those settings are saved into an .INI file. Check if you have a "PICKIT 2" folder in "MPLAB IDE Common\". The issue has been reported/solved on the microchip forum IIRC.
 
Last edited:
2N7000 marking confusion

I have a strip of Fairchild 2n7000D26Z's from Mouser.

I was looking at the little line that one often sees on top of the transistor. Some of these 2n7000's have the line on the right and others on the left. I was under the impression that this mark indicated E. Why is it not in the same place on each of the supposed to be identical transistors?

Crude ASCII , round side would be up.
Code:
  /-------\
 / __      \
/-----------\
  /-------\
 /      __ \
/-----------\
 
I think it is just part of the injection molding process; it is the point where the plastic is injected into the mold for the casing.
 
Both the 2N7000 and BS250 have different layouts. The giveaway is use a meter to figure out which way the internal diode is wired. The Junebug PCB was laid out to allow for different pinouts (as long as the Gate is in the middle)
 
C18 Junebug 18F1320 LED sequencer demo

A C18 version of the "Junebug 18F1320 LED sequencer demo".
This is a rather slavish copy of the ASM version.

Code:
// *** C18 Junebug 18F1320 LED sequencer demo ***
// Flashes LEDs1 thru 6 from left to right forever
// DIP Switch (SW6) must have TUTOR on (SW6-1,2,3) all other switches off
//
// NOTE: Add either 18f1320i.lkr (for debug) or 18f1320.lkr (no debug) to your project.

#pragma	config OSC = INTIO2, WDT = OFF, LVP = OFF, DEBUG = ON
#include <p18f1320.h>
#define LED(x,y)  LATA=x; TRISA=y; delay()

int count; // delay loop counter

void delay(void)
{
    for (count=64; count>0; count--) {} //decrement Count and skip when zero 
}
        
void main(void)
{
     ADCON1 = 0; // make RA0 digital
     while(1)    // loop forever
     {
        LED (0b00000001, 0b10111110 ); // LED <PORTA>, <TRISA>
        LED (0b01000000, 0b10111110 );
        LED (0b01000000, 0b00111111 ); 
        LED (0b10000000, 0b00111111 ); 
        LED (0b10000000, 0b01111110 ); 
        LED (0b00000001, 0b01111110 ); 
    }
}

EDIT:

This is a more C-ish version that chases the lights from left to right to left...
Code:
// *** C18 Junebug 18F1320 LED sequencer demo2 (chaser) ***
// Flashes LEDs1 thru 6 from left to right to left forever
// DIP Switch (SW6) must have TUTOR on (SW6-1,2,3) all other switches off
//
// NOTE: Project requires a linker scrpt.
// Add either 18f1320i.lkr (for debug) or 18f1320.lkr (no debug) to your project.

#pragma	config OSC = INTIO2, WDT = OFF, LVP = OFF, DEBUG = ON
#include <p18f1320.h>
#define LED(x,y)  LATA=x; TRISA=y; delay()


int count; // delay loop counter

void delay(void)
{
    for (count=64; count>0; count--) {} //decrement Count and skip when zero 
}
 
 void ledOn(int led_)
 {
     switch(led_)
     {
         case (1):
         {
              LATA = 0b00000001;
              TRISA = 0b10111110;
              break;
         }
         case (2):       
         {
             LATA = 0b01000000;
             TRISA = 0b10111110;
             break;
         }
          case (3):
         {
             LATA = 0b01000000;
             TRISA = 0b00111111;
             break;
         }
         case (4):
         {
             LATA = 0b10000000; 
             TRISA = 0b00111111;
             break;
         }
         case (5):
         {
             LATA = 0b10000000; 
             TRISA = 0b01111110;
             break;
         }
         case (6):
         {
             LATA = 0b00000001;
             TRISA = 0b01111110; 
             break;
         }      
     }        
 }
               
void main(void)
{
     int led; 
     ADCON1 = 0; // make RA0 digital
     while(1)    // loop forever
     {
        for (led=1; led<7; led++)
        {
            ledOn(led);
            delay();   // delay could be moved to ledOn()
        }   
        for (led=5; led>1; led--)
        {
            ledOn(led);
            delay();
        }   
 
    }
}
 
Last edited:
3v0 said:
I have a strip of Fairchild 2n7000D26Z's from Mouser.

I was looking at the little line that one often sees on top of the transistor. Some of these 2n7000's have the line on the right and others on the left. I was under the impression that this mark indicated E. Why is it not in the same place on each of the supposed to be identical transistors?

Crude ASCII , round side would be up.
Code:
  /-------\
 / __      \
/-----------\
  /-------\
 /      __ \
/-----------\
As a prospective assembler of the JUNEBUG, Thanks to Mr Bill, but i have few doubts.

- why not use BS170 or BS107 in place of 2N7000. These are also N-channel types .
- whether 18F2525 or 18F2550 come with bootloader builtin or we have to load it. If so , how?

- even with much effort, i could not locate latest firmware for pickit2 i.e., ver2.02 ,if I am right
i was able to get 2.01 only, from microchip site.
 
Last edited:
mvs sarma said:
As a prospective assembler of the JUNEBUG, Thanks to Mr Bill, but i have few doubts.

- why not use BS170 or BS107 in place of 2N7000. These are also N-channel types .
I will leave this one to BIll.​
- whether 18F2525 or 18F2550 come with bootloader builtin or we have to load it. If so , how?
It does not come built in. You are to program it using another programer.
Easy to do if you can get the use of another programmer.​
- even with much effort, i could not locate latest firmware for pickit2 i.e., ver2.02 ,if I am right
i was able to get 2.01 only, from microchip site.
It is OK to use the 2.01. MPLAB will update it for you auto-magic like.​
Keep lenght checker happy:D
 
Status
Not open for further replies.

Latest threads

New Articles From Microcontroller Tips

Back
Top