Hi Folks,
My name is Derek and I work offshore operating ROV's which have DC thruster motor's that fail from time to time.
I was wondering how feasible it would be to build a small testing unit to speed up the fault finding process.
I have a idea of what I would like it to look like and have some of the spec's of the system that it needs to connect into.
I also have access to an electronics workshop with the tools required to make such a thing, it's just my knowledge that's lacking
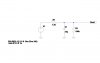
My interpretation of the finished tester would be something that would plug in-line between the existing connections and show that the Voltage was present and show direction of rotation and what percentage.
I'm not entirely sure that this may be the best way to test this so please read the techie bit that follows later. You may have a better approach to the needs.
**broken link removed**
Spec's of the thruster that would be attached to it.
SM4M Thruster Specification
Nominal Voltage: 250 VDC
Nominal Current: 4.5 A (normal running)
Thrust @ 2000RPM: 25 kgf
Weight in Air: 3.7 kg (including propeller and nozzle)
Weight in Seawater: 2.2 kg (including propeller and nozzle)
Depth Rating: Up to 2500 m
Control Signal: PWM for Speed signal
Electronics 24 VDC @ 200 mA reversible for direction control
Connector: 7-Way Connector
Conection details
**broken link removed**
Text from the system manual explain the control of the thrusters.
"The digital data containing the speed
and direction signals are passed to the Thruster Control PCB (6034P). The speed signal
is converted into a TTL pulse width modulated signal and applied to the required
thruster to control its speed. The thrusters are controlled by a direction DC voltage
signal, whose polarity dictates thruster shaft direction"
"Thruster Motor Control
Thruster demands from the surface are transmitted to the two thruster drive PCBs
(6034P) via the backplane under control of the CPU. Each thruster control PCB has
four channels, each capable of producing a speed and direction signal.
The speed signal to the thruster control PCB is a 12 bit digital signal, which is converted
into a TTL 50 Hz base frequency pulse width modulated (PWM) signal of which its
duty cycle is proportional to the required speed. For example a 100% duty cycle
represents a continuous 0 V signal causing the motor to run at full speed, no duty cycle
causes the motor to stop (10-12 Volt signal) and 50% duty cycle the motor runs at half
speed. The duty cycle is referenced to the direction 0 volt line. The speed signal is fed
to the thruster via the bulkhead connector pin 5.
Direction is controlled by a 24 VDC signal (derived from 6051AP, PSU1-1), DIR+ &
DIR-, of which the polarity decides thruster direction. The 24 VDC is routed to the
thruster motor via the motor bulkhead, pins 4 & 6 providing a supply to the motor
electronics as well as thruster direction."
If you need any other info such as drawings of the PCB's etc please let me know.
Thanks
Additional info from the manual that may better describe the control process...
Thruster Control PCB (Part No. 6034P)
Function
The Thruster Control PCB provides the electronics power supply, speed and direction
controls for up to four thruster motors.
Technical Description
The outputs are isolated from the control electronics to prevent a fault on the load
affecting the rest of the system.
Speed
Two counter/timer IC’s each produce a TTL pulse width modulated (50Hz) signal for
two thrusters. The signal is amplified and converted from TTL to +12 V (10-12V) for
output to the thrusters. The speed is referenced to the 0 Volt direction line. Fuses
protect against excess load on each speed output and a zener diode connected across the
signals output provides over-voltage protection.
Direction
Thruster direction is controlled by two digital bits per thruster. The four pairs of bits
are simultaneously latched and used by a direction control circuit to produce TTL signal
outputs. The outputs are used by a differential driver circuit to provide the required
thruster direction as follows:
• DIR+ High & DIR- Low give clockwise direction.
• DIR+ Low & DIR- High give anticlockwise direction.
The direction voltage range is 21-24 VDC.
Fuses protect each direction output and a zener diode provides over-voltage protection.
Fuses
Direction and speed fuses F1 to F12 – wire ended 250 mA.
24 VDC input supply fuse, F13 – wire ended 1.5 A.
My name is Derek and I work offshore operating ROV's which have DC thruster motor's that fail from time to time.
I was wondering how feasible it would be to build a small testing unit to speed up the fault finding process.
I have a idea of what I would like it to look like and have some of the spec's of the system that it needs to connect into.
I also have access to an electronics workshop with the tools required to make such a thing, it's just my knowledge that's lacking
My interpretation of the finished tester would be something that would plug in-line between the existing connections and show that the Voltage was present and show direction of rotation and what percentage.
I'm not entirely sure that this may be the best way to test this so please read the techie bit that follows later. You may have a better approach to the needs.
**broken link removed**
Spec's of the thruster that would be attached to it.
SM4M Thruster Specification
Nominal Voltage: 250 VDC
Nominal Current: 4.5 A (normal running)
Thrust @ 2000RPM: 25 kgf
Weight in Air: 3.7 kg (including propeller and nozzle)
Weight in Seawater: 2.2 kg (including propeller and nozzle)
Depth Rating: Up to 2500 m
Control Signal: PWM for Speed signal
Electronics 24 VDC @ 200 mA reversible for direction control
Connector: 7-Way Connector
Conection details
**broken link removed**
Text from the system manual explain the control of the thrusters.
"The digital data containing the speed
and direction signals are passed to the Thruster Control PCB (6034P). The speed signal
is converted into a TTL pulse width modulated signal and applied to the required
thruster to control its speed. The thrusters are controlled by a direction DC voltage
signal, whose polarity dictates thruster shaft direction"
"Thruster Motor Control
Thruster demands from the surface are transmitted to the two thruster drive PCBs
(6034P) via the backplane under control of the CPU. Each thruster control PCB has
four channels, each capable of producing a speed and direction signal.
The speed signal to the thruster control PCB is a 12 bit digital signal, which is converted
into a TTL 50 Hz base frequency pulse width modulated (PWM) signal of which its
duty cycle is proportional to the required speed. For example a 100% duty cycle
represents a continuous 0 V signal causing the motor to run at full speed, no duty cycle
causes the motor to stop (10-12 Volt signal) and 50% duty cycle the motor runs at half
speed. The duty cycle is referenced to the direction 0 volt line. The speed signal is fed
to the thruster via the bulkhead connector pin 5.
Direction is controlled by a 24 VDC signal (derived from 6051AP, PSU1-1), DIR+ &
DIR-, of which the polarity decides thruster direction. The 24 VDC is routed to the
thruster motor via the motor bulkhead, pins 4 & 6 providing a supply to the motor
electronics as well as thruster direction."
If you need any other info such as drawings of the PCB's etc please let me know.
Thanks
Additional info from the manual that may better describe the control process...
Thruster Control PCB (Part No. 6034P)
Function
The Thruster Control PCB provides the electronics power supply, speed and direction
controls for up to four thruster motors.
Technical Description
The outputs are isolated from the control electronics to prevent a fault on the load
affecting the rest of the system.
Speed
Two counter/timer IC’s each produce a TTL pulse width modulated (50Hz) signal for
two thrusters. The signal is amplified and converted from TTL to +12 V (10-12V) for
output to the thrusters. The speed is referenced to the 0 Volt direction line. Fuses
protect against excess load on each speed output and a zener diode connected across the
signals output provides over-voltage protection.
Direction
Thruster direction is controlled by two digital bits per thruster. The four pairs of bits
are simultaneously latched and used by a direction control circuit to produce TTL signal
outputs. The outputs are used by a differential driver circuit to provide the required
thruster direction as follows:
• DIR+ High & DIR- Low give clockwise direction.
• DIR+ Low & DIR- High give anticlockwise direction.
The direction voltage range is 21-24 VDC.
Fuses protect each direction output and a zener diode provides over-voltage protection.
Fuses
Direction and speed fuses F1 to F12 – wire ended 250 mA.
24 VDC input supply fuse, F13 – wire ended 1.5 A.
Last edited: