Continue to Site

Welcome to our site!

Electro Tech is an online community (with over 170,000 members) who enjoy talking about and building electronic circuits, projects and gadgets. To participate you need to register. Registration is free. Click here to register now.

  • Welcome to our site! Electro Tech is an online community (with over 170,000 members) who enjoy talking about and building electronic circuits, projects and gadgets. To participate you need to register. Registration is free. Click here to register now.

Pulsar Stuff

Status
Not open for further replies.

AtomSoft

Well-Known Member
Hey guys. Im in the mood to start doing boards. As today is payday and someone else owes me money ima have enough to spare on that

PCB Fab In a Box starter kit from Pulsar. It comes out to $165.99 with that laminator and Shipping.

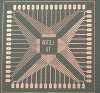
Comes with alot of stuff. I can probably make about 100 boards with that stuff included since ill be making small boards.

I was wondering if anyone has used this and had thoughts on it.

Thanks!

STARTER KIT:


Laminator:


EDIT:
I like the fact that they take returns well:

As with all of the products we manufacture and sell, you have a full month to "kick the tires".

If at any time you aren't absolutely in love our system, we'll buy it back at full price... used and all!

No silly restocking fees, no discounting, no kidding!
 
Last edited:
Search 'Pulsar' or 'toner+transfer'. There are a thousand threads on toner transfer.

Seems to be a pretty controversial subject.
 
heh yeah. I figured that. But im not asking which is best. Im asking on how are some other people results on this product. :D

Also here is a PCB i will be making. Does it look clean? Neat?

**broken link removed**
 

Attachments

  • irSwitch.png
    irSwitch.png
    55 KB · Views: 292
Last edited:
Other peoples results are all in the previous threads.

Get rid of the 90 degree angles. Cut them all off at 45degree angles. 90degree angles are generally frowned upon in PCB making and they can have problem etching.

After a quick look. Your bottom right trace that goes between two pins could just go around everything and not go through component pins at all. Increase the drill size of your vias if you are making this board yourself.

EDIT: Your text is on the top layer. If you don't know already, learn how to do a ground plane fill. It helps save etchant.
 
Last edited:
I use that exact kit and its awesome. Well worth the money. The only thing imo that sucks is wasting a whole sheet for one pcb. I recently made a 2 inch by 3 inch pcb out of a 8 1/2 by 11 sheet. Usually I end up printing 10 copies of the same board as to not waste the rest of the sheet. I guess you could cut them down to picture size pieces but I wish you could just buy them in that size. As compared to using magazines or glossy paper the pulsar paper wins hands down. You literally run it through the laminator 3 or 4 times to ensure all the traces transfer, throw it in water for about 30 seconds and your done. You can then run it through the laminator with the green or white plastic rolls they include which will only stick to the toner to make it resist etching a little better but its really not necessary. I actually print the silkscreens out on the transfer paper...place the silkscreen on after I etch the board and run it through the laminator with the white stuff....comes out perfectly and looks amazing!
 
I use that exact kit and its awesome. Well worth the money. The only thing imo that sucks is wasting a whole sheet for one pcb. I recently made a 2 inch by 3 inch pcb out of a 8 1/2 by 11 sheet.

Print out your design on a regular piece of paper. Cut out the toner transfer paper slightly larger and tape it over the printed design on the regular piece of paper, then run it through the printer.

20090701-stellaris-pcb-001-jpg.31048
 
This thread reminded me that I found the first PCB I ever made when I was pulling camping equipment out of the basement last week. It looks a lot like Jason's.

This is actually the second one I ever made as I remember the original one I fully completed before realizing I hadn't mirrored it, so it was all backwards.

I think this was somewhere around 2004.
 

Attachments

  • 20090723-1st-pcb-001.jpg
    20090723-1st-pcb-001.jpg
    199.4 KB · Views: 1,904
  • 20090723-1st-pcb-002.jpg
    20090723-1st-pcb-002.jpg
    179.8 KB · Views: 243
Hi Atomsoft,

Thats a lot of Dollars for pcbs.

Have used toner transfers, but no experience of the Pulsar system; wondered if you have considered the uv pre-sensitised boards, not cheap but consistent results.

With the availability of cheap uv leds a diy exposure box is very easy.

Sample of the kind of work I've done with uv leds shown below.
 

Attachments

  • pcb.jpg
    pcb.jpg
    92.8 KB · Views: 398
...

After a quick look. Your bottom right trace that goes between two pins could just go around everything and not go through component pins at all. Increase the drill size of your vias if you are making this board yourself.
...

And the other trace above that runs between the regulator pins can just run above them, you can run it pretty much straight upward... ;)
 
Thanks for info guys. Those are some cools boards. And nice Link!!! that made me like it more :D

Hows this now? :

ir2-png.31713
 

Attachments

  • ir2.png
    ir2.png
    14.6 KB · Views: 835
I was about to say the same thing but I normally get shot down when I say this so shoot me.:D

Try to make all angles greater than 90° and avoid T-junctions wherever possible - it makes etching more reliable.
 
That's much better.
 
G'day Jason,
That second design does look a heap better mate, now what I do with my designs where a T or junction come off a track I put a fillet in each corner so the junction is alot thicker. If you add that then hero999 might not wet his nappies as after some of his replies to other peoples boards really makes one wonder if indeed he did wet himself.

Cheers Bryan :D
 
Hi Jason,
I marked in red what I meant
ir2.png


Cheers Bryan:rolleyes:
 
Status
Not open for further replies.

Latest threads

New Articles From Microcontroller Tips

Back
Top