Electro Tech is an online community (with over 170,000 members) who enjoy talking about and building electronic circuits, projects and gadgets. To participate you need to register. Registration is free. Click here to register now.
Welcome to our site! Electro Tech is an online community (with over 170,000 members) who enjoy talking about and building electronic circuits, projects and gadgets. To participate you need to register. Registration is free. Click here to register now.
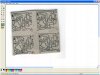
It is hard to tell from the photo but it should be better. I am guessing you used a clothes iron, not a laminator. If so iron longer. The laminator is the way to go.
Did you have your printer set to max darkness and what printer did you use ?
Did you use the green foil ?
Did the toner come off in the etchannt or did if come off prior to that ?
The PCBs look very similar to my test using glossy photo paper. Some traces went off while soaking the board with the paper. The others were hard to remove with a Scotch brite.
I go along with 3v0 using a laminator for that purpose. Mainly the outer traces disappeared, meaning there wasn't enough heat to "burn" them onto the copper clad.
I spent 2 hours yesterday trying to increase the density on an HP 1320 laser printer.
yes I applied the green foil.
It isn't perfect but will double check tomorrow but 3 of the boards look ok.
some of the small solder holes are gone but use-able.
need to drill then remove the ink.
the traces came out really dark.
used the muratic acid / hydrogen peroxide mixture.
I wonder about using two metal plates then clamping the board between hen heating up the plate on top??
It didn't seem to work much better.
on my first attempt I had several traces on the blue sheets.
on the second attempt the traces only came off on one of the boards.
If I do this much more I may just buy a laminator.
$70 is alot of moola.
near future going to build the EQ/spectrum analizer circuit which has lots of small traces.
Do you use the laminator yourself?
is it worth the $$ or can one find a better deal at ??
The laminator is the way to go. It they can take the PCB stock and get hot enough most any should work.
I purchased a small one from Harbor freight that does not get hot enough (the results look a lot like what you are getting with the iron). I have been tempted to open it up and see what they are using to heat. Maybe some fiddling could fix it. Not sure it is worth the effort.
Some people have found laminators for a lot less the $70. If you buy the one pulsar suggests you know it is going to work. It can be found elsewhere. Check Ebay and amazon.
Edit: Just need to check. You are soaking the PCB and paper in water after heating? I use 3M blue masking/painter tape to hole the paper to the PCB while laminating. The toner release should be 100%. If the tape lets go in the water the paper floats off the PCB after about a minute.
I use the GBC 9 inch Creative Laminator that I bought at Staples office supply for about $30.
All my boards are perfect. I run through the laminator multiple times to ensure good adhesion. This laminator doesn't take large .065 inch thick boards.
My etching process is to use a sponge. Green foil is needed with this process.
Need to make sure the copper is absolutely clean (no greasy fingerprints). I had similar problems with traces near the edge of the board in the beginning. I don't touch the board directly any more, and leave about a 1/4 inch border. I bought a refilled toner cartridge last summer, almost half the price of a new HP. Unfortunately, I get pinholes. Fortunately, the boards I've made with it, have all worked fine, just not pretty as before, and it worries me. Hate to think about wasting time drilling and stuffing the board, figuring out what went wrong (most of my designs are poorly conceived anyway ). Really not worth the savings for this application. Save the planet at the office, more wasteful, if you have to make new boards...
This site uses cookies to help personalise content, tailor your experience and to keep you logged in if you register.
By continuing to use this site, you are consenting to our use of cookies.