First, have we determined why it is chattering?
Second, this was actually the type of circuit I was hoping for. Independent thresholds and setable at any time independent of the output state. I got so excited by the quick and obvious response, I forgot the other criteria (not to mention I didn't explicit ask for it).
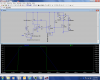
I still need to trace out the current paths to fully understand it, but (having recieved the necessary parts today) I have entered it into my simulator and have it working, My concern with the circuit is how to get the bicolor 2-pin led working. I am attempting to configure two optoisolators to give the opposite polarities I need in order to make it work. Here's my first attempt. I don't think it works yet as the current through R19 (placeholder for the bicolor LED) is 8uA and -6mA.
View attachment 75575