Continue to Site

Welcome to our site!

Electro Tech is an online community (with over 170,000 members) who enjoy talking about and building electronic circuits, projects and gadgets. To participate you need to register. Registration is free. Click here to register now.

  • Welcome to our site! Electro Tech is an online community (with over 170,000 members) who enjoy talking about and building electronic circuits, projects and gadgets. To participate you need to register. Registration is free. Click here to register now.

Gate Opener Idea

Status
Not open for further replies.

Iawia

Member
Hi All,

I am attempting to open a driveway gate with a 24v motor amplified by a 10:1 gear train to get me to 500 kg-cm of torque. I was told I needed an H-bridge for the bi-directional motor control. The motor stall current is 3A, so most motor drivers I have seen can do up too 2.6 continuous current, 3A transient current, so I guess these drivers will not work.

My questions regarding this setup are:

1) I was looking at this controller (https://www.sparkfun.com/datasheets/Robotics/L298_H_Bridge.pdf). What were to happen if the motor exceeded 3A maximum? Does this destroy the controller or does the controller sense this problem and loop out? What precautions can be done to ensure the controller never goes above 2.6 A continuous? I assume i cannot use this since my motor stall current is 3A.

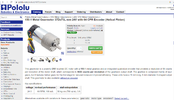
2) I found a controller that can do more than 3A (Jrk G2 24v13A) but it is a hefty $140. Before I make this purchase I want to discuss with y'all regarding this! (I still want to shut down if amperage gets out of control here and i'm not sure how too do that).

I will use a raspberry pi to provide the logic to the controller and eventually RF control. I am just a knowledgeable hobbyist so I feel quite inadequate when it comes to circuits. Any recommendations or assertions you can provide regarding my general mechanical or electrical assembly are welcome.

13 Amp Mtr Controller
37D 150:1 Gear Motor

Thank you! You guys are the best.

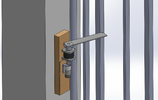
ps. I will add a chain to the end of the armature to pull the gate closed in clockwise operation. Counter clockwise operation, the arm will push the gate open.
 

Attachments

  • ISO view.png
    ISO view.png
    293.4 KB · Views: 165
  • Motor, Pololu 37D, 150_1.png
    Motor, Pololu 37D, 150_1.png
    314.8 KB · Views: 185
  • Jrk G2 24v13A USB Mtr Ctl.png
    Jrk G2 24v13A USB Mtr Ctl.png
    273.8 KB · Views: 165
You are so observant. In my effort to understand this module better, I could not find a datasheet, only this website. It has a -05v- in the part number, so I erased it since it is not what you suggested. What is the bottom right potential for (post #17)?


I have two options, first there is an encoder that comes with the motor so i can keep track of the angle possibly. Knowing this probably wont work due to error in physical systems (gear backlash namely), i was thinking of adding a trip sensor to signal gate open/close status to microcontroller, then shut the motor off using logic ([00] to the 'input' at the module). I'm not sure using limit switches would work since something can block the gate causing the controller to think it was closed.

Just to give you more a little more system info, I eventually plan on using a RF 433Hz Tx/Rx pair to provide the commands to Pi (just ordered them to play with). So I plan on sending a HIGH/LOW to a Rasp Pi GPIO input & the gate latch using a key fob.

I am still curious about the diodes, so whenever you have time (no rush). Thank you!
You NEED limit switches, it's a vital feature for such applications - and a crucial part of safe design. Complicated electronic methods are all well and good, but are much less effective, and much less reliable - by all means use such methods, but it's VERY important to have limit switches as backups.

As for current detection - that's simple enough, a low value resistor in series with the motor, with an opamp (or two) monitoring the current through it, and feeding an analogue input on the PI.

You also need IR beams for safety purposes - all this is basic gate technology.

Why not just buy an existing gate controller, which already has all the facilities you need?.
 
I looked at the website and did not see the module you posted.
You're right, there are extra pins due to me taking the image from that site which sells 4 channel relays only. Sorry for the confusion.

I may have found a 2 Ch 3.3v version. that being said, I have updated the drawing using your diode comments and the assumption that 'Vcc' and 'Gnd' is for the coil voltage and can be triggered with 3.3v. I can still use the module you suggested if you think it doesn't matter much (i'd prefer to use amazon anyway).

I am not 100% clear on the jumper pin config from the site above which states, "VCC is the system power supply and JD_VCC is the relay power supply, use with the jumper cap". Does it mean I have the option to power the whole module using motor voltage (24v) or Coil voltage (3.3v)? I would want these to be at separate voltages, yes?

Thanks again for all of your help, I really appreciate it.

1668154031781.png
 
No, you are 'perhaps' getting further away? :D

The bottom right connection (labelled 3.3V in your latest picture) is 'possibly' nothing to do with the relay coils. It's the power feed (from the PI) to the top of the opto-coupler LED's - the modules commonly have a link you can fit to join the top of the relays to it as well - although this particular example 'may' have that permanently wired, so has no separate relay power feed.

These pages show the usual schematic of these types of modules:


You need to check, and confirm, that any modules you use are wired to do exactly what you want - with the modules in the links I just gave, you could power the opto-couplers from the PI at 3.3V, and have a separate 5V feed for the relay coils. It's always a good idea to separate the relays power supply from the processors power supply - in the case the relays could be powered from the 5V that feeds the PI, with the 3.3V PI output feeding the opto-couplers.

I've been looking round for 3.3V versions, and they seen pretty rare - on closer inspection many that claim 3.3V actually require a 5V supply for the relays, but here's one that actually uses 3V relays:

 
I may have found a 2 Ch 3.3v version.
Yes, that relay is a 3V version and requires about 150mA of 3V (or 3.3V) power for Vcc.
Do you have that available?
I am not 100% clear on the jumper pin config from the site above which states, "VCC is the system power supply and JD_VCC is the relay power supply, use with the jumper cap". Does it mean I have the option to power the whole module using motor voltage (24v) or Coil voltage (3.3v)?
No option.
It requires 3.3V power for everything.
I have updated the drawing using your diode comments
That is incorrect.
The diodes do not go in series, they go between the actuator and 24V and between the actuator and 0V.
Read my post again.
 
Why not just buy an existing gate controller, which already has all the facilities you need?.
Hi Nigel. Yes, this is an option, probably an equally challenging option except that I would not learn how to build it (mechanisms, programming, RF, microcontroller interfacing etc). I don't have a great answer for this Nigel except that I know I would be very proud at the end if I did it (with your help of course).

At first glance, it seems the price would be more expensive to go the off the shelf route also. Just for a shelf controller, power supply, and actuator, prices start at $500. At this point, I have all these things for less than 200. But its more about learning than money, since it is highly possible I can implement this poorly and it would end up costing me more $, which is fine, the price of knowledge I guess.

Yes, I will use a limit switch. I did not know that was its name until now, but yes it is what I was planning on doing.
 
Omg Ok I think I got you now.

View attachment 139233

I am still not clear about what the jumper setting is for? I can play with the module and see what it changes.
It's shown in the schematics I linked to - it joins the opto-coupler and relay power connections together - by removing it you can power them separately.
 
Have you attached a battery and switch to manually activate the motor to check for stall conditions and capability?
The gearbox helps, but an overheating electric motor becomes a fire hazard if heat and current aren't detected by the controller or external sensor. As for the bridge idea, adequate relays may be the only solution.
Hi Shokjok, I have not thought about the motor burning, but a stall current of 3A shouldn't burn it up. Typically, stall currents are not healthy for the motor as long as it doesn't happen a lot. I do plan on limiting current in software somehow, or using a current limiting circuit, I just haven't had the chance to build the system yet to see where it can be added. Perhaps as a fuse, or breaker, or in a software driven behavior. I have a lot of the parts now and am putting it together! I am very excited.
 
Status
Not open for further replies.

New Articles From Microcontroller Tips

Back
Top