Continue to Site

Welcome to our site!

Electro Tech is an online community (with over 170,000 members) who enjoy talking about and building electronic circuits, projects and gadgets. To participate you need to register. Registration is free. Click here to register now.

  • Welcome to our site! Electro Tech is an online community (with over 170,000 members) who enjoy talking about and building electronic circuits, projects and gadgets. To participate you need to register. Registration is free. Click here to register now.

PCB Alternatives

Status
Not open for further replies.

Buntyk

New Member
Hi everyone,
This is my first post here and i hope you guys can help me. I am completely new to electronics, i have no prior electronics exterience either through education or experience. However i have in the past tampered with electronics in terms of repairing things around the house. I have been interested in this for a long time and want to learn more. recently i have decided to start so what i wanted to know is, are their any alternatives to making my own PCB?

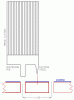
i have seen videos on Youtube and other sites on using Press and Peel paper with a laser printer and cooper clad, but this seems slightly dangerous as some of the chemicels used are in fact dangerous.

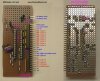
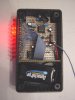
Is there any way i can possibly use something for beginers? i am looking at making a proximity sensor circuit board, where a LED will light up when something comes within 5 inches of it. i know its very simple for you guys but its totally new to me so please understand that i am trying my best to learn.

i would appreciate any help you can give and guidance on where to look, book recommendations etc.

im pretty excited about this and am looking forward to being able to make things and hopefully learn. so please help me..

Thank you,

Bunty.
 
I have made many circuits with stripboard. It has parallel rows of copper strips that are cut to length with a drill bit. The copper strips form half the wiring of a pcb and resistors, capacitors and a few jumper wires form the other half of a pcb. The stripboard is perforated so all parts fit and can be soldered to it. One wire per hole.
If you want to change a part then it can easily be unsoldered and replaced with another part.

Here is an example:
 

Attachments

  • Sound Level Indicator 002.jpg
    Sound Level Indicator 002.jpg
    47.1 KB · Views: 1,049
Last edited:
For starting out and testing simple circuits I would recomend a solderless breadboard. These make it easy to tinker and change things around untill you get your circuit working.

Once you are ready to make something more permanent you can use perf board or stripboard of dead bug prototyping.
 
Wow that brilliant, are stripboards the same as BreadBoards? if not then which one would you say is easiler?

Has anyone used the software VirtualBreadboard any views on this?

I have been looking around the net for some sort of guide on lists of components and their uses/usage. for example what is a transitor used for, what is a relay used for. I really want to go to basics so if you guys know of any books or any websites on which this information is i would appreciate a link please.

Heres is something that really confused me, i watched a video as i mentioned above on making your own pcb, and here is what the guy done

YouTube - How to make a PCB

1) Draw the circuit diagram on a piece of software
2) Printed it on a Press and Peel paper using laserjet printer
3) placed onto copper clad and ironed on with a household iron
4) peeled the paper off
5) used etching fluid to remove copper

and he ended up with a green plastic board with the traces on it, how though, there was no plastic board within the copper, so how come after etching he has this? does the press and peel paper result in this? did i miss a step or something?

thanks again for your help this is great, will look into buying a Bread/Strip board and start my trial and error :)

Thanks,
 
A breadboard has intermittent contacts. It has high capacitance between rows of connections and high inductance of the many long connecting wires. It is difficult to see which connection goes where. Their wiring is usually a mess.

A stripboard has each part securely soldered to a copper strip. The strips are cut to the length needed so the capacitance between rows and the inductance is low, like a pcb. Its wiring is neat and tidy so seeing what connects where is easy.
 
Stripboard is the worst electronics invention ever created.
It is the most inefficient, ugly, amateurish way to create circuits. It is totally disallowed in any Australian electronics magazines.
There are other prototyping boards on the market having lands or donuts for each hole and some have lands joined as pairs. But any more regimentation than this is very difficult to work with.
I have never used it and never will. It is a total embarrassment. It’s not even good to suggest beginners use it as it prevents sensible layout.
 
Stripboard has a single wire soldered in each hole. Replacing parts is easy.
A "donut" board needs to have many connecting wires unsoldered (and forgotten about where they go) in order to replace a part.

The strips on a stripboard form half of a pcb. The parts and a few jumper wires form the other half.
 
Stripboard was invented in the UK over 30 years ago by Zepher. It has never taken on and if they had etched the board and joined two holes with a fine joiner, the whole concept would have been much better. Every time you cut a track you lose a hole.
 
I make PCBs using PulsarProFx's variation of the toner transfer method. The drawback is that you need both a laser printer and a laminator (some use a clothes iron but I do not recommend it.

**broken link removed** is a good walk through.
 
Stripboard was invented in the UK over 30 years ago by Zepher. It has never taken on and if they had etched the board and joined two holes with a fine joiner, the whole concept would have been much better. Every time you cut a track you lose a hole.

I had samples of Strip board (VERO BOARD)given with Practical Electronics magazine way back in 60s. They were appearing milled boards.
One could always create a track CUT at middle of two holes, not to loose a Hole.
If one could imagine the times, I really feel it was a boon to wire up circuits on strip boards. As such perhaps "worst electronics invention ever created", may be too harsh.

Any invention should be seen as per the available trends of those times. Home brewing PCB was an impossible task in those times.
 
Last edited:
Firstly, it only appeared once.
Secondly, in 40 years of electronics I have never been asked for it.
And thirdly, have you ever tried to cut the copper between two holes?
If they had etched the board and maybe joined two holes or left each hole individually, the concept would have been much better.
 
I have made many circuits with stripboard. It has parallel rows of copper strips that are cut to length with a drill bit.

Here is the right tool to cut copper strips without messing up the board with holes. :)

Please replace "1/20" with "1/10"

Regards

Hans
 

Attachments

  • TRACE-CUTTER.gif
    TRACE-CUTTER.gif
    5 KB · Views: 585
Last edited:
Here is the right tool to cut copper strips without messing up the board with holes. :)
Thanks Boncuk, Really a Nice tool. I was using normal pencil mender blades. Perhaps we have to get one fabricated locally and it is not off shelf, right?
 
Last edited:
The drill material is called "tool steel" not "cutting steel" Some small wood drills are made like this.
But you can easily buy matrix board with a much better design on the underside so you don't have to build a circuit according to the strips.
 
Stripboard is the worst electronics invention ever created.
It is the most inefficient, ugly, amateurish way to create circuits. It is totally disallowed in any Australian electronics magazines.
There are other prototyping boards on the market having lands or donuts for each hole and some have lands joined as pairs. But any more regimentation than this is very difficult to work with.
I have never used it and never will. It is a total embarrassment. It’s not even good to suggest beginners use it as it prevents sensible layout.

"I have never used it and never will"... :eek: Perhaps you should give it a go....

Veroboard is fantastic! In the hands of someone who already knows the parts pinouts and can just grab some transistors and solder them in, it's as fast as a breadboard AND permanent. It's reliable as any PCB (within the current specs). I've got test gear and PSUs that I made with vero 20-30 years ago and they have never missed a beat.

I can whip up a 555 device, or a 2 transistor temperature controller or a PIC doodad literally in a few minutes. Sure making PCBs is nice (and I do that too where its warranted) but I guarantee for small stuff I can vero it before you can finish even routing it on your PCB layout program... Then you have to print/iron/etch/drill etc.

I don't cut tracks that much on vero except between DIL IC pins of course. To cut tracks I use a 1/8" drillbit in a slow cordless electric screwdriver, it's perfect for cutting the copper neatly in about 2 seconds with no hassles apart from losing a hole. With a little experience you can keep all the jumper wires running one way and the tracks running the other, to keep track cutting to a minimum. Here's one for a 29pin PIC I prepared earlier (in a few minutes - complete with SMD regulator);
 

Attachments

  • mb2_pcb.jpg
    mb2_pcb.jpg
    97.7 KB · Views: 1,349
Thanks Boncuk, Really a Nice tool. I was using normal pencil mender blades. Perhaps we have to get one fabricated locally and it is not off shelf, right?

Hi mvs sarma,

in Germany it's an off shelf item. It is called "Leiterbahnunterbrecher".

I'll check for sources.

Boncuk
 
Here is one source:

Conrad Electronic - Europas führendes Versandhandelsunternehmen für Elektronik und Technik

Order number: 528008-62, price €5.10 (including sales tax)

Use the tool overlapping in cutting area to get a clean (half circle from both sides) cut.

It works fast and clean.

You might "manufacture" your own. Use a round piece of pine wood and drill two holes at 1/20" (1.27mm) distance, one for the centering pin and one for the blade. Insert the centering pin and the blade and fix with epoxy. Use stainless steel for the blade and sharpen it at both edges (before inserting). That way it will cut cw and ccw.

Boncuk
 

Attachments

  • Trace-Cutter.jpg
    Trace-Cutter.jpg
    5.7 KB · Views: 412
  • BLADE.gif
    BLADE.gif
    4.1 KB · Views: 415
Last edited:
I have made hundreds of circuits on Veroboard. Some were huge digital ones.
They looked professional enough to be sold for high "custom-made" prices.
 
I make PCBs using PulsarProFx's variation of the toner transfer method. The drawback is that you need both a laser printer and a laminator (some use a clothes iron but I do not recommend it.

**broken link removed** is a good walk through.

Tha'ts great! What do you do with the chemicals after etching. Please don't say use it to kill weeds.
 
Status
Not open for further replies.

Latest threads

New Articles From Microcontroller Tips

Back
Top