Continue to Site

Welcome to our site!

Electro Tech is an online community (with over 170,000 members) who enjoy talking about and building electronic circuits, projects and gadgets. To participate you need to register. Registration is free. Click here to register now.

  • Welcome to our site! Electro Tech is an online community (with over 170,000 members) who enjoy talking about and building electronic circuits, projects and gadgets. To participate you need to register. Registration is free. Click here to register now.

little help needed?

Status
Not open for further replies.
Unfortunately neither of those circuits will work.
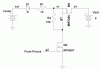
In the first, the lower nmos fet will merely short out the motor. Your fets are only half of an H-bridge. Google for an explanation.
In the second, there is no way of unlatching the relays. A latching relay has either dual coils (one for set, one for reset, as in the Chrisatronics circuit) or a single coil which must be enrgised by reversing the polarity of the voltage across it. The Chrisatronics article explains this.
my question is if i then reverse this process to make the motor reverse will it not just keep cancelling itself out because input 9 is still high?
How the micro treats signals from the limit switches is up to you as the programmer. You could just tell it to stop the motor then reverse the motor direction so that the switch will be reset at a later moment.
 
so should i use a h bridge, is a L293D motor driver a h bridge? whats the easiest way for me to do what im trying to do. (the motor driving part im on about)
 
The L293D is a quad half-H-bridge that can handle 600mA (1.2A peak) per half-bridge and has built-in diodes. That's one option.
If you want to use discrete components in a d-i-y H-bridge, it would look something like the attached. D1-D4 would not strictly be necessary if the fets have built-in protection diodes.

Explanation:
The bridge gets 2 control signals In1 and In2 from the micro. If In1 is high (4.8V) M3 switches on, pulling the gate of M1 low (~0V) via R2 and turning M1 on also. So the motor runs one way. Similarly if In1 is low and In2 is high then M4 and M2 switch on and the motor runs the other way. If both In1 and In2 are low the motor is off. It is essential that In1 and In2 are never both high at the same time, or smoke will rise!
 

Attachments

  • H_Bridge.gif
    H_Bridge.gif
    14.5 KB · Views: 123
Last edited:
Yes, uc = micro-controller = picaxe.
 
Right I think my schematics are done On paper I just have to transfer it to a computer I am going to use express sch to draw it up is there any better ones with a simulator that I can get?
 
I would advise making sure the motor will work the door. The windshield wiper motor was used for two reasons. 1) Because of the gear reduction and/or worm drive, it won't move when stopped. 2) It has enough torque to move the door.

Remember that both limit switches activated is considered a fault.

Some motors won't stop immediately, unless braking is employed. Some "H-bridges" have two inputs which control the modes: brake, coast, forward and reverse. Others have two inputs that control direction(Fwd/rev) and (not enable).

I've personally done controls using the fwd/rev and not/enable with brake being done by a relay and I've done controls where a relay was used to tell a motor to go forward or reverse.
The latter was a really odd design, because of it's difficulty. I used a synchonous motor, two limit switches, a couple of solid state relays, a couple of indicators and I think a few reed relays. I forget the design. The motor was attached via a slip clutch. This was for a shutter to be used in a vacuum system. It didn't have to open fast and it opened within about 2.5 s and the limits had to be adjustible. I believe the system worked by sending it a 1 sec long pulse for open and another for close and provided open collector outputs for the state.

I also unsuccessfully played with PWM to control an automobile blower motor.
 
Last edited:
I am going to use express sch to draw it up is there any better ones with a simulator that I can get?
I've never used express sch so can't say what's best. I used LTSpice (a free download schematic editor and simulator) for drawing the schematic above. There is a Yahoo user group for LTS, which has additional free downloads to add to the simulation component models.
 
Last edited:
Well, the solar panel is one of the problems ;-)
1) Nothing to automatically connect the solar panel (the Chrisatronics circuit uses a latching relay),
2) No light sensor,
3) What are R3 and R?? connected to pin 9 of the micro for? Do you really want/need to check the output voltage of the regulator?
4) The micro isn't connected (at the bottom of R4) to the limit switches.
5) The gates of Q2 and Q3 aren't connected as per my schematic.

Edit: The LT323 is not a low-dropout regulator so is unsuitable here. A much lower current-rating regulator would be perfectly adequate as only a few mA are needed at 5V.
 
Last edited:
1)i dont understand how in his schematics it works because its not connected to the micro so there is nothing to tell the solar panel to charge the battery.(how should that be wired on my schematics.)

the light sensor is there on the right hand corner of the pic express sch didnt have an ldr symbol, your question 3 is the awnser to your question 2.

5) its wired the same as your drawing

other than this is everything else ok?

i have revised it to your spec and i have also circled the connections from Q2 to the resistor and Q3 to the resistor
schematics paint.jpg
 
i dont understand how in his schematics it works because its not connected to the micro so there is nothing to tell the solar panel to charge the battery.
I don't fully understand either. The only clues we have are: "The charging relais is a bistable. That means it holds its position even when powered off. This way, all the power from the solar panel goes into the accu and no power is wasted on the relais." and "The battery is loaded when the voltage gets lower than 12 V until it reaches 14.2 V again."
So it looks as though he simply checks the battery voltage and if it is below 12V then the 'set' coil of the latching relay is energised to close switch K1 and connect the solar panel directly to the battery. He does not check to make sure the solar panel actually has a high enough voltage to charge the battery, nor does he limit the charging current in any way. When the battery voltage reaches 14.2V he energises the 'reset' coil of the relay to open switch K1 and disconnect the solar panel.

Regarding the light sensor, that clarifies things. However, pin 9 of the micro isn't shown as an analogue input (only pins 1,2,6,7 are). Make sure you use an analogue-capable input of the picaxe.

Where you have circled the connections is not as per my circuit. You have both gates connected to the tops of the resistors, i.e. to +6V. The gates should connect to the bottoms of the resistors, i.e. Q2 gate>>R6, Q3 gate>>R5.

Edit: The voltage regulator is still shown as unsuitable LM323.
 
Last edited:
o ok i understand the resistors now and will change it, it only shows as lm323 because it doesnt have a symbol for the lm317T which is the regulator ill be using so would that be the best way for me to recharge the battery to copy that one? and on the pinout of the picaxe 18m2 i have 1,7,8,9,10,11,12,13,17 and 18 all programmable to in/out/adc some also do touch,pwm and i2c. but i will make sure it goes into an analogue port
 
ok i have done a little modification i managed to find an lm317t, so thats been replaced. ive moved the Q3 and Q4 to the correct side of the resistor.

i have also changed out the switch from the solar panel with a mosfet im not sure this will work but it so i could read the voltage across the battery and program the mosfet to come on when the battery is going low and go off when its not needed.

schematics paint.jpg

would this work or should i just change the mosfet for a relay?
 
The nmos fet for switching the solar panel won't work as shown, because its gate pin needs to be driven several volts above its source pin to turn it on. There are problems with using a fet where the polarity of the drain-source voltage is subject to reversal, because most fets have a protection diode which effectively could provide a conduction path even with the fet 'off'. As a switch you could use an NPN bipolar junction transistor with its collector grounded and its emitter connected to the negative terminal of the solar panel; but that might need an additional negative voltage source to switch the transistor off fully. So that leaves a latching relay as the preferred option for switching the panel, as per the Chrisatronics circuit.

The LM317t needs two resistors to set its output voltage and must have a minimum load current. Check the thread about the LM317 in this forum.
 
Last edited:
Here's another option for switching the solar panel, which does not need a latching relay and needs only one control signal from the picaxe. Not knowing the characteristics of your solar panel I've included a diode to prevent any reverse current flow through pmos fet M1 and the panel in the event that its voltage is less than the 6V battery voltage. Both fets need to be able to be turned on with less than 5V between their gate and source. M1 must be able to handle the maximum charging current. R1 is a current limiter but may be unnecessary.
 

Attachments

  • ChargerSwitch.gif
    ChargerSwitch.gif
    7.6 KB · Views: 132
Can't see any obvious probs. Make sure there is plenty of decoupling of the power rails, by fat capacitors, as with only 6V there isn't much margin for the picaxe. A drop in its supply could cause nuisance resets.
Some component values might need changing if your motor is drastically different from the one you described. Good luck with the build!
 
thank you and when you say fat capacitors and decoupling, can you put that in laymans terms for me sorry. will 6v make it a problem? should i use 12v?
 
In your schematic C1 and C2 are 'decoupling' capacitors. Their effect is to 'short out' (decouple) any high frequency voltage spikes appearing at the input and output of the regulator. I would add another 10uF electrolytic cap from the regulator pin 1 to ground, and at least a 100uF electrolytic cap and a 100nF metallised polyester cap in parallel with it directly across the battery. The picaxe should have a 100nF decoupling cap wired between its Vdd and Vss pins, as close to the chip as possible.
Providing you have a suitable solar panel I would advise using a 9V or 12V battery (as per Chrisatronics). The regulator drop-out and decoupling would then become less critical.
 
Last edited:
Status
Not open for further replies.

Latest threads

New Articles From Microcontroller Tips

Back
Top