Continue to Site

Welcome to our site!

Electro Tech is an online community (with over 170,000 members) who enjoy talking about and building electronic circuits, projects and gadgets. To participate you need to register. Registration is free. Click here to register now.

  • Welcome to our site! Electro Tech is an online community (with over 170,000 members) who enjoy talking about and building electronic circuits, projects and gadgets. To participate you need to register. Registration is free. Click here to register now.

Is this header pin bad or not?

Zestfully4

New Member
Should I replace it? Is it damaged, or will it work? Is it safe to test with the power source of 4.5V? I have a feeling something might go wrong if connected to power. But if I should test it, perhaps there's a way you can recommend for testing with multimeter?

I don't have a replacement at hand and don't have experience yet to determine whether a component is bad or not with visual, so please understand.

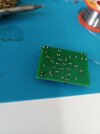
2024-08-24-11-12-26-783.jpg
 

Attachments

  • 2024-08-24-11-12-40-117.jpg
    2024-08-24-11-12-40-117.jpg
    2 MB · Views: 111
I can't see what's on the top side of header. Is it an ESD shorting plug? Otherwise looks a bit fuzzy..

If it looks like a parallel array of 2S LEDs 4.5V sounds about right or add resistors and use 5V(?) Follow the traces.

You ought to invest in a programmable digital V A P power supply to adjust voltage with a current limit and display power. ~ $1/watt
 
I can't see anything obvious with the pin header - but it does look like there may be some solder bridges (red) and dry / partial joints (yellow) ?

2024-08-24-11-12-40-117a.jpg
 
Placing the LEDs flush to the board without a 3mm spacer means the gold bond wire might dislocate with a hot iron used over 3 seconds.. Review the LED soldering specs. I had a client who damaged many LEDs this way. Heat travels about 1mm /s along the LED leads and once it reaches the wire bond joint any motion on the leads can break it. They should not get wounded if you can make a good solder joint in 2 seconds. (fragile) Observe the lead length minimum and maximum hand solder time at all times.

I agree the red-circled solder joints need repair. Good eye loops or a 10x eyeglass helps. A microscope cam is wonderful.

You will need to populate the Resistors depending on your supply voltage using. IF all the LEDs are 2.1V and appear to be in strings of 7, 6, 6 but there are 4 resistors So check your instructions. But I think it runs off V+= 3.3V with the resistors drawing (R3)140mA, (R4)120mA, (R4)120 mA with < 1.2V drop using 1/4W resistors rising < 70'C

My est. is use 3.3V and use R3= 12, R4 = R2 =10 ohms 1/4W and R1=1k? if it enables all dim with switch off.(?)
 
Last edited:
The header is not damaged that I can see, it looks like you have mounted it upside down.
Are you sure? I would always solder headers with the long pins inserted through-hole, and I don't know why it would be any different here?
 
To reiterate what I was asking with my post — which was simpler than you might have thought, is basically, if the melted plastic around the header destroyed the component or not and guidance for finding out if it is through testing, if not obvious.
 
Placing the LEDs flush to the board without a 3mm spacer means the gold bond wire might dislocate with a hot iron used over 3 seconds.. Review the LED soldering specs. I had a client who damaged many LEDs this way. Heat travels about 1mm /s along the LED leads and once it reaches the wire bond joint any motion on the leads can break it. They should not get wounded if you can make a good solder joint in 2 seconds. (fragile) Observe the lead length minimum and maximum hand solder time at all times.

I agree the red-circled solder joints need repair. Good eye loops or a 10x eyeglass helps. A microscope cam is wonderful.

You will need to populate the Resistors depending on your supply voltage using. IF all the LEDs are 2.1V and appear to be in strings of 7, 6, 6 but there are 4 resistors So check your instructions. But I think it runs off V+= 3.3V with the resistors drawing (R3)140mA, (R4)120mA, (R4)120 mA with < 1.2V drop using 1/4W resistors rising < 70'C

My est. is use 3.3V and use R3= 12, R4 = R2 =10 ohms 1/4W and R1=1k? if it enables all dim with switch off.(?)
Thanks a lot for the deep insight! I don't have a spacer, but I'd like to make sure I'm following what you've said, so would simply not insert the LEDs flush on the PCB but leaving ~3 mm space between it and the board be an acceptable solution?
 
That's my suggestion if you can solder in <2 s. What does your datasheet say?

< 5s time for the plastic header.

But due to large size, it is quicker if you heat the pad in 3s then place the solder to melt on to tip and via and let it flow around pin in one continuous motion then quickly remove the tip with the right minimal amount of solder. Remove solder with solder braid replace header and try again to solder in 3 s.

Always quick wipe hot tip on damp sponge after each joint at about 600'F 315'C, hotter allows quicker but more damage if too slow.

Clean copper, clean top, use dip liquid flux on headers, wires and you might get each solder point perfect in 1 s with the right temperature and timing of heat-solder-release.
 
Last edited:

Latest threads

New Articles From Microcontroller Tips

Back
Top