Continue to Site

Welcome to our site!

Electro Tech is an online community (with over 170,000 members) who enjoy talking about and building electronic circuits, projects and gadgets. To participate you need to register. Registration is free. Click here to register now.

  • Welcome to our site! Electro Tech is an online community (with over 170,000 members) who enjoy talking about and building electronic circuits, projects and gadgets. To participate you need to register. Registration is free. Click here to register now.

Want to start making my own boards with a CNC router, what do I need?

Status
Not open for further replies.

FusionITR

Member
For example, i want to pick up a small router, something like this:

**broken link removed**

It says it comes with everything I need, including the software, so I have that covered. Questions I have though -

1. Do CNC routers also drill holes? Or do I need a seperate machine for that?

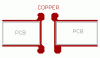
2. How do I plate pads/holes/vias? Since the entire board of copper, I would assume I would need to soldermask it first and then plate it? What are the steps for this?

3. With that said, how is the soldermask done? If I even had soldermask chemicals, how would I keep the soldermask off the pads/holes/vias?
 
1. Yes they can drill holes. The PCB layout program will generate a drill file with G-Code to do the drilling. Look into Eagle and an add on to it called PCB-Gcode.

2, For the most part you do not. If you want plated through holes have a board house make the PCB. There are a few ways you can try to do it but none are good.

3. Most people do not need our use a soldermask.
 
2, For the most part you do not. If you want plated through holes have a board house make the PCB. There are a few ways you can try to do it but none are good.

3. Most people do not need our use a soldermask.

What do the PCB houses use to plate holes and pads? I need soldermask because I use 95% SMD components and without soldermask/plated pads it would be near impossible to solder them.
 
PCB houses use a series of chemicals and electroplating. Not a DIY sort of things but a few people have tried. Cheaper to have them made.

I solder SMD parts without a solder mask. The more important thing is a solder paste mask to apply the right amount of solder paste. I solder mine in a fry pan ala sparkfun.

It is quite possible to hand solder SMD parts too. Checkout the sparkfun website for the drag method and the use of solder wick.

As a reality check. I have done SMD part down to .5mm pitch. At that point I have trouble making my PBS rather then soldering them.
 
If I can't get a legit way to do soldermask I don't think it's worth spending $600 on a cnc drill. I may stick with fab houses.
 
I have heard of soldermask films that can be applied to the PCB then exposed to UV. But if you are going to do that you may as well do the board with photo resist and etch it.

I used to do photoresist but the problem with that is you still don't get the whole drilled and the resolution is extremely poor. The generally quality of photo resist boards aren't even in the same league as as fab houses. My designs have 100+ parts with lots of thin and closely space tracts. Photoresist boards are not even at an option for me at his point even for prototyping.
 
I have been using the toner transfer system from pulsarProFx and the resolution is very close to that of fab houses. The laser printer used it the limiting factor.

I use a CNC mill to drill the holes prior to applying the toner and etching.
 
I have been using the toner transfer system from pulsarProFx and the resolution is very close to that of fab houses. The laser printer used it the limiting factor.

I use a CNC mill to drill the holes prior to applying the toner and etching.

Even if I had a perfect photoresist system, I wouldn't want to deal with having to manually drill 100's of vias and manually solder fill them with wire to the back side.
 
Agreed. That is why I use the CNC to drill the holes. With SMD parts you do end up stuffing a lot of vias. That is why having them done makes sense. BatchPCB is a decent and there is a website that does similar but you get 3 PCBs of the same type for $2 a sq in. Per board that is $2/3.

I have not been active in the past 6 months. On my next design I will do the first prototype myself and then order boards when it has been proven.
 
Last edited:
Agreed. That is why I use the CNC to drill the holes. With SMD parts you do end up stuffing a lot of vias. That is why having them done makes sense. BatchPCB is a decent and there is a website that does similar but you get 3 PCBs of the same type for $2 a sq in. Per board that is $2/3.

I have not been active in the past 6 months. On my next design I will do the first prototype myself and then order boards when it has been proven.

Only part of the reason I want to buy a CNC router is price, but it's also turn around time. Most cheap(er) quality places are at least $120 or so because they have a minimum quantity, plus its about 1.5 weeks lead time. And I usually make minor errors so I have to get the boards done at least 2-3 times. Thats months of time and 100's of dollars on issues I can solve in a day if I had a cnc router.

If I can get a CNC router and a system plate holes I'd invest in it without a second thought if it was reasonably priced. Without the plated holes though it's not work it. I could live without the soldermask though.
 
There are enough people interested in making the through hole work in DIY PCBs that there has been some progress.

One effort used the repair compound used to fix defroster grids on rear car windows. Other people have used other conductive pastes or inks which the squeegee into the holes. Last I checked the paste was not a reliable in the long run. But if the prototype only has to last through the development period it may be a solution.

I made a few solder paste stencils with Eagle and cut them with a cricut. It is a CNC with a knife used by the scrap book crowd. I am still experimenting with it.
 
Hi FusionITR,

I have gained quite some experience manufacturing plated through hole PCBs.

The device I used was developed by Isel automation. There are four baths necessary for the prepared PCB:

- cleaner
- activator
- another cleaner
- electrochemical copper plating

The PCB has to pass each bath at an exact temperature and an exact time period. A rocker takes care of removing trapped air out of the drill holes. (Otherwise they won't be plated.)

When a PCB is finished the first time it looks like being made by a commercial PCB manufacturer. Leaving the plating liquid in the tank it will become unusable after a few hours, creating a sponge like copper layer and huge build ups of copper at the drill entries (both sides, leaving the center to scale). Using through holes to place parts will result in extra drilling - most probably removing the entire plating. (See attachment)

This stuff is the most expensive part of all chemicals to use.

PCB material:

This method requires differential etching, meaning PCB material with 5µ copper layer is used. The film must be a negative image of your PCB design.

The exposed and developed PCB has to be covered with special self adhesive tape without leaving any air trapped between the tape and the PCB surface.

When this is done all drills have to be made (not to forget one!)

Finally the tape is removed and the PCB rinsed thoroughly with denaturated water, which it prepares for through plating.

All drills and the copper traces on both sides receive a copper layer of approximately 35µm. After etching the trace copper layer will have been reduced to 35µm (5µm on the base material +35µm electrochemical copper layer)

I found out that commercial PCB drill holes never meet the center of a pad. I did drilling manually with the drill hole exactly in it. (General accuracy of commercial PCBs is 0.025mm which might suffice, but never looks good.)

I doubt the machine you intend to buy will have the repeated accuracy. The photo was not clear enough to see what kind of drive spindles are used.

You could use the chassis and mount your own precision spindles, reduction gear (tooth belt) and stepper motors to it.

Last not least photoresist PCB material is as accurate as the film you use. A laser print is by far not sufficient for fine traces. I got my films made using a Gerber printer in a near by print shop. The finest trace width used was 0.245mm and none of them was underetched or missing.

From my experience BUNGARD has the best quality PCB material in Germany. Storing the material in a dark, cool place it's still well usable after one year. The photoresist layer is superb and of equal thickness all over the surface which guarantees sharp contours.

For PCB material look up: http:Bungard Elektronik

As far as SMD soldering is concerned I go along with 3v0. Distributing the solder paste in correct doses is the "A" the "O" of SMD soldering.

Regards

Boncuk
 

Attachments

  • THROUGH-HOLE.gif
    THROUGH-HOLE.gif
    6 KB · Views: 169
Last edited:
Our company previously had a micro-CNC, I think, probably because technology does not pass at that time, I found engraved PCB, all the circle are not enough rules.

Now micro-CNC precision should have been raised, I said that the situation 8 years ago.
 
Our company previously had a micro-CNC, I think, probably because technology does not pass at that time, I found engraved PCB, all the circle are not enough rules.

Now micro-CNC precision should have been raised, I said that the situation 8 years ago.

I hope so!

Designing a CNC router planning should include an accuracy of 5/1,000mm. (0.025mm is a mile when it comes to precision)

This accuracy would eliminate the need for photographic or "press 'n peel" methods including a photoresist layer on the PCB material.

Isolation machining should be the future of manufacturing precise PCBs.

Boncuk
 
Status
Not open for further replies.

Latest threads

Back
Top