Continue to Site

Welcome to our site!

Electro Tech is an online community (with over 170,000 members) who enjoy talking about and building electronic circuits, projects and gadgets. To participate you need to register. Registration is free. Click here to register now.

  • Welcome to our site! Electro Tech is an online community (with over 170,000 members) who enjoy talking about and building electronic circuits, projects and gadgets. To participate you need to register. Registration is free. Click here to register now.

Text LED Panel

Status
Not open for further replies.
Do you mean 3.2V on the LED itself? What color LED?

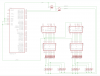
Since this circuit is using the HC595 as a high side driver it won't be easy to replace with something more powerful. The Fairchild data sheet says 35mA per I/O pin but there's a 70mA limit for DC on each power/ground pin.

Let's do some research - if we turn the LEDs around then we could use p-channel MOSFETs on the 16 rows and a small transistor on each of the 125 columns.
 
Last edited:
They're white LED.
But to tell you the truth, i've read on this forums, that the white LED got phosphur (i think it's how we spell it), and they don't last more than 1 year.
Maybe i'll use 2.2V Red LED, still, they work at 20~25mA, with about 5000~8000mcd.

Do you think i still need to use MOSFET and the transistors?

I'm begin to get kinda "lost", lol... but i will build this.
 
I don't expect white LEDs to be any worse than others if you get quality parts and don't over drive them.

The limit for each HC595 is a total of 70mA. 15mA*8 is already beyond this limit, but I was accepting the same risks as the original designer did.

If you turn the LEDs around and use a high side P-MOSFET for the rows, you can use a darlington package like the ULN2803 for the columns. The main advantage is one package replaces 8 transistors and 8 base resistors.
 
Can you draw a schematic (even on paint), to tell me how i can connect the P-MOSFET the ULN2803, and one or two LED for example?
I don't have experience with MOSFET that's why i'm asking for this D:

Turning the LED around you mean changing their current polarity right?
 
Mehhh, no one talks much about message LED displays, it's a awesome project to do, why only me and mneary speak of it? D:

I know the chinese sells this things cheap, but isn't cool to make our own things? Don't think that because the chinese people can reproduce anything, they can be better than any of us. :<
 
Sorry my reply took so long, here it is. Note that pin 10 of the '2803 isn't connected. (It's for diodes if it was used as a relay driver).

There are many other parts that can be used as drivers. The main advantage of the 2803 is the single package for 8 buffers. If you have other cheap buffers, we can look at them. Each section of the '2803 can be replaced by a 2N3904, 2N2222, or BC546-7-8-9-50, with a base resistor.
 

Attachments

  • Chardisplay.png
    Chardisplay.png
    58.6 KB · Views: 284
Thank you for the schematic! :D

Can you tell me what's the program that you've made that schematic? And if you can send me the schematic file it would be great, i want to write the rest of the schematic with all the LED and all the other circuits.
 
Thank you once again! ;D

When i've completed the schematic i will post it here for your comments about it, let's see if this time i can finish the schematic phase with sucess.
 
Last edited:
80x100mm is a pretty small board. Do you have a strategy for fitting the LEDs? Maybe a CPU board and a series of LED boards?
 
Nah, i've just downloaded the cracked version of Eagle 5.9.0 Professional! :D

If you want you can download it here too: Mehh... i was just trying to be helpful here.

It was cracked today by the haxors and it's working! :D
 
Last edited:
Cracked version will produce files that future versions of Eagle will be blocked from reading.

(I'm happy that you removed it. People who want it already know where to get it, and this place can maintain its reputation.)
 
Last edited:
Aww, indeed 250mA i could use 10 LED on that component, but once again i don't know what pins i should use. D:

Can you draw a simple schematic on how to connect the correct pins to the LED? I've almost completed the previous schematic that you've sent me, but i agree that it will be required a lot of soldering (or at least a much bigger PCB).
 
The essence is you connect the signals Drain0...Drain7 to the LEDs where the signals QA....QH were connected before we added the drivers. SEROUT is connected where QH' (QH bar) was connected.

I'll have to wait till tomorrow to draw a schematic.It looks like the tpic6595 isn't in the Eagle library so that will need to be done first. I would begin with a similar part ('HC595???) and rearrange as required.
 
Here's the schematic that i've edited: View attachment Message Displayv2.zip

I've got kinda confused with the LED row and columns, i'm looking at that schematic and i think the LED Display will be 15x16 instead of 15x160, but i have no idea in how to make the display "widther" (is that how it's spelled?) D:

Since the component can output 500mA, how can i add more LED to the row?
 
Last edited:
I was busy building a 406 LED projector to catch some bugs and beetles (yeah it was awesome soldering that ;D).

And now i want to finish this text LED display project.

But as you may see, i'm having some troubles. I don't know how to connect 15x160 LED on my schematic, and i'm beginning to wonder if the components will be enough to power up the LED, after all each LED needs 25mA to power up, so i need some advice on how to do it right.

I have a attachment on my previous post of the schematic i'm trying to build, it's on Eagle format.
 
Welcome back. :) [edit] this replaces previous version where I over estimated everything by a factor of 16. [\edit]

So far, the LED array looks OK. It will just be a matter of finding room on the page for the rest of them (128 done, 2432 more). You have to attach an LED from each row to each column. That means 16 cathodes on IC3 pin 111, with each anode going to a different MOSFET.

I should revise the schematic and post a modified version shortly.

160 columns each use 25mA when its row is activated. If you want all the LEDs in one row to be on, that's 4 amperes. But due to the multiplexing, only one row is on at a time, so they don't add together.

If the distance between them (centers) is 0.25", your board is 40 inches long. Myself, I would divide it into several smaller boards that I would place edge to edge.
 
Last edited:
OK, I have to stop for the night, but here's some of what I talked about. I added more rows to columns 1-8 and put new LEDs on columns 9-16. I have not finished them because this is only supposed to be an example. You get to fill it in until you have all 20 of the 'HC595s hooked up.
 

Attachments

  • Message Display.zip
    38.3 KB · Views: 242
Status
Not open for further replies.

Latest threads

Back
Top