Continue to Site

Welcome to our site!

Electro Tech is an online community (with over 170,000 members) who enjoy talking about and building electronic circuits, projects and gadgets. To participate you need to register. Registration is free. Click here to register now.

  • Welcome to our site! Electro Tech is an online community (with over 170,000 members) who enjoy talking about and building electronic circuits, projects and gadgets. To participate you need to register. Registration is free. Click here to register now.

simple 555 4-LED Strobe light PCB problems.

Status
Not open for further replies.
I want to make another version, but its alot of effort to make one, drill it, solder it, just to find out that youve cocked up somewhere along the line!
 
I have flipped the images, and overlayed them. Its quite confusing:eek: but i think that it shows how its all connected.
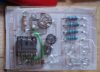
Thanks
 

Attachments

  • Overlay.jpg
    Overlay.jpg
    45.7 KB · Views: 616
hi,
Checked your pcb againsnt your recent pix, it all looks OK?

Just a couple of suggestions, cut off all the component surplus wire under the pcb to prevent further problems.

Check the polarity/condition of 4u7 cap.

If it still fails, send me a PM, so we can organise for it to be sent to me.
I'll fix it FOC as you are in the UK.

Eric

While you are studying electronics you will suprised how much you will learn
thru your screw ups, don't be disheartend, we have all been there.
 
Thanks very much Eric. That’s really kind of you.:)

It’s not so much that I need it fixed; it’s just that I want to know why it doesn’t work! I have very little use for it really and I dont need it back.

I want to make more circuits on pcbs but i'm put off by the fact that I have no idea why this one is wrong.

I am already astounded at what I have learnt so far, I feel a little more competent now, until I’m looking at a circuit that should work, but doesn’t, then I feel a little helpless!

I’ve always been madly addicted to all things electrical:eek:, and now I’m making my own gadgets! Don’t worry mate it would be difficult to get too disheartened by all of this.

Ill test the cap and let you know;).

Thanks mate.
 
bitem2k said:
I have very little use for it really and I dont need it back.

Of course you do, if nothing else it will be useful as a tester for 555s.
I have a similar board that I built about 25 years ago
 
I don’t know from which side you see to the PCB, the easy way to check it right or not (is in the case of your design PCB) simply check the positive & negative supply to IC -555
If it OK, means you mount the component OK. Next come to U problem.

1) First of all connect pin 5 of IC to ground through ceramic disc capacitor 0.1uf.
2) Second you should to change the 100K variable to 1 M ohm than you can get a good fleshing rate.

Zia ul Haq
 
Hi, I just ditched the pcb. Best thing i ever did with it. I have since made several different pcbs that all work (after a little debugging).
I reckon it was just shoddy soldering on my behalf.

thanks
 
bitem2k said:
Hi, I just ditched the pcb. Best thing i ever did with it. I have since made several different pcbs that all work (after a little debugging).
I reckon it was just shoddy soldering on my behalf.

thanks

It happens :( After a while of debugging, when the list of 'things that could be wrong' starts to diminish, it can just take up too much time, which could be spent making another PCB. Still, if you're anything like me, its not the fact you need the board, its more just finding out why it doesn't work, for peace of mind (so rare these days..).

I hate to sound 'positive', because its not like me, but its a good learning experience..even if you didn't find the fault, you tested it to the best of your ability, and learned something new in the process. And you haven't blown any expensive hardware doing it... which is a sure fire way to make sure you never repeat a mistake :D

Good luck in your future projects.

Blueteeth
 
Nice one mate, You right, its not about the circuit its just annoying to not know why it doesnt work.
All pcbs ive made since then work ( at least for a bit anyway!).

Cheers.
 
bitem2k said:
simulated it in croc-clips
I wouldn't recommend Crocadile Clips for any serious simulation. It's only designed for educating school children and it's a bit 'Mickey Mouse' for most applications. I have a copy I got from school many years ago, it's perfect for simluating digitial logic circuits but a 555 timer circuit is about as far as you can go with it, and even then you can bump into problems.

Try using something a bit more grown up like LTSpice, it might not be as easy to learn but it will serve you well in the long run.
 
Last edited:
Hi guys,

Im new here and new to electronics, but I've run into this problem before. What my experience has been is that the 555 gives out a sine wave form, not a square form. What that means is that it doesnt go all the way down to 0v, so there is still some residual power going to the NPN, causing it to allow current to flow through.

To solve this, you need to up the resistor value from the output pin. I have had good luck with both 16k and 18k resistors, as used on different circuits. Also, you will need to have another resistor connecting from post resistor to base to the emitter. This resistor needs to be about 10x the pin 3 to base resistor. This also helps drain the residual energy.

On my last flashing LED project, the LEDs were supposed to flash, then switch sides, flash, switch sides, etc. The no longer flashed, just changed sides. I tracked that problem down to not having the base to emitter resistor in place.

I hope I helped.

Clayton
 
Last edited:
Clayton said:
Hi guys,

Im new here and new to electronics, but I've run into this problem before. What my experience has been is that the 555 gives out a sine wave form, not a square form. What that means is that it doesnt go all the way down to 0v, so there is still some residual power going to the NPN, causing it to allow current to flow through.

The output of a 555 is a square wave (or depending on duty cycle a rectangle wave) - a sinewave is completely different, and bears no resemblance to anything you can get out of a 555.
 
Yeah, croc clips is pretty shite, not to mention horendously buggy, However its the only bit of software ive tried that at least attempts to conform to Standard Windows design practices.

I downloaded LT spice a while ago, along with other circuit sims. Ill give it another bash.

thanks mate.
 
Nigel Goodwin,

I apologize for providing bad information, I do try to avoid doing that. You will find that I post very little.

However, my solution is still valid as has been shown through several working projects.

Clayton
 
Last edited:
Clayton said:
Nigel Goodwin,

I apologize for providing bad information, I do try to avoid doing that. You will find that I post very little.

However, my solution is still valid as has been shown through several working projects.

In what respect?, a 555 doesn't output a sinewave, or anything close to one.
 
If I have four replies, I apologize. However after 2hrs, I kind of dispair of the prior three replies appearing. Without further ado, here is my fourth iteration of this post.

Nigel Goodwin,

You ask in what respect is my solution to bitem2k's problem still valid. I would ideally point you to my own completed LED projects. However absent that option, I guess I'll have to make a logical presentation.

I probably need to give a little background. For the last 3 months or so I have been dealing with flashing LEDs. It is in part a pet project to see how efficiently/cost effectively/etc I could make flashing blue LEDs that would be suitable for police patrol work. I have made flashing LEDs using 555s and a set using a 555 / 4017 combination. In all of my versions I have used NPNs and in one style I have used PNP transistors also.

Now, despite my very regrettable goof in calling the output sine instead of square, the solution to his problem is not bothered. This is because it boils down to controlling the transistor. The obvious problem here is that the transistor is not turning off. What this simply means is that there has to be some voltage getting to the transistor. As you are no doubt aware, it takes very little to turn the transistor on. The solution that I have found in my own work is to put a higher value resistor in-line. W/ my 12v work 16k works well between the output and the base of the transistor. Another resistor needs to be added between the base and the emitter of the transistor. The recommended value and one that works in my work is 10x the output to base. BTW, the resistor goes after the output to base resistor.

Here is a link that I referenced when building my circuits.
https://www.electro-tech-online.com/custompdfs/2007/02/transistorswitches.pdf

Clayton
 
Clayton said:
You ask in what respect is my solution to bitem2k's problem still valid. I would ideally point you to my own completed LED projects. However absent that option, I guess I'll have to make a logical presentation.

The only problem with your post was calling it a sinewave, the resistor between base and emitter is standard practice, for the reasons you stated.
 
the resistor between base and emitter is standard practice, for the reasons you stated.

Nigel Goodwin,

It appears from the pictures posted by bitem2k that his project lacks that resistor.

Clayton
 
It would appear that the reason my circuit doesnt work (most of the time) is because I foolishly omitted the decoupling capacitor.

thnx
 
Status
Not open for further replies.

New Articles From Microcontroller Tips

Back
Top