Continue to Site

Welcome to our site!

Electro Tech is an online community (with over 170,000 members) who enjoy talking about and building electronic circuits, projects and gadgets. To participate you need to register. Registration is free. Click here to register now.

  • Welcome to our site! Electro Tech is an online community (with over 170,000 members) who enjoy talking about and building electronic circuits, projects and gadgets. To participate you need to register. Registration is free. Click here to register now.

PIC based high-resolution cap meter

Status
Not open for further replies.

Mr RB

Well-Known Member
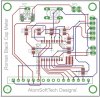
Hi, I have done a PIC 16F628 based pico-capacitance meter.

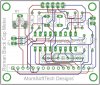
I know there are a lot of other designs around but this one is very quick to build as it just uses one IC, the PIC (as it uses the PICs internal comparator as the oscillator).

It measures down to 0pF and reads in 0.01pF resolution in the bottom range, up to about 18000pF.

Total measuring range is 0pF to 50uF. It only needs a decent 10k 1% resistor and will be calibrated so ideall you won't need any special caps or test equipment to build it.

The schematic, PIC HEX file and photos etc are all here;
https://www.romanblack.com/onesec/CapMeter.htm

capmeter_3-1.gif


capmeter_2-1.jpg
 
Last edited by a moderator:
Great Job and nice finishing.

I've got all the parts except for 16 MHZ oscillator :).
 
Thanks a ton! I bought a DVM with cap measurement but it sucks and doesnt even work... I will make this ASAP

I will get PCBs made of this.. dont worry im not going to sell it. I just want a nice sturdy version. When i order its in sets of 3. Ill be sure to send you 1 :D thanks
 
Last edited:
Hi,

Nice product case design. Is that a custom case or found somewhere?

Can it really be as good as 0.01pf?
 
Mr RB - How hard would it be to get something like this working on an Arduino (more specifically, an ATMega328)? Your circuit is using the PIC's on-board comparator as an oscillator; AFAIK, the ATMega doesn't have such a device (unless there is one that isn't set up for usage in the Arduino system - maybe there's a way to get at it otherwise). So is there some other way to do what you are doing (worst case: use an external comparator)?
 
Hi 3v0, yeah I've seen the PICs with capacitive touch feature built in. The main benefit of those is they can select between a number of inputs to connect to the PIC comparator. However for this design any old PIC with a comparator will work fine. :)

Vizier87, thanks! Yep the front panel text is CNC engraved. It's that black/white stuff that is used for permanent front panels. I got the material from a trophy shop.

Atom, sure get PCBs made and I'm not stressed if you sell a couple of PCBs to cover your costs. If you want to sell full kits just give me $2 for each kit you sell.. ;)

MrAl, the case was a $6 electronics case from Altronics australia; https://www.altronics.com.au/index.asp?area=item&id=H0285 I've seen them from other suppliers probably Jameco or Digikey or someone in the USA will have them.

Yes it does INDICATE to 0.01pF. :) As for accuracy that depends on the calibration and linearity. The calibration I could get to better than 0.2% of a cap value, (I think mine is better than 0.1% but I only had a limited number of 1% caps to test so it depends how good those caps were). The linearity should be quite good, as it has zero function that removes ALL internal capacitance and constant delays (like the comparator switching times) then the only thing that adds to the measured period after that is the external cap.

Please don't think it has 0.01pF overall accuracy! :eek: Where the 0.01pF resolution is nice is in seeing temperature drift of caps and seeing the effect of putting your finger near something etc. Or seeing how much a trimcap changes when you put the metal screwdriver in it.

cr0sh, an ATMega + external comparator shold be fine! You need a comparator with fast switching times and good push-pull output. The the ATMega needs to measure the periods as described on the web page and display it. An Arduino may introduce problems as it has long tracks to IO pins and may not make a great oscillator. But then again it might work fine, I don't know.

Thanks everyone for the interest! :)
 
another realy proffesional project RB. i have a cap meter on my DMM but i am going to have a go at building this looks a handy bit of kit to have :D
 
Awesome Roman! PCBs at my current place will cost about $10 each unless i make it smaller ,.. like have the LCD connected via ribbon cable which i might do just to bring the price down a ton (about $4 each) so i can sell for less. Im not profit hungry so prices at my store are ULTRA FAIR! If i do decide to sell it ill make you a special link to keep track of the sales so you can see what i owe you and wont feel cheated :D
 
Last edited:
Heh here is a preview. Its not complete, i still need to add power regulator and some caps but so far so good. Board cost is about $4.5 which isnt too bad. I has built in ICSP so you can reprogram if you decide to update code or if someone wants to try and make there own code heh...
 

Attachments

  • CapMeter.jpg
    CapMeter.jpg
    99.8 KB · Views: 1,667
Last edited:
... Board cost is about $4.5 which isnt too bad. ...

Jason, if you can squeeze that design to fit onto a 50x50 mm (1.9x1.9 in) board you can take advantage of the Seeed Studio's Fusion PCB Service that gets you 10 boards for just under $13 (including shipping). That's got to be worth a free board, right (grin)? Seriously though, the boards look great, you just need to be prepared to wait 2-3 weeks to get them from China. Apparently, they wait until they receive enough orders to panelize a much larger board in order to provide those great prices.

Cheerful regards, Mike

**broken link removed**

**broken link removed**

**broken link removed**
 
Last edited:
Thanks Ghostman, it would be cool to see a few of these get built. :)

Atom, if you don't mind some suggestions on the PCB;
1. many people will prefer through-hole to SMD pics, easier to solder, they might already have PIC, they can replace easier if it blows up etc etc
2. actually I'd probably go through hole on all the parts, there are not many ;)
3. I would make the button totally external to the PCB, it saves space and button can be placed neat on front panel
4. I think people might want the calibration trimpot, an easy way is to put 500 ohm trimpot in series with the middle 1k5 resistor and make it 1k2 (see my post#1)
5. the 2 wires to the probes should go right across the internal cap, wiring short if possible
6. a ground plane would be nice on the PCB, as it is so sensitive a ground plane will help. My unit does not have a good ground plane and the reading can change by 0.10pF when I put a couple fingers on top of the meter (near the LCD). That's not a big problem as it can be rezeroed anytime, just a ground plane will improve it and has no cost really.
7. You should be able to make the PCB pretty small, it can piggyback on the rear of the LCD (as button is on front panel).

Check out my Shift1-LCD board below, it is a small piggyback board that goes on the rear of the LCD;

**broken link removed**

(Just remember to reverse the 16 LCD pins)
 
Last edited:
Hi MrRB,

Very nice...
 
Roman good ideas, i was actually going to sell this already made. I sell all my PCBs already made. But a though hole version would be nice and as a kit even better. Saves me time :D
Ill make another REV and this time all through hole
 
OK Through hole about 39mm x 47mm which is kind of smaller. Passes the DRC from Fusion site. I know some cap values are wrong... its a draft i simply copied some symbols heh

capmeter5-jpg.54869
 

Attachments

  • CapMeter5.jpg
    CapMeter5.jpg
    135.4 KB · Views: 5,144
Last edited:
Status
Not open for further replies.

Latest threads

New Articles From Microcontroller Tips

Back
Top