Continue to Site

Welcome to our site!

Electro Tech is an online community (with over 170,000 members) who enjoy talking about and building electronic circuits, projects and gadgets. To participate you need to register. Registration is free. Click here to register now.

  • Welcome to our site! Electro Tech is an online community (with over 170,000 members) who enjoy talking about and building electronic circuits, projects and gadgets. To participate you need to register. Registration is free. Click here to register now.

Looking For A Schematic

Status
Not open for further replies.
My Google-fu is strong today!

Delta_Physics_Advert.png


You were around a decade off - there were three adverts that I could find, in Electronics Today International, October & December 1986 plus February 87.

eg. See page 14 in this issue:
 
My Google-fu is strong today!

View attachment 128939

You were around a decade off - there were three adverts that I could find, in Electronics Today International, October & December 1986 plus February 87.

eg. See page 14 in this issue:
Well, thanks very much indeed, for digging that out. I had my doubts about the time frame, the cardboard box it was in, might be the original, the postage stamp, says 1st Aug 1987, just checked again, area is Honer Oak Park, where Delta Physics address was. A long shot but could try writng. Thanks again :)
Also, all those magazines, will have a lot of interesting articles, tutorials, keep me busy during the lock down :)
 
Some magazines, have a cumulative index, showing contents of each year or several years? Does anyone know if any of these magazines have the same? Save me having to thumb through all the contents of each issue.
Thanks.
 
My Google-fu is strong today!

VERY well done - explains why I'd never heard of it, as it wasn't an article, just a sales advert.

However, as for the schematic, I would suggest by far the easiest solution is simply to draw it out - it looks a pretty simple design, so should be easy to do.

The address given seems to be domestic premises?, so presumably was just a very small operation run from their home?.
 
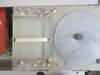
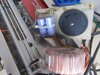
If the unit is completely dead, the implication is that it's most likely a fault in the PSU module.
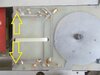
Last time I switched it on the neon light came on, though not working. I have been learning a little about PSU, full wave rectification, smoothing caps. I know that those PSU caps can pack a punch. So don't really wan't to fiddle about, sticking fingers in here and there...... until I really know what I'm doing.

That said, I'm studying for my RSGB amateur foundation radio license. I recently bought myself a Hantek digital storage oscilloscope 5102p. I did my research and came to conclusion, was a decent scope for the money, £175 Amazon Prime. I've been watching a series of YouTube videos,How to use an oscilloscope / What is an oscilloscope / Oscilloscope tutorials,
is a nice chap and goes into a lot of depth.
I'm also working through an online electronic technician training course https://lue-yang.mykajabi.com/ one of the video tutorials is on the scope, quite in depth lasts 1 hour 40 minutes.


Have also bought a Chinese signal generator again researched. I then bought a digital multimeter, not a Fluke brand, but had decent user reviews on YouTube and elsewhere, a UNI-T UT61 series, is a big chunky, substantial meter and not so expensive. I've also bought a Capacitor ESR meter.
Signed up to a couple of Udemy courses and am working my way through them, " Awesome Electronics Course From Soup To Nuts
Everything you need to know about Electronic Basics. The first Step into Understanding Electronics & their Components. " and " The Complete Electronics Course 2020:Analog Hardware Design. I've also been learning how vacuum tubes work.

I'd like to have a crack at repairing my old amp and also troubleshoot repair electronics equipment.
 
From the photos you posted, it appears to be a simple transformer + rectifier & smoothing capacitors type circuit - not a switched mode type where the capacitors are charged to several hundred volts.

Can you post some more photos of the PSU module, rather closer in, but overall views to see all the PCB tracks and connections?
 
From the photos you posted, it appears to be a simple transformer + rectifier & smoothing capacitors type circuit - not a switched mode type where the capacitors are charged to several hundred volts.

Yes, it's a basic and simple PSU and amplifier, the power supply will only be about 40V (or 20+20V) - should be easy enough to draw the circuit out and repair it.

Probably the only equipment required would be a multimeter, most probably no need (or use) for his other test equipment on this occasion.
 
On Sunday morning I'l have a look and if needs, will use my new solder sucker, to remove the wires I originally soldered, to fit it.Will Upload some clear photos to forum I did have an elastic wrist earthing strap, last time I looked, couldn't find it, reminds me to order a replacement tonight . Meantime will touch pipe on radiator..... high tech approach :) Thanks guys.
 
From the photos you posted, it appears to be a simple transformer + rectifier & smoothing capacitors type circuit - not a switched mode type where the capacitors are charged to several hundred volts.

Can you post some more photos of the PSU module, rather closer in, but overall views to see all the PCB tracks and connections?
Here they are. I could have done the original soldering a bit better, never mind. I tested the fuse, works.
 

Attachments

  • 2.JPG
    2.JPG
    104.4 KB · Views: 198
  • 1.JPG
    1.JPG
    114 KB · Views: 198
  • 3.JPG
    3.JPG
    131.8 KB · Views: 191
  • 4.JPG
    4.JPG
    101.5 KB · Views: 195
OK, that's about as straightforward as the come.

What voltage do you get across the capacitors; the output terminals at the left of the first photo?
 
The 2 long springs look like a reverb. Look for burned or discolored resistors. Look for caps with, cracks, swelled up, holes. Bad caps sometimes test as, open or short circuit. Look at pc board for burned away traces. Test your switches and volume controls. If no visible signs of bad parts or bad board turn power ON us meter to follow the power through power supply and each part. Could be a bad cord, bad rectifier, bad fuse. Check for the obvious first then test, transistors & ICs last even thought they might be first to blow out. IC are often only 68 cents each solder in an IC socket then plug in a new IC. I like IC sockets if a part smoked it might smoke again. I have found fuses soldered to the PC board. Look for heat over load devices they might need to be reset. Look for wires that have come loose and need to be soldered on again.
 
Yes, that's what I was looking at.
OK thanks. I've been reading the following, "
Current
Current is what flows through a wire. Think of it as water flowing in a river. The current flows from one point to another point just like water in a river. Current flows from points of high voltage to points of low voltage. Current can be shown in circuit diagrams by using arrows as in Figure 1. The arrow shows which way the current is flowing. An I is usually included beside the arrow to indicate current. "
--------------------------------------
Then goes on to say, "
Voltage
Voltage indicates the power level of a point. Voltage is measured in volts. If we continue the river comparison, a point at the top of a hill would be at a high voltage level and a point at the bottom of a hill would be at a low voltage level. Then, just as water flows from a high point to a low point, current flows from a point of high voltage to a point of low voltage. If one point is at 5 volts and another point is at 0 volts then when a wire is connected between them, current will flow from the point at 5 volts to the point at 0 volts. "

So would I be right, ( suitable DC voltage range ) to attach the positive red probe of the meter to the positive of the capacitor after turning on power, and the ( common) negative ( GND/earth?) black probe to 0V on the metal chassis, to measure the difference in potential between the two points? From what I've been reading and understanding..... I think I might be correct :)
 
You should measure the voltage across the capacitors, with the red lead on one end of the capacitors and the black lead on the other end of the capacitors.

Using the height analogy, if you're wanting to know how high a building is, you measure from the top to the bottom of the building. If the building is on a hill, or in a valley, the roof will be at a different height to an identical building that is somewhere else, but that if of no interest if you want to know what ladder to buy to get to the roof.

Here we don't know if the voltage on the capacitors has any connection to ground, and for now we don't care. All that is of interest to start with is what the voltage is from one end of the capacitors to their other end.
Hi,
Sorry for delay in replying. The meter read 55V I then thought I should discharge the capacitors. I connected a set of pliers across the same terminals, for volt reading, followed by a spark, loud crack and wisp of smoke. I had safety goggles on and wearing rubber gloves......Checked with meter, no voltage reading. Perhaps I should leave off this until I have learn't quite a bit more about electronics?
 
Last edited:
You only need to discharge capacitors if they will present a danger. 55 V is low enough to not really be dangerous, but a 80 + volts it getting to where it can be a a safety issue.

It's best to put some resistance in the way when discharging capacitors, but you may not have done any significant damage.

Was the power on when you discharged that capacitors? If so, that was the wrong thing to do and you may have damaged the diodes or a fuse. The transformer will be fine. If you short a transformer of that size, it will take a minute or more to heat up enough to burn out.

What is the voltage rating of the capacitors? What is the output voltage rating of the transformer? The input voltage will match the mains voltage.
 
Status
Not open for further replies.

Latest threads

New Articles From Microcontroller Tips

Back
Top