Continue to Site

Welcome to our site!

Electro Tech is an online community (with over 170,000 members) who enjoy talking about and building electronic circuits, projects and gadgets. To participate you need to register. Registration is free. Click here to register now.

  • Welcome to our site! Electro Tech is an online community (with over 170,000 members) who enjoy talking about and building electronic circuits, projects and gadgets. To participate you need to register. Registration is free. Click here to register now.

Dual power supply for a processor

Status
Not open for further replies.

giftiger_wunsch

New Member
Hi,

I'm in the process of setting up a case for a RabbitCore RCM4000 processor + prototyping board (I bought an aluminium project box of suitable dimensions and so far I have drilled stand-off holes and fitted a currently disconnected switch to the front), and before I connect the switch and power supplies I need to think about how exactly I'd like it to be powered, so here is what I'm basically hoping to achieve:

I have a rechargable 9V PP3 battery, which will act as a portable power supply in future if I give the processor functions which prevent it being plugged into the wall.

I also have a wall-wart which delivers around 6VDC, which can power the device when it's possible to plug it in.


Separately, both options are obviously straight forward, but if possible I would like to have the wall-wart charge the battery while it is plugged in, as well as powering the processor. I assume to prevent over-charging and other factors, battery chargers must have several different safety measures built into their circuits; are these difficult to incorporate myself? Or could I obtain a component which could be adapted to charge the battery in this way?

Thanks in advance for any advice.


EDIT: The 9V PP3 rechargable battery is a nickel metal hydride battery.
 
Last edited:
You can't charge a 9V battery from a 6V source. The source has to be greater than 9V.
 
Well, while the wall-wart is listed as having a 6VDC output, in practice it usually produces around 10.4V.
 
It's not the best method but you could charge the battery at a 0.1C value (C being the ampere hour rating of the battery) through a resistor in series with the supply. A NiMHd 9V battery has a nominal voltage of 8.4V so the resistor value would be (10.4-8.4) ÷ 0.1C (C is typically 175mAh to 250mAh for a 9V NiMHd depending upon the battery so 0.1C would be 17.5mA to 25mA).

To isolate the charge circuit you need a add a diode from the + battery terminal (anode to battery) to the circuit being powered. Connect the resistor from the supply to the battery + terminal. Connect the supply to the circuit also.

For best battery life don't charge it for more than about 15 hours if the circuit is not on.
 
I'd imagine you wouldn't have suggested it if there was, but I assume there's no risk of causing the battery to overheat / burst / explode / other nasty things using this method?

The amp-hour rating of the battery is 175mAh (out of interest, what exactly does this mean? I'm guessing this indicates that 175mA is the highest current at which it is safe to charge the battery, but why multiplied by hours?)

So the resistor value should ideally be 2,017.5Ω based on the formula you provided?
 
Last edited:
That low a current should not cause it to significantly overheat or explode, etc. but it could reduce the battery lifetime if constantly charged at that rate. In your situation the battery voltage will tend to rise to about 9.8V when fully charged so that will reduce the charge current with a 10.4V source and thus minimize any reduction in battery life.

Of course, you can also charge the battery at a lower current to be safer, but that prolongs the charge time. A 0.1C rate requires about 15 hours to recharge a completely discharged battery.

Actually, looking at the charging curves for NiMHd batteries, the initial charge voltage would be about 9.1V, so that is the battery voltage you should use when calculating the charge resistance value, not 8.4V.
 
Right, so essentially the effective voltage between the wall-wart output and the battery would be approximately 1.3V; with a resistor (or equivalent combination of resistors) of 1.3175kΩ in series, the current should be approximately 987µA... I admit this certainly doesn't seem likely to be able to cause the battery to overheat.

That should result in ~0.36C of charge being separated across the battery terminals every hour (to begin with, obviously the voltage, current, and rate of charge will all decrease as charging continues), though to work out the increase in voltage of the battery over time I believe the capacitance of the battery is required...

Sorry, trying to make sense of it all :p 
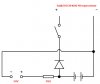
feel free to point at any holes in my calculations.
 
Last edited:
As for the problem of charging the battery for too long: perhaps I could use a relay to switch off the charge circuit once the voltage between the wall-wart and the battery dropped to an expected value?
 
Using a MAX712 you're always on the safe side.
 
a simple approach is to use two resistors, and a small slide switch or jumper.

one resistor for normal/fast charge, and one for trickle charge.
if you connected and charged freshly, just switch off after 10 or 20 hours.

I've recently made a PCB using one AAA battery, and a DC/DC converter.
there is some simple charging logic, jumpers, diodes, resistors.
NiMH AAA cells are not that sensible.

I do not know the Rabbit CPU work current.
small PICs can work from a few mA.

personally i only use power supply via USB sockets, since this makes it possible to use ready-made distribution hubs, which even come together with 1A wall adapter (electronic transformer).

you could charge a 9v battery from 5v, using a simple DC/DC converter, such as found on talkingelectronics.com
these circuits are small and the component values not critical.
you won't even need any regulation in many cases.
 
Right, so essentially the effective voltage between the wall-wart output and the battery would be approximately 1.3V; with a resistor (or equivalent combination of resistors) of 1.3175kΩ in series, the current should be approximately 987µA... I admit this certainly doesn't seem likely to be able to cause the battery to overheat.

That should result in ~0.36C of charge being separated across the battery terminals every hour (to begin with, obviously the voltage, current, and rate of charge will all decrease as charging continues), though to work out the increase in voltage of the battery over time I believe the capacitance of the battery is required...
987µA gives about 1mAh in one hour. For a battery with C=175mAh this would be 1/175 = 0.0057C per hour, not 0.36C. Thus it would take over 175 hours to charge a dead battery. You would need a resistor of 1.3V ÷ 17.5mA = 74Ω to charge at a 0.1C rate.

Further thought: Since your 6V converter has a 10.4V open circuit voltage it's obviously not regulated. Thus if the circuit load drops the converter voltage below about 8.4V, the battery will start to discharge. It might be better if you used a 12V regulated converter.

To answer your other question, you can not reliably use a battery voltage limit on a NiMHd battery to determine when it is charged. The only possible way to use voltage is to use an intelligent circuit (µP) to determine when the voltage peaks and then starts to drop off slightly. That point is where the battery is charged.
 
A 9V rechargeable battery is supposed to be charged for 1/10th its capacity. So for a battery with a 175mAh capacity it should be charged at 17.5mA for 14 to 15 hours.
If it has 7 cells then it is nominally 8.4V and is about 9.8V fully charged.

The datasheets for 9V rechargeable batties show how little current they can produce. The Energizer 9V Ni-MH battery drops to 6V in 5 hours with a current of only 35mA. With a current of 175mA its voltage drops to 6V in 20 minutes.
 
987µA gives about 1mAh in one hour. For a battery with C=175mAh this would be 1/175 = 0.0057C per hour, not 0.36C. Thus it would take over 175 hours to charge a dead battery. You would need a resistor of 1.3V ÷ 17.5mA = 74Ω to charge at a 0.1C rate.

Ah... I mistook + for ÷ I'm much more used to / to mean divide. Thanks for the clarification.


I feel slightly silly now, but I checked my processor manual and I was wrong about the working voltage: it should be between 8 and 30V, not 6 and 14 as I originally thought. I realised this when my 9V battery only managed to power the processor for about 30-45 minutes before it started getting communication errors with my computer because it wasn't being powered sufficiently. I may have to use either two 9V batteries in series or find a more suitable single battery. I'll probably go for the second option - any suggestions?

Since I now know that the processor / prototyping board can take a supply up to 30V, I may also try to find a higher voltage (and hopefully regulated) wall-wart so that it will be better within the operational range, and also be powerful enough to charge whatever type of battery I end up using.

If anyone could suggest a suitable type of battery I'd be appreciative. And would the method of charging differ from that of a 9V battery?

Thanks in advance.


Edit:

audioguru said:
With a current of 175mA its voltage drops to 6V in 20 minutes.

That'll explain why my battery lasted such a shot amount of time then... it powered the board sufficiently for about 30 minutes, and then I checked the voltage and found that it had dropped to about 6.4V.
 
Last edited:
Assuming your processor circuit has a linear and not a switching regulator supply, putting two 9Vs in series won't help because the current draw is still the same.

You could use AA size NiMH batteries which are very common and typically have a capacity of over 2000mAh, about 10 times that of the 9V battery. You would need a minimum of 7 of them in series to give you a nominal output voltage of 8.4V, the same as your 9V battery.

If you wanted to save some weight and space you could use 7 AAA size NiMH batteries which typically have about a 1000mAh capacity.

You can charge them the same way, just at a higher current. 0.1C would be a charge current of 200mA for 14-15 hours for a 2000mAh battery. Of course you can always charge at a lower current, but obviously it takes longer.
 
Thanks for the advice cruschow. As for the charging: would I simply charge all 7 in series in the same way I would have charged the 9V battery? Would there be any additional concerns with charging so many in series, for example because of the increased resistance of 7 batteries in series?
 
You can charge them in series, the same as the 9V battery which has 7 small cells in series. NiMh batteries have very low internal impedance so that's not a significant factor in charging them in series. It would be much less than any series resistor you would be using to limit the charge current.
 
Last nooby question: is it safe to solder directly onto the battery terminals, or will I need to get a battery pack to hold them?
 
Could someone have a look at the circuit diagram I've posted and point out any problems / make suggestions? Please bear in mind this is the first circuit diagram I've drawn since I was in school :eek: and that I'm new to electronics.


Just to clarify: the RabbitCore RCM4000 Microprocessor can handle 6-30VDC; the battery shown is comprised of 8 x 2800mAh, 1.2V AA batteries.
 

Attachments

  • power_circuit.jpg
    power_circuit.jpg
    41.7 KB · Views: 136
Last edited:
Your single resistor for a battery charger will limit the life of the Ni-MH battery cells because it will overcharge them if the micro does not draw much current.

Energizer recommends a max trickle charge current of 1/40th the capacity for a long life. 1/40th= 70mA and you are overcharging with 205mA to 267mA.
 
Energizer recommends a max trickle charge current of 1/40th the capacity for a long life. 1/40th= 70mA and you are overcharging with 205mA to 267mA.

Didn't you say earlier that it should be charged at 10% of its capacity? Or is it different for the AA batteries? I'll change the resistor to a 160Ω. Other than needing a higher resistor, is my circuit diagram correct to perform the desired function?
 
Status
Not open for further replies.

Latest threads

New Articles From Microcontroller Tips

Back
Top