Continue to Site

Welcome to our site!

Electro Tech is an online community (with over 170,000 members) who enjoy talking about and building electronic circuits, projects and gadgets. To participate you need to register. Registration is free. Click here to register now.

  • Welcome to our site! Electro Tech is an online community (with over 170,000 members) who enjoy talking about and building electronic circuits, projects and gadgets. To participate you need to register. Registration is free. Click here to register now.

Bentham 605 Current stabilised Power Supply

Status
Not open for further replies.

dperry

New Member
Hi all,

I am trying to repair this Bentham power supply.
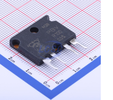
The FETs keep on blowing up. I have replaced them and same problem - I've measured everything else and it seems to be fine when compared against the datasheets. I have also checked for shorts and cannot find anything.
I am connecting a lamp between "red" and "black" on the right side of the schematic and it's supposed to give 12V when connected (we have another unit that is working).
When the FETs were replaced, they started at 12V, but then slowly ramped up to 38V and blew the lamp.

Any suggestions to why this may be happening?

605 Circuit diagram[6006].jpg
 
IC1 might be faulty destroying the fets through excessive gate voltage, could also be poor handling causing ESD damage to gates & subsequent breakdown. Can you describe exactly how the fets are determined as "blown up" with resistance readings across all 3 terminals ?
 
I am using this test once the FETs are being disconnected from the circuit

How to Check N-Channel Mosfets​

1) Set the DMM to the diode range.

2) Keep the mosfet on a dry wooden table on its metal tab, with the printed side facing you and leads pointed towards you.

3) With a screwdriver or meter probe, short the gate and drain pins of the mosfet. This will initially keep the internal capacitance of the device completely discharged.

4) Now Touch the meter black probe to source and the red probe to drain of the device.

5)You should see an "open" circuit indication on the meter.

6) Now keeping the black probe touched to the source, lift the red probe from drain and touch it to the gate of the mosfet momentarily, and bring it back to the drain of the mosfet.


7) This time the meter will show a short circuit (sorry, not short-circuit rather "continuity).

The results from the point 5 and 7 confirms that the mosfet is OK.

Repeat this procedure many times for proper confirmation.

For repeating the above procedure each time, you will need to reset the MOSFET by shorting the gate and the drain leads using meter probe as explained earlier.
 
I'd first look at the circuitry around S2, the presets and the "2V5" 2.5V reference.

The power output circuit is controlling the FETs to try and match whatever voltage is on the common of S2 by the voltage produced across the 0.1 Ohm FET source resistors.

eg. Just 1V at S2 common will turn the FETs on hard enough to try and sink 10A each, 20A total output current.

If anything is wrong in that reference voltage section, the whole thing will either shut down or go haywire.


Also note that resistance of filament lamps increases rapidly as the voltage increases; some types have been used as current regulators.
If the current setting from the PSU is just a fraction too high, it could hypothetically "run away" with no fault present.

A normal fixed resistor with a high enough power rating would be a much better test load.
 
I'd first look at the circuitry around S2, the presets and the "2V5" 2.5V reference.

The power output circuit is controlling the FETs to try and match whatever voltage is on the common of S2 by the voltage produced across the 0.1 Ohm FET source resistors.

eg. Just 1V at S2 common will turn the FETs on hard enough to try and sink 10A each, 20A total output current.

If anything is wrong in that reference voltage section, the whole thing will either shut down or go haywire.
Thanks for your help!
The 2.5V reference measures 2.52V

Measuring between the -ve connector of the 33000UF cap and the S2, I am getting 0.43V

Across R27 and R28, I am getting 0V, but I am not sure how to measure that correctly - the resistors have 4 legs like the attached picture. How do I measure the voltage across that?
 

Attachments

  • resistor.png
    resistor.png
    1.2 MB · Views: 133
OK, 0.43V should give 8.6A current.

The resistors look like precision current shunts with Kelvin connections - ie. one terminal at each end of the resistor is used for the load current & the other two are used to sense the voltage across the resistor, so the resistance of leads and external connections does not affect the accuracy of the measurement.


Just measure between each source connection and V-
There will only be a reading there whilst the PSU is connected to a load, so current is flowing.
 
Ok - bearing in mind that the lamp has no bulb in it and I think that both of the FETs might be blown...
Going between V- and each source connection, I get 0.43V on one and 30.8V on another.
 
Across R27 and R28, I am getting 0V, but I am not sure how to measure that correctly - the resistors have 4 legs like the attached picture. How do I measure the voltage across that?
Going between V- and each source connection, I get 0.43V on one and 30.8V on another.
One of those two statements is clearly wrong!

I am intrigued by where IC2's power pins are connected as they are not shown on the schematic.
As your gates are sadly punched through is it possible IC2 is connected to the >30V unregulated supply or that U1 is faulty meaning the 12V is a lot higher ? Either could cause the gate punch through observed.

To reduce your consumption of fets while testing you could fit just one and only use the lowest current range, as someone said a resistor would be a much better test load than a low resistance cold filament. Even better to start with fit no fets and observe the gate voltages!
 
One of those two statements is clearly wrong!
"Across R27 and R28, I am getting 0V, but I am not sure how to measure that correctly - the resistors have 4 legs like the attached picture. How do I measure the voltage across that?"
this statement is wrong as I was measuring it incorrectly
 
I am intrigued by where IC2's power pins are connected as they are not shown on the schematic.
As your gates are sadly punched through is it possible IC2 is connected to the >30V unregulated supply or that U1 is faulty meaning the 12V is a lot higher ? Either could cause the gate punch through observed.

To reduce your consumption of fets while testing you could fit just one and only use the lowest current range, as someone said a resistor would be a much better test load than a low resistance cold filament. Even better to start with fit no fets and observe the gate voltages!
I will pull it apart today and check
 
"Across R27 and R28, I am getting 0V, but I am not sure how to measure that correctly - the resistors have 4 legs like the attached picture. How do I measure the voltage across that?"
this statement is wrong as I was measuring it incorrectly
As I think was already mentioned it's a Kelvin connected resistor meaning each end has two terminals connected together. I would imagine the outer pins the easiest to probe so just use those. If you have ~30V across one of those resistors it is open circuit and needs replacing, however it may blow again if the mosfet & control circuit is faulty and you have a heavy load attached. The answer is to debug the circuit with a light load, a resistor suitable for the lowest current setting, for example if that is 100mA then a 10R resistor should drop 1V & dissipate just 100mW easily within the capacity of a 1/4W resistor. If something is seriously wrong hopefully it will burn before anything else! As I said, stick to just one output circuit at a time, given the gate punch through's it's possible the op-amp is toast by now.
 
Thanks for all the help so far - if i haven't mentioned this already, it's a project for work and i have pulled to work on some other things for the next couple of weeks, so I will feedback on all the help ASAP.
Thanks again
 
Status
Not open for further replies.

Latest threads

New Articles From Microcontroller Tips

Back
Top