Continue to Site

Welcome to our site!

Electro Tech is an online community (with over 170,000 members) who enjoy talking about and building electronic circuits, projects and gadgets. To participate you need to register. Registration is free. Click here to register now.

  • Welcome to our site! Electro Tech is an online community (with over 170,000 members) who enjoy talking about and building electronic circuits, projects and gadgets. To participate you need to register. Registration is free. Click here to register now.

Advice required for simple Laptop Power Supply ID-Sense circuit

Status
Not open for further replies.

danryu

New Member
I'm wondering if anybody can help me with this issue.

I'm located in a rural spot in Mozambique, in southern Africa, and I can't power my laptop.

The laptop computer in question is made by Razer, but two original power supplies I have for the laptop have failed in rapid succession.
It's not an option for me to order a new power supply, even if I had faith that the third one wouldn't die soon anyway.

However I do have access to a similarly-rated HP power supply - 230W, 19.5V at 11.8A.
But the laptop power input has a 3rd pin, a "smart" or ID-Sense connector. The laptop won't charge or power on unless this 3rd pin is set at the right voltage.

I opened up one of the faulty Razer power supplies, and I don't think it uses 1wire or anything like that (as in Dell power adapters I believe).

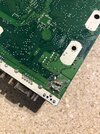
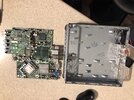
I think it is just a simple circuit with a couple of resistors (R233 and R226) and a capacitor (C207) - please take a look at the pic here.
closeUpEditGd.png

PIC
closeUp2.png


I believe this means I will be able to replicate the Smart pin setting with the following circuit:
HP-Razer diag(2).png


R233 and R226 are both 220kOhm, I believe.
But as you can see, I'm unsure of the capacitor position - should it be A, B, or C?
Or should I not have a capacitor at all?
C makes more sense to me, but it looks like it's B on the photo.
Any ideas?

Also, what kind of size of capacitor is likely a good bet?

Any feedback will be much appreciated!
 
The track from the resistors looks to go under C227 to the area above with the R220 label.
That appears to be the internal system 0V / ground, as it connects to charger negative via a couple of low value resistors.

Try different resistors, or a variable resistor, from the sense pin to charger positive and see what happens - some value will likely

Start at eg. 1M Ohm and work down? Don't go below around 10K, to avoid overloading any input protection circuits if it's just a logic input.

edit - I just noticed that the thick component lead near the top left of the second photo looks to have been pushed through, breaking the joint?


Edit 2 - OK, those photos are apparently the PSU not the laptop!

It appears to just have the two 220K resistors in series to ground - but they are at the opposite side of the current sense resistors, so could be used to monitor the current being provided by the charger.

You may also need to add the 50 milliohm power resistor between the sense and negative laptop connection.
 
Last edited:
Is something connected to the ID sense and 19.6V tabs on the other side of the board?

Ie. What are these 2 blobs of solder (in red squares) attached to:
1628248697008.png
 
I think there is a good chance that the power supply has failed on the primary side. So if you connect 19.5 volts to it's output terminals you could measure the voltage on the third wire. If you try this set the current limit low on your bench power supply or if you can't set a current limit do something to limit the current initially in case original power supply tries to draw a lot of current.

Les.
 
It appears to just have the two 220K resistors in series to ground - but they are at the opposite side of the current sense resistors, so could be used to monitor the current being provided by the charger.

Thanks very much for your response.
If I've understood you right, what I need to do looks like this:
HP-Razer diag_respin.png


Is it potentially this simple?
 
If you try this set the current limit low on your bench power supply or if you can't set a current limit do something to limit the current initially in case original power supply tries to draw a lot of current.

Thanks for this great tip. Unfortunately I am working with a shoestring setup - I have a basic soldering iron, some solder, a cheap multi-meter and that's about it. I can order some basic components (resistors etc) from an electronics guy in the capital city - but that's about it.
So I can't really experiment much - I have to try and make a good estimate on what I need, and put it together...
 
If it is, it's under that big blue capacitor...

No, there's nothing of note on the other side. The solder dots on the other side are about the same level as the white line, not as far as underneath the blue capacitor.

Is my circuit in the response to your previous comment correct?
Thanks rjenkinsgb
P8060572.JPG
 
No, there's nothing of note on the other side. The solder dots on the other side are about the same level as the white line, not as far as underneath the blue capacitor
Agreed. Nothing there. Perhaps the white circles around the blobs mean they are test points.
 
The next tracks on the underside & the two series resistors look to be underneath the BLUE capacitor.
Just lift that and take another photo to be certain there are no other signal tracks hidden away in there?
 
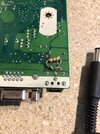
I have a simpler solution that works. Solder a 290 ohm resistor as shown in attached pictures to underside of MB where power connector is. The outer two solder points are the 19vdc supply and the centre one is the sense pin. The three solder points at bottom are the earth return pin. A bit of sticky tape over the resistor prevent chassis shorts. Saves mucking around opening the power supply.

220317 - HP Resistor - 1.jpeg220317 - HP Resistor - 2.jpeg220317 - HP Resistor - 3.jpeg
 
Is that a 390 ohm? There is no "standard" 290 ohm resistor, so I suspect the first band is orange, not red. Colors fade with time and heat...
 
Sagorl, I'd say that you are correct. My eyes aren't what they used to be. It was a real b**ch to solder, I had to get a wire brush onto the pads to clean it up so the solder would take. Must have some form of conformal coating on it. The thing is still working and I have just put Ubuntu onto it for it to be used as a security camera recorder.
 
How about this? Simply connect the new power supply in parallel with the old power supply. The new power supply supplies the actual 19 volt power. Let the old power supply provide the mystery signal.
 
Ie. What are these 2 blobs of solder (in red squares) attached to:
those solder blobs are contact points for a "bed of nails" test fixture at the factory.
 
i think you have a through-hole component that broke loose from the circuit board, at least that's what it looks like (circled in red):
closeUp2-broken-pad.png
 
Status
Not open for further replies.

Latest threads

New Articles From Microcontroller Tips

Back
Top