Continue to Site

Welcome to our site!

Electro Tech is an online community (with over 170,000 members) who enjoy talking about and building electronic circuits, projects and gadgets. To participate you need to register. Registration is free. Click here to register now.

  • Welcome to our site! Electro Tech is an online community (with over 170,000 members) who enjoy talking about and building electronic circuits, projects and gadgets. To participate you need to register. Registration is free. Click here to register now.

Pull Up Reisitor?

Status
Not open for further replies.

Wond3rboy

Member
Hi i know this is kind of emberassing but i want to know how a pull up resistor works cause if i put a pull up resistor to RA4 of a 16F628a then it just keeps the LED at a constant high voltage turning it on.How does any IC with an open collector or open drain o/p assert control using a pull up resistor.This was done in Proteus.

Thanks.
 
A pull-up resistor works on the fact that when on current flows in a resistor, the voltage drop in a resistor is zero (the voltage at both ends is the same), but when a current does flow through them they allow a voltage drop which lets the two ends of the resistor be different.

See my attached image. Suppose we had an input pin and just connected it to +V through a resistor. So if a resistor runs from +V to a pin (with input current so low we can just assume it is zero), we can say that the pin voltage is equal to +V since the resistor connects them, but no current flows so the voltage is the same at both ends of the resistor.

What happens if we also add a switch to connect the pin to ground? WHen the switch closes the input pin is connected to ground and current suddenly flows through the resistor from +V to ground making a voltage drop of +V in the resistor. So the result is that the input pin voltage is 0V whenever the switch is closed, and whenever the switch is open, no current flows in the resistor so there is no voltage drop and the resistor "pulls" the voltage "up" to +V.
 

Attachments

  • basics1.gif
    basics1.gif
    2.5 KB · Views: 1,280
Last edited:
Pull up resistors keep an inactive control line at VCC, they're usually high value resistor mainly to keep input pins from floating. You don't usually use pull up resistors with an LED, please post your schematic from a screen capture of Proteus and explain exactly what you're having trouble understanding.
 
Thanks dk... thats the concept that i have which is to prevent IC pins from floating.What about the pull up resistor on RA4 of Nigel's LCD tutorial.It doesnt let the IC have any control and never goes high.
 

Attachments

  • LCD + Switch Board.JPG
    LCD + Switch Board.JPG
    48.9 KB · Views: 804
Last edited:
Thanks dk... thats the concept that i have which is to prevent IC pins from floating.What about the pull up resistor on RA4 of Nigel's LCD tutorial.It doesnt let the IC have any control and never goes high.

RA4 is an open drain when configured as an output.
 
RA4 is an open drain when configured as an output.

It is configured as an output when i load Nigel's program in it.

Code:
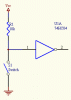
Tutorial 3.1 - requires Main Board and LCD Board.

This program displays a text message on the LCD module, it consists mostly of subroutines for using the LCD module.

;LCD text demo - 4 bit mode
;Nigel Goodwin 2002

	LIST	p=16F628		;tell assembler what chip we are using
	include "P16F628.inc"		;include the defaults for the chip
	ERRORLEVEL	0,	-302	;suppress bank selection messages
	__config 0x3D18			;sets the configuration settings (oscillator type etc.)


		cblock	0x20			;start of general purpose registers
			count			;used in looping routines
			count1			;used in delay routine
			counta			;used in delay routine
			countb			;used in delay routine
			tmp1			;temporary storage
			tmp2
			templcd			;temp store for 4 bit mode
			templcd2	
		endc

LCD_PORT	Equ	PORTA
LCD_TRIS	Equ	TRISA
LCD_RS		Equ	0x04			;LCD handshake lines
LCD_RW		Equ	0x06
LCD_E		Equ	0x07

		org	0x0000

		movlw	0x07
		movwf	CMCON			;turn comparators off (make it like a 16F84)

Initialise	clrf	count
		clrf	PORTA
		clrf	PORTB


SetPorts	bsf 	STATUS,		RP0	;select bank 1
		movlw	0x00			;make all pins outputs
		movwf	LCD_TRIS
		bcf 	STATUS,		RP0	;select bank 0

		call	Delay100		;wait for LCD to settle


		call	LCD_Init		;setup LCD


		clrf	count			;set counter register to zero
Message		movf	count, w		;put counter value in W
		call	Text			;get a character from the text table
		xorlw	0x00			;is it a zero?
		btfsc	STATUS, Z
		goto	NextMessage
		call	LCD_Char
		call	Delay255
		incf	count, f
		goto	Message

NextMessage	call	LCD_Line2		;move to 2nd row, first column

		clrf	count			;set counter register to zero
Message2	movf	count, w		;put counter value in W
		call	Text2			;get a character from the text table
		xorlw	0x00			;is it a zero?
		btfsc	STATUS, Z
		goto	EndMessage
		call	LCD_Char
		incf	count, f
		goto	Message2

EndMessage	
		
Stop		goto	Stop			;endless loop


;Subroutines and text tables

;LCD routines

;Initialise LCD
LCD_Init	movlw	0x20			;Set 4 bit mode
		call	LCD_Cmd

		movlw	0x28			;Set display shift
		call	LCD_Cmd

		movlw	0x06			;Set display character mode
		call	LCD_Cmd

		movlw	0x0d			;Set display on/off and cursor command
		call	LCD_Cmd

		call	LCD_Clr			;clear display

		retlw	0x00

; command set routine
LCD_Cmd		movwf	templcd
		swapf	templcd,	w	;send upper nibble
		andlw	0x0f			;clear upper 4 bits of W
		movwf	LCD_PORT
		bcf	LCD_PORT, LCD_RS	;RS line to 0
		call	Pulse_e			;Pulse the E line high

		movf	templcd,	w	;send lower nibble
		andlw	0x0f			;clear upper 4 bits of W
		movwf	LCD_PORT
		bcf	LCD_PORT, LCD_RS	;RS line to 0
		call	Pulse_e			;Pulse the E line high
		call 	Delay5
		retlw	0x00

LCD_CharD	addlw	0x30
LCD_Char	movwf	templcd
		swapf	templcd,	w	;send upper nibble
		andlw	0x0f			;clear upper 4 bits of W
		movwf	LCD_PORT
		bsf	LCD_PORT, LCD_RS	;RS line to 1
		call	Pulse_e			;Pulse the E line high

		movf	templcd,	w	;send lower nibble
		andlw	0x0f			;clear upper 4 bits of W
		movwf	LCD_PORT
		bsf	LCD_PORT, LCD_RS	;RS line to 1
		call	Pulse_e			;Pulse the E line high
		call 	Delay5
		retlw	0x00

LCD_Line1	movlw	0x80			;move to 1st row, first column
		call	LCD_Cmd
		retlw	0x00

LCD_Line2	movlw	0xc0			;move to 2nd row, first column
		call	LCD_Cmd
		retlw	0x00

LCD_Line1W	addlw	0x80			;move to 1st row, column W
		call	LCD_Cmd
		retlw	0x00

LCD_Line2W	addlw	0xc0			;move to 2nd row, column W
		call	LCD_Cmd
		retlw	0x00

LCD_CurOn	movlw	0x0d			;Set display on/off and cursor command
		call	LCD_Cmd
		retlw	0x00

LCD_CurOff	movlw	0x0c			;Set display on/off and cursor command
		call	LCD_Cmd
		retlw	0x00

LCD_Clr		movlw	0x01			;Clear display
		call	LCD_Cmd
		retlw	0x00

LCD_HEX		movwf	tmp1
		swapf	tmp1,	w
		andlw	0x0f
		call	HEX_Table
		call	LCD_Char
		movf	tmp1, w
		andlw	0x0f
		call	HEX_Table
		call	LCD_Char
		retlw	0x00

Delay255	movlw	0xff		;delay 255 mS
		goto	d0
Delay100	movlw	d'100'		;delay 100mS
		goto	d0
Delay50		movlw	d'50'		;delay 50mS
		goto	d0
Delay20		movlw	d'20'		;delay 20mS
		goto	d0
Delay5		movlw	0x05		;delay 5.000 ms (4 MHz clock)
d0		movwf	count1
d1		movlw	0xC7			;delay 1mS
		movwf	counta
		movlw	0x01
		movwf	countb
Delay_0
		decfsz	counta, f
		goto	$+2
		decfsz	countb, f
		goto	Delay_0

		decfsz	count1	,f
		goto	d1
		retlw	0x00

Pulse_e		bsf	LCD_PORT, LCD_E
		nop
		bcf	LCD_PORT, LCD_E
		retlw	0x00

;end of LCD routines

HEX_Table  	ADDWF   PCL       , f
            	RETLW   0x30
            	RETLW   0x31
            	RETLW   0x32
            	RETLW   0x33
            	RETLW   0x34
            	RETLW   0x35
            	RETLW   0x36
            	RETLW   0x37
            	RETLW   0x38
            	RETLW   0x39
            	RETLW   0x41
            	RETLW   0x42
            	RETLW   0x43
            	RETLW   0x44
            	RETLW   0x45
            	RETLW   0x46


Text		addwf	PCL, f
		retlw	'H'
		retlw	'e'
		retlw	'l'
		retlw	'l'
		retlw	'o'
		retlw	0x00

Text2		ADDWF   PCL, f
            	RETLW   'R'
            	RETLW   'e'
            	RETLW   'a'
            	RETLW   'd'
            	RETLW   'y'
            	RETLW   '.'
            	RETLW   '.'
            	RETLW   '.'
            	RETLW   0x00


		end


Every thing else seems to be working.The first two tutorials worked like a charm.

Thanks.
 
Last edited:
It is configured as an output when i load Nigel's program in it.

Every thing else seems to be working.The first two tutorials worked like a charm.

Thanks.

That resistor 10K, on RA4 is correct.

Whats not working on this tutorial.? I could run it in Oshonsoft Sim.

Im sure the program should run correctly.:)
 
Hi,
Ran OK in Oshonsoft Sim.:)
 

Attachments

  • esp01 Mar. 25.gif
    esp01 Mar. 25.gif
    6.2 KB · Views: 328
Thanks Eric, i just downlaoded a trial copy of Oshonsofts PIC18 simulator,although i am going to stick to Proteus but i will see if i can simulate this there and i am trying to work out why the resistor is causing problems in proteus.

Sorry for late reply.
 
Your schematic looks a little strange:
Why is Vdd and RS of the LCD connected to RA4 of the PIC?
The pullups, R5-R8 don't appear to be wired right. They should be around 10K. Not 150Ω.
MCLR of the PIC is floating.
E & RW of the LCD are floating.
The contrast POT for the LCD appears to be wired wrong. It is hard to see the model number of the LCD to be sure on this.
 
Last edited:
Hi missed conenctions there.Now i have made all the encessary connections. The LCD still does not display any thing.I am uploading the picture,the file and asm file from Nigel's tutorial.
 

Attachments

  • NigelsTutoail3.zip
    17.7 KB · Views: 167
  • lcd+switch board.JPG
    840.8 KB · Views: 290
Last edited:
Hi missed conenctions there.Now i have made all the encessary connections. The LCD still does not display any thing.I am uploading the picture,the file and asm file from Nigel's tutorial.

hi,
Is the PIC set have 'weak' pullups? if not the switch/resistor wiring looks wrong.
 
hi,
Is the PIC set have 'weak' pullups? if not the switch/resistor wiring looks wrong.

Hi Thanks for your reply. The switch/resistor wiring was same in the previous tutorial altough they were connected to PORTA and the resistor value was less.I decreased the resistance value for the LED to get more brightness.In the program that i uploaded i-e LCD Tutorial 1 the SW/R combination is not used.I am working on teh Oshonsoft simulation though but wanted to know why is it not working in proteus.The pull up on RA4 keeps it as high all the time.
 
Status
Not open for further replies.

Latest threads

New Articles From Microcontroller Tips

Back
Top