Continue to Site

Welcome to our site!

Electro Tech is an online community (with over 170,000 members) who enjoy talking about and building electronic circuits, projects and gadgets. To participate you need to register. Registration is free. Click here to register now.

  • Welcome to our site! Electro Tech is an online community (with over 170,000 members) who enjoy talking about and building electronic circuits, projects and gadgets. To participate you need to register. Registration is free. Click here to register now.

Press-n-Peel PCB problem

Status
Not open for further replies.
1. The copper clad becomes whitish completely when left ideal for 15-20 sec as you can see in image I uploaded.
2. The toner on copper clad get easily removed by simply scratching it... not a strong bond I think:(

Good for you!

I agree; the white bits are remnants of the paper and can be rubbed or brushed with a soft brush while soaking...

How much force does it take to remove toner? Like Hero says, it does not stick that well but shouldn't be a problem, however if it removes while gently rubbing as above, that means your copper is not cleaned well enough. (The copper surface must be VERY clean.)

If you do get some voids, but most of your traces are good, you can fill gaps with a 'Sharpie' permanent marker:

**broken link removed**

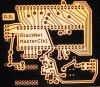
Take it easy on yourself; it is your first so don't expect it to be great. It can take a couple or three boards to figure out your technique. You don't have to etch the first one. If it isn't good enough, clean it off with acetone and try again until you have something you like before you etch.
 
2. The toner on copper clad get easily removed by simply scratching it...

Don't scratch it. I know this sounds like lousy advice, but that toner doesn't stick well at the best of times. You will be thankful it doesn't stick any worse than it does when you have to scrub it off with a scouring pad and acetone.

But - if it's so powdery it falls off when you tap it, that's a different issue (assuming you cleaned the board well). If they are powdery like that, it's probably because you aren't getting it hot enough. When it's really hot, it "carbuerizes" to a sort of glossy finish.

Don't bother to upload pictures that out of focus.
 
Hi,

For toner transfer, I would say that the older the printer is, the best result you will get. If you can find an old Laserjet II or III with original HP cartridge in it you will be in luck. These printers are obsolete because the resolution is very low. They are not good for printing images but they are very good for the purpose of toner transfer.

If you look well, you will find one. Everybody is getting rid of them. I bought 9 of them at different occasions and I never paid more than 10$ each. There was one yesterday at the recycling center and the guy was asking 5$ for it. I did not take it.

When you will be fed up with it, you can vamperize it and find inside a lot of electronic goodies along with a nice big stepper motor.

Alain

I just notice that I have been hit with a negative reputation point for this reply. The reason was "Much misinformation".

Not that it is such a big deal but I was expressing my opinion. Anyway, where is the "Much misinformation"? Maybe one thing I said is questionable, the first sentence. Then, If so, wouldn't be better to prove me wrong?

Again, it is not a big deal. I enjoy this forum very much. :)

Alain
 
Last edited:
I gave you a good rep point, don't think you deserved a bad one for that post. Your first sentence may be helpful, I've had some problems with Press-N-Peel using newer printers ("Brother" printers) that I didn't have with older ones.
 
Last edited:
Good for you!

I agree; the white bits are remnants of the paper and can be rubbed or brushed with a soft brush while soaking...

How much force does it take to remove toner? Like Hero says, it does not stick that well but shouldn't be a problem, however if it removes while gently rubbing as above, that means your copper is not cleaned well enough. (The copper surface must be VERY clean.)

It doesn't remove by simply rubbing it get removed when we scratch it. Also I tried again, same paper pulp is again there so i tried to remove by rubbing it with thumb, by using soft brush. But again it is there me cant able to remove it ...:( Also I cleaned the board very nicely before this process.
 
Try using your camera's macro setting, that picture is far to blurry to see anything clearly.

In my experience the toner doesn't stick to the board that well but that isn't a problem because it still resists the etchant.

Did you try magazine paper?

I've not had any problems with the white stuff.

If all else fails, try normal printer paper, it isn't as good as magazine paper but at least you can be certain it's compatible with your printer.

No, me didn't tried the magazine paper. Can you please explain how to have really good artwork by using magazine paper.

How normal paper (u talking of A4 sheet ? ) works ?
 
The reason you have pulp or paper fiber in the toner is because the melted toner has soaked into the paper.

Slick magazine paper has clay on the surface of the paper to make it smooth. The clay helps prevent the toner from soaking into the paper.

Some magazine paper works better then others.
 
Properties of toner transfer paper

How about using TRACING Paper?

I do not know but this is the process as I understand it.

For toner transfer you need to things to happen.

1: Toner transfer requrires paper that will accept/hold the toner in place during and after printing.

2: After the toner is heated and attached to the PCB it must let go of the paper.

In general better a paper is at one of these the worse it is at the other.

For example aluminum foil and cooking parchment are very good at releasing the toner but very poor at holding on to it. The toner falls off or moves while working with it.

Copy/printer paper is very good at holding the toner but will not release it. The melted toner runs between paper fibers binding them to the toner.

Keep in mind that as the papers ability to hold the toner increases the ability to make fine lines decreases. This is because the paper literally pulls the toner off the copper.

The starch coated Pulsar paper is a special case. It is very good at holding the image when dry (1) and when wet it dissolves and releases 100% of the toner (2). With this system the image is limited by the printer rather then the paper.

What about slick clay based papers ? We know the image releases because the clay does not allow the image to soak into the paper. It is possible that to some degree clay acts like the starch and releases the toner. If and to what degree this is true may limit line fineness.

3v0
 
As I transferred the PCB layout on the copper clad using DESMAT inkjet glossy paper and domestic iron. But the paper get soaked in the image on the copper clad. And I cant able to remove it. As I tried rubbing it by brush using soap water and also tried to clean it by wet cotton. But the residue remains there. When it dries it get whitish. Also I am attaching my circuit Layout check it out.


So please suggest me any method to avoid soaking of paper or to remove that paper preferably using "DESMAT glossy paper".
 

Attachments

  • circuit ground plane.pdf
    18.3 KB · Views: 222
Last edited:
Not all Glossy papers are the same. You need a high clay content glossy paper. If the one you are trying to use will not come off of the board properly afterwards, even after scrubbing, then it's not going to work. You'll have to try another type.
 
Experiment.....

Not all Glossy papers are the same. You need a high clay content glossy paper. If the one you are trying to use will not come off of the board properly afterwards, even after scrubbing, then it's not going to work. You'll have to try another type.

I wish all you cheap-skates :) would start posting the type of paper, or name of magazine from which it is taken. There is no sense in keeping it a secret.
I am a firm believer in "time is money" so I use P-n-P, it is easy fast and cheap. For the price of a elaminator you can buy a lifetime supply!
But I have been thinking, so today I took the front page of U.S. News & World report and sprayed several coats of my wife's spray starch on it. After a short drying period I sent a small piece of it through my printer to get my test pattern on it.
Looking at the print with a magnifying glass, it looked good. After the hot iron transfer process to the copper clad board and a few minutes of soaking in warm water, most of it (about 90%) pealed right off. Not bad for the first try.

The 0.10" lines looked ok but nothing smaller was anything to brag about.

This is probably all I am going to post on the subject of spray starch.
But to be honest I have also been thinking about egg white, why not...............
 
Last edited:
I wish all you cheap-skates :) would start posting the type of paper, or name of magazine from which it is taken.
I am a firm believer in "time is money" so I use P-n-P, it is easy fast and cheap. For the price of a eliminator you can buy a lifetime supply!
But I have been thinking, so today I took the front page of U.S. News & World report and sprayed several coats of my wife's spray starch on it. After a short drying period I sent a small pice of it through my printer to get my test pattern on it.
Looking at the print with a magnifying glass, it looked good. After the hot iron transfer process to the copper clad board and a few minutes of soaking in warm water, most of it (about 90%) pealed right off. Not bad for the first try.

The 0.10" lines looked ok but nothing smaller was anything to brag about.

This is probably all I am going to post on the subject of spray starch.
But to be honest I have also been thinking about egg white, why not...............
Thanks Rolf,
I heard about the egg white being used as photo sensitive coat ( not sure about positive or negative or about the detailed process). Hope your present post encourages home brew starch costing methods.
 
Thanks Rolf,
I heard about the egg white being used as photo sensitive coat ( not sure about positive or negative or about the detailed process). Hope your present post encourages home brew starch costing methods.

I was of cause thinking about egg white as a water solvent release for the toner.
Wish someone would try it!
 
I wish all you cheap-skates :) would start posting the type of paper, or name of magazine from which it is taken. There is no sense in keeping it a secret.
I am a firm believer in "time is money" so I use P-n-P, it is easy fast and cheap. For the price of a elaminator you can buy a lifetime supply!

DirtyLude said:
I use Staples Photo paper. They've changed it to Gloss paper or something; I think it's in a purple envelop now. I'm not certain. I have a stack of the old stuff.

It does stick a bit, and has to be scrubbed off the board. For those starting out, I think the Pulsar stuff would remove that learning curve of trying to get it right. The photo paper works for me 100% of the time now, but my success rate was much lower to start out with.
 
Last edited by a moderator:
Experiment II

I was of cause thinking about egg white as a water solvent release for the toner.
Wish someone would try it!

I tried laser printing on some HP premium glossy photo paper, it was a disaster! The toner mostly lay-ed on top with very poor coverage, the paper was obviously much to slick.

Wetting the paper surface revealed that it had a water soluble coating. Putting two and two together I sprayed a piece with some spray starch and after drying; the laser printer lay-ed down a perfect print!

I have not had time to figure out the best way of removing the paper after transfer, I would guess boiling in water should do the job. (scrubbing seems like to much of a house chore)

But here is my first try (before etching):
P6230415 ssz pcb.jpg

The lines are 0.20", 0.10" and 0.06"
 
I tried laser printing on some HP premium glossy photo paper, it was a disaster! The toner mostly lay-ed on top with very poor coverage, the paper was obviously much to slick.

Wetting the paper surface revealed that it had a water soluble coating. Putting two and two together I sprayed a piece with some spray starch and after drying; the laser printer lay-ed down a perfect print!

I have not had time to figure out the best way of removing the paper after transfer, I would guess boiling in water should do the job. (scrubbing seems like to much of a house chore)

But here is my first try (before etching):
View attachment 30691

The lines are 0.20", 0.10" and 0.06"

The photo looks promising for small tacks even, but how come that the tracks are see ripped, as if not horizontal. Perhaps track edge registration has to be proper.
How to manage that the starch would not flake out during drying after spray?
 
The photo looks promising for small tacks even, but how come that the tracks are see ripped, as if not horizontal. Perhaps track edge registration has to be proper.
How to manage that the starch would not flake out during drying after spray?

The photo was not rotated to the exact horizontal position of the lines.
Granted the 0.06" traces are not perfect.

The spray starch can I used was almost empty and it was not much of a spray, more like spurts.
So I cheated a little and rubbed it around with my finger.
I am sure the starch is in a water based solution so there should be no problems.
 
Rolf why don't you try pressnpeel? Especially with a laminator it will do a much cleaner job than what you got with the toner and starch.

This was done with pressnpeel blue and a few passes through the laminator, it doesnt show that well in the pic but the .010" tracks are razor sharp. And you can leave the pnp on the tracks so they dont corrode.
 

Attachments

  • bn_clk1.jpg
    bn_clk1.jpg
    65.8 KB · Views: 240
Status
Not open for further replies.

Latest threads

New Articles From Microcontroller Tips

Back
Top