Continue to Site

Welcome to our site!

Electro Tech is an online community (with over 170,000 members) who enjoy talking about and building electronic circuits, projects and gadgets. To participate you need to register. Registration is free. Click here to register now.

  • Welcome to our site! Electro Tech is an online community (with over 170,000 members) who enjoy talking about and building electronic circuits, projects and gadgets. To participate you need to register. Registration is free. Click here to register now.

Need help making squencing tail lights

Status
Not open for further replies.

Tom Stark

New Member
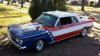
OK guys could use some help here. I have a 1962 Chevy Corvair. I built an ECU for it and have all engine management controlled by it. But that was rather easy as all the work was done all I had to do is follow directions and solder up the PCB with the labeled components.
I am more of a fabricator and engine builder than electronics guy, but I can follow directions.
I am adding a third tail light on each side. The stop light and turn light are the same lights. I will run a new wire to each side in the back for the turn lights, and will have them connected to a relay to disconnect the stop light on the side that the turn light is operating on. that is easy enough.
Here is where I need help. I do not want to use a flasher for the rear, I want the lights to work like this. Numbering the lights from the inside to the outside 1, 2, 3. (one inside, 3 outside) what I want is lights to light first 1, then while 1 is still on 2, then while 1 and 2 are still on 3, then all three off and start over. Not knowing much I am guessing I would need a 555 timer and transistors? If anyone can help I would greatly appreciate it.
If any of you have questions about stretching or shrinking metal, or clearances required in an engine for a particular use, hey I can help you then! LOL!
TIA
Tom Stark
 
Hi TS,

At last a vehicle without a CAN bus- I hope.

Pictures of classic automobiles and motorbikes are always appreciated, by me anyway.:)

About your requirement, there are two general approaches:
(1) Microcontroller- simplest, most flexible, but requires a rudimentary program.
(2) Discrete components (transistors, resistors, capacitors)- simple, but more components than (1) and less flexible.

Which way would suit you?

spec
 
Last edited:
Is the blinking turn signal pulse going to turn on the turn sequencer circuit?
 
Is the blinking turn signal pulse going to turn on the turn sequencer circuit?
There would be no blinking pulse to the rear, only the front. the rear will just have constant power while turn signal is on. At least that is my thinking now.
Thank you
Tom
 
Hi TS,

At last a vehicle without a CAN bus- I hope.

Pictures of classic automobiles and motorbikes are always appreciated, by me anyway.:)

About your requirement, there are two general approaches:
(1) Microcontroller- simplest, most flexible, but requires a rudimentary program.
(2) Discrete components (transistors, resistors, capacitors)- simple, but more components than (1) and less flexible.

Which way would suit you?

spec
Actually it is CAN capable, but no CAN use as of yet. I do not have a programmer, so not sure if I would be able to do the microcontroller or not. That would be nice, but if I can't program it, ....
I will try to post 2 pics of the car, they were taken 2 years apart. 1 as I got the car, the other after I finished it. First car I painted since 1974!
Thank you for your help, greatly appreciated!
Tom
 

Attachments

  • Corvair 3-4 copy.jpg
    Corvair 3-4 copy.jpg
    669.5 KB · Views: 286
  • 62-Vert_001.jpg
    62-Vert_001.jpg
    24.3 KB · Views: 255
Actually it is CAN capable, but no CAN use as of yet. I do not have a programmer, so not sure if I would be able to do the microcontroller or not. That would be nice, but if I can't program it, ....
I will try to post 2 pics of the car, they were taken 2 years apart. 1 as I got the car, the other after I finished it. First car I painted since 1974!
Thank you for your help, greatly appreciated!
Tom
Like the before and after pics of the Corvair- some hard work has been expended there.:cool:

The last car I completely resprayed was in 1989.

spec
 
Last edited:
Here's the LTspice simulation of a 555 circuit that I think does what you want.
The circuit uses one 555 timer, and two CD4027 JK flip-flop chips, plus resistors and capacitors.
Outputs B1, B2, and B3 control the bulbs (B1 is inside).
It continues the sequence as long as the Turn signal voltage is high (simulated by V_Turn source on left).
The values of R2 and C5 determine the speed of the sequence.
The values shown give a complete sequence time of about 0.9 seconds.
Higher values slow it down.

You will need to add a transistor driver to each output for whatever the bulb current is.
(If you know the bulb current, we can help with that. Are they incandescent or LED?)

Power and ground for the CD4027 chips are not shown but must be connected.
Be sure and tie all unused inputs on the spare 4027 to ground to avoid any erratic behavior.

upload_2017-2-20_11-41-10.png
 

Attachments

  • Turn Sig Sequencer.asc
    2.9 KB · Views: 234
Last edited:
Here's the LTspice simulation of a 555 circuit that I think does what you want.
The circuit uses one 555 timer, and two CD4027 JK flip-flop chips, plus resistors and capacitors.
Outputs B1, B2, and B3 control the bulbs (B1 is inside).
It continues the sequence as long as the Turn signal voltage is high (simulated by V_Turn source on left).
The values of R2 and C5 determine the speed of the sequence.
The values shown give a complete sequence time of about 0.9 seconds.
Higher values slow it down.

You will need to add a transistor driver to each output for whatever the bulb current is.
(If you know the bulb current, we can help with that. Are they incandescent or LED?)

Power and ground for the CD4027 chips are not shown but must be connected.
Be sure and tie all unused inputs on the spare 4027 to ground to avoid any erratic behavior.

View attachment 104430
Thank you so very much! I will have to get my act together and build this in the coming weeks! I appreciate the help so very much! You guys are great!
 
Like the before and after pics of the Corvair- some hard work has been expended there.:cool:

The last and car I completely resprayed was in 1989.

spec
Thank you for the kind words! I added 4 wheel disc brakes, made the caliper mounts in my shop, and modified calipers and rotors. Next I want to add rack and pinion steering. Always something!
Thanks!
Tom
 
Actually it is CAN capable, but no CAN use as of yet. I do not have a programmer, so not sure if I would be able to do the microcontroller or not. That would be nice, but if I can't program it, ....
I will try to post 2 pics of the car, they were taken 2 years apart. 1 as I got the car, the other after I finished it. First car I painted since 1974!
Thank you for your help, greatly appreciated!
Tom
I recall My Dad having one that looked like the old photo after the engine caught on fire.
 
Here's the LTspice simulation of a 555 circuit that I think does what you want.
The circuit uses one 555 timer, and two CD4027 JK flip-flop chips, plus resistors and capacitors.
Outputs B1, B2, and B3 control the bulbs (B1 is inside).
It continues the sequence as long as the Turn signal voltage is high (simulated by V_Turn source on left).
The values of R2 and C5 determine the speed of the sequence.
The values shown give a complete sequence time of about 0.9 seconds.
Higher values slow it down.

You will need to add a transistor driver to each output for whatever the bulb current is.
(If you know the bulb current, we can help with that. Are they incandescent or LED?)

Power and ground for the CD4027 chips are not shown but must be connected.
Be sure and tie all unused inputs on the spare 4027 to ground to avoid any erratic behavior.

View attachment 104430
OK, I ordered parts from DigiKey, and should have them soon. I do have some questions regarding reading your schematic. I gather the triangular arrows are indicating ground. Now on the CD4027B chips, the arrow at the top is that ground, or showing which end of the chip is pin 1? I assume the CLR at the bottom is connected to ground through R3, and also to C3 then to other points shown. I see also that C2 and C5 are the only caps that have polarity. Is it that they are the only ones with polarity, or the only ones where polarity matters? (basically asking if all caps have polarity or not). Then also on the lower left is a circle with + top and - bottom is that just to illustrate what ever I am using to switch on the power? And lastly (for now! LOL!) I assume the CLK on the flip flops are all connected.
Sorry for all the basic questions, I appreciate your help greatly!
Tom
 
Status
Not open for further replies.

Latest threads

New Articles From Microcontroller Tips

Back
Top