Continue to Site

Welcome to our site!

Electro Tech is an online community (with over 170,000 members) who enjoy talking about and building electronic circuits, projects and gadgets. To participate you need to register. Registration is free. Click here to register now.

  • Welcome to our site! Electro Tech is an online community (with over 170,000 members) who enjoy talking about and building electronic circuits, projects and gadgets. To participate you need to register. Registration is free. Click here to register now.

Just what you've all been waiting for...another LED toggling question.

Status
Not open for further replies.

Patrick398

New Member
I have a some long press/short press code which is working nicely, controlling a relay and an opto from a single button. I thought it would be nice to blink the indicator LED to show when the change has occurred but my indicator LED is on the same pin as the relay. I thought it would be easy enough to use a spare pin for the LED but here we all are, head it hands.
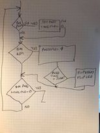
When the button is short pressed the relay is toggled. So i need my indicator LED to also toggle with it. When the button is held for 2.5 seconds the opto is toggled. So far so good. But i need the indicator LED to blink a few times and remain on. It should blink a few times every time the long press occurs but toggle on and off along with the relay. As it is i can't even get it to stay on when the opto pin is toggled. It feels like it should be so easy but i've been banging my head against the keyboard for hours now.

I should point out i know that the code as is won't do what i want, i've stripped it back to a point where it's mostly doing what i want but i've run out of ideas what to try next to get the blinking mode change

Code:
#include <ezButton.h>
const int buttonPin = 3; //2
int relayPin = 0;// 5
int optoPin = 1; //6
int ledPin = 2; // 7

const int SHORT_PRESS_TIME = 1000; // 1700 milliseconds
const int LONG_PRESS_TIME  = 2500; // 2500 milliseconds

ezButton button(buttonPin);  // create ezButton object that attach to pin 7;

int ledState ;
int optoState = LOW;
int relayState = LOW;
unsigned long pressedTime  = 0;
unsigned long releasedTime = 0;
bool isPressing = false;
bool isLongDetected = false;

void setup() {
  pinMode (ledPin, OUTPUT);
  pinMode (buttonPin, INPUT_PULLUP);
  pinMode (relayPin, OUTPUT);
  pinMode (optoPin, OUTPUT);
  button.setDebounceTime(30); // set debounce time to 30 milliseconds
  digitalWrite (relayPin, relayState);
  digitalWrite (optoPin, optoState);
  digitalWrite (ledPin, ledState);

}

void loop() {
  button.loop(); // MUST call the loop() function first

  if (button.isPressed()) {

    pressedTime = millis();
    isPressing = true;
    isLongDetected = false;

  }

  if (button.isReleased()) {
    isPressing = false;
    releasedTime = millis();

    long pressDuration = releasedTime - pressedTime;

    if ( pressDuration < SHORT_PRESS_TIME ) {

      relayState = !relayState;
      digitalWrite(relayPin, relayState);


      ledState = ! ledState;
      digitalWrite (ledPin, ledState);

    }
  }

  if (isPressing == true && isLongDetected == false) {

    long pressDuration = millis() - pressedTime;

    if ( pressDuration > LONG_PRESS_TIME ) {

      optoState = ! optoState;
      digitalWrite (optoPin, optoState);

      isLongDetected = true;


    }
  }
}
 
This is the problem when you use someone else's code - the library. You have no idea what it's doing. Write your own key read routine and you'll have full control.

Mike.
 
First thing that comes to mind is flowchart your desired function to get
a visual confirmation you are doing all the tests/changes you want,
based on relay and button state. By flowcharting its usually easy to see
where you are missing state information/effect on other parts of code,
and easy to see where subroutines might be necessary. You can do it
it by hand or online there are several sites offering free tool to do it.

1630566307825.png


Regards, Dana.
 
Thanks for the replies. I've put together a flow diagram with exactly what i think is happening and i really can't see any reason why the LED state would change when the opto state changes. The relay state remains the same as it should, only being controlled by a short press. The LED pin is basically doing exactly what the relay pin is doing so i don't understand why it is behaving differently
Untitled Diagram.drawio.png
 
And here is what it will eventually look like hopefully. I just need to solve the problem of the LED pin not following the relay pin first.

Untitled Diagram.drawio (1).png
 
Your flow diagram is not the diagram of the flow of your posted code.

It seems like test for short press and long press should be in same group
of code. After all you have by definition released the button at that point
(based on what I see in your code) so its time to If else because the button
was one of two possibilities, short time or long time.

You also have to deal with, if blinking button and another press occurs.....
Thats when blinking by HW nice, you simply upon button press make
sure blinking HW is off. Like a PWM stopped.

Once you do the flow diagram look for flags that are not getting
set cleared at right time.

Nice way of doing this, w/o tying up main(), is use ISRs, especially when
long qualifying timing events are needed to effect actions. That way one
is not tied up in blocking code. I see library is non blocking. But does not
gen ISRs for long period qualification of next action to carry out when
timeout complete .....?

1630584889300.png


I did not finish the flow chart, but you get the idea.

"Normally" one thinks of a main routine scanning button, and calling a subroutine
when something happens. In turn that invokes a response, that sets/clears flags
depending on whats done in routine. Subroutine can be as simple as flag handling,
then main() acts on the flag status. Or sub does response/hardware manipulation,
and the flags, and returns to main.


Regards, Dana.
 

Attachments

  • 1630584459403.png
    1630584459403.png
    56.7 KB · Views: 274
Last edited:
I've been away for the last couple of days so now I'm back I can offer the following,
Here's a function that will read a key and return,
0 if no key press.
1 if short key press.
2 if long key press(1 second in this case).
Code:
#define button 10

uint8_t readKey(){
  static uint32_t keyTime,tick;
  static bool key=true,previous=true;
  bool edge;
  if((millis()-tick)<20)      //delay for debounce
    return(0);
  tick=millis();
  pinMode(button,INPUT_PULLUP);
  key=digitalRead(button);
  edge=key^previous;          //has the key changed?
  if(edge && previous){       //new key press? Went from 1 to 0.
    keyTime=millis();         //copy millis for later
  }
  previous=key;               //keep copy in previous
  if(edge && key){            //new key release? Went from 0 to 1.
    if((millis()-keyTime)>1000){  //change 1000 for longer key press.
      return(2);
    }else{
      return(1);
    }
  }
  return(0);
}

You can test it with,
Code:
void loop(){
  uint8_t temp = readKey();
  if(temp==1)
    Serial.println("Short press");
  if(temp==2)
    Serial.println("Long press");
}

Mike.
As you've got the source code for it, you simply need to look at that.
Unfortunately, most people looking for help are beginners and won't understand the library code.
 
Great, thank you for that! It's going to take me a little while to get my head round it and understand what everything is doing but i have the jist of it i think. So somewhere else in the code i need to state what return (1) and return (2) are actually doing? i.e toggling the relay/LED
 
One thing I find useful when writing code is to make routines stand alone so they can be tested away from the other code.
For example, to flash the LED I would do the following,
Code:
void flashLED(uint8_t count){
  static uint32_t flashTick;
  static uint8_t flashCount=0;
  flashCount+=count;
  //only flash if flashCount is not zero and ¼ second has passed
  if(millis()-flashTick<250 || flashCount==0){
    return;
  }
  flashTick=millis();
  if(flashCount--&1){
    digitalWrite(LED_BUILTIN,LOW);
  }else{
    digitalWrite(LED_BUILTIN,HIGH);
  }
}
This needs calling continuously from the loop with a value of zero and when required to flash called with the number of flashes times two.
Note, if you call it with an odd number the first state will be LED off.
The above can be test by using,
Code:
void loop(){
  uint8_t temp = readKey();
  flashLED(0);          //call the LED routine so flashing can continue
  if(temp==1){
    //do stuff for short press
  }
  if(temp==2){
    flashLED(6);        //flash the LED 3 times
  }
}

Mike.
 
Status
Not open for further replies.

Latest threads

New Articles From Microcontroller Tips

Back
Top