Continue to Site

Welcome to our site!

Electro Tech is an online community (with over 170,000 members) who enjoy talking about and building electronic circuits, projects and gadgets. To participate you need to register. Registration is free. Click here to register now.

  • Welcome to our site! Electro Tech is an online community (with over 170,000 members) who enjoy talking about and building electronic circuits, projects and gadgets. To participate you need to register. Registration is free. Click here to register now.

Fuel gauge adapter

Status
Not open for further replies.
it appears that everyone lost interest in this thread
Not so; but 'er indoors and the rest of the family seem to think I have other things to do than use ETO all the time :D. I'll play with the sim (time permitting!) to see if we can match those figures.
 
This gives a better curve fit.
 

Attachments

  • NonlinearGaugeAdapter2.gif
    NonlinearGaugeAdapter2.gif
    22.3 KB · Views: 133
No, but I'll try that Eric. The emitter degeneration resistor is intended to minimise any temperature drift contribution from the transistor while not dropping too much voltage. I'm sure there's some drift, but do you see any way round using diodes (the main cause of drift) to get a non-linear response whether using my transistor circuit or your op-amp circuit? But considering either circuit will be used with a small gauge marked vaguely 0,50,100% I doubt the drift would be objectionable.
 
No, but I'll try that Eric. The emitter degeneration resistor is intended to minimise any temperature drift contribution from the transistor while not dropping too much voltage. I'm sure there's some drift, but do you see any way round using diodes (the main cause of drift) to get a non-linear response whether using my transistor circuit or your op-amp circuit? But considering either circuit will be used with a small gauge marked vaguely 0,50,100% I doubt the drift would be objectionable.

alec,
Done a quick check, quickie asc attached, looks awful.

As you know its the diodes which are the problem.
 

Attachments

  • Draft10.asc
    3.1 KB · Views: 156
Yes, just done the check too :(.
I doubt the drift would be objectionable
That was a rash statement! Have to think of some way of compensating, since 50C is quite likely under a dashboard. Thermistor across R3 perhaps? Do you know if there's a thermistor model for LTS?
 
Yes, just done the check too :(.
That was a rash statement! Have to think of some way of compensating, since 50C is quite likely under a dashboard. Thermistor across R3 perhaps? Do you know if there's a thermistor model for LTS?

alec,
Copy the Therm from this asc project.

You can always use a standard resistor and make the R value a function.
R= R0 *exp(-B*((1/273+Tref))-(1/(273+Tnew))))

Where R0 is usually Resistance at 25C and B is ~4000

EDIT:
On that asc there is a Self Heating and Non self heating Therm version
 

Attachments

  • ThermComp1.asc
    5.3 KB · Views: 150
Last edited:
alec,
The two subs for the Therms.
 

Attachments

  • ntcsubs.zip
    629 bytes · Views: 97
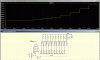
Thanks guys! That curve looks great, but I was beginning to wonder about temperature sensitivity when I saw all those diodes.

The other thing I'm curious about is that Alec's latest schematic, while it produces the collector currents I've determined are necessary to drive the gauge in a linear fashion, doesn't actually include the 200 ohm path to ground that I mentioned in Post #36. It's not intuitively apparent to me whether, if the plot were of Ic(Q1), would that value change at all with the addition of a 200 ohm resistor between the collector and ground?

If the temperature sensitivity could be compensated for with a thermistor, that would be pretty slick. (But as with this transistor solution in general, I wouldn't know where to start in selecting the specific component to order...) Failing that, I wonder what's worse, a state-of-charge gauge that exhibits wild temperature sensitivity (keep in mind that this car is powered by lead-acid batteries, so leaving it parked outside all day in -10 C really will change how much energy you have left to get home from work--maybe underreporting state of charge in that situation isn't such a bad thing, since the battery monitor won't actually know the batteries are compromised from cold soaking until you get underway), or just reverting to a linear solution that doesn't account for the nonlinearity of the gauge (i.e. I'd have to explain to my brother that the gauge will read 50% when he's actually at 25% and then move rather quickly over the bottom half of the scale)?
 
Thanks for the files, Eric. I've tried slapping a thermistor across R3. It reduces the temperature drift for the lower part of the curves but doesn't do enough for the upper part. I'm coming round to the view that this diode approach won't cut the mustard and we'll have to find another solution. I've got one idea in mind, but need to work on it. If it looks promising I'll post details. Don't hold your breath.
If you do have to revert to a linear solution then is fitting a new scale to the gauge a possibility?
 
What thermistor did you try? If it eliminates the drift when the batteries are near empty, that's really the important part.

If I have to revert to a linear solution, I suppose I could fit a new scale to the gauge, but I've already had the instrument panel out of that car once for repairs and I'd rather never have to do that again! So if all else fails I'll just explain to my brother that "half" on the gauge is actually 25% and leave it at that.
 
The thermistor was a generic simulation model. No need to order one!
Attached is the simulation result for that other idea I mentioned. The principle is to use an LM3914 (I couldn't find an LTSpice model for one so had to invent my own) in bar mode to give a summed output current increasing as the source voltage goes from 0 to 5. Each output of the chip inherently sinks the same constant current, programmed by R1 to be ~20mA here. So, to get a non-linear response some of that current has to be sourced from the 12V line (or the chip supply) instead of via the gauge input, the amount varying with the output stage. R5 to R13 are the shunt resistors for the respective stages.
The chip needs a 5V supply, to keep power dissipation within bounds.
If the ten steps of the resulting curve are too coarse, a second LM3914 (and associated components) could be cascaded with the first to give 20 steps.
 

Attachments

  • LM3914GaugeDriver.gif
    LM3914GaugeDriver.gif
    25.9 KB · Views: 142
  • LM3914GaugeDriver.asc
    6.7 KB · Views: 124
That should certainly work! Two questions:

1) What do I need to do to get a 5 V supply voltage? Is there some kind of specialized diode available like the LT1009 I used for a 2.5 V reference in the op-amp circuit?

2) It looks like the way you've modeled the gauge still isn't consistent with the 7.3 V measured on the input wire (with no input connected). I've been envisioning the gauge looking like the attached sketch, so unless I'm overlooking something, your schematic has R15 connected to the wrong end of R14.
**broken link removed**

Thanks again!
 
1) A 78L05 gives a stabilised 5V supply.
2) You're quite right. Well spotted. Error on my part. Will re-jig things and get back to you.
 
Right. Schematic corrected re R15 (no other change was necessary). I've also added R17, purely to make it easier to check where the current goes in the sim. With zero input current the gauge input is now ~ 7.4V.

Edit: BTW, temperature drift using the LM3914 is negligible. The curves drawn for different temps (-10 to +50C) overlap almost exactly! Although that chip is specified to work at 0-50, I'm sure it would be perfectly ok in this application at well below 0.
 

Attachments

  • LM3914GaugeDriver2.gif
    LM3914GaugeDriver2.gif
    24.3 KB · Views: 142
Last edited:
Shucks, I forgot that "you will not receive any more notifications until you visit the forum again," so I didn't see your follow-up post until just now...

Again, two questions:

1) Do the shunt resistors need to be adjusted up? The last two nonzero steps look like they're, well, zero, and all the levels seem to be shifted down.

2) If I want a 20-step curve, how would the second chip (etc.) tie into the circuit that you've modeled above?
 
1) When I corrected the R15 position the shunt resistor values stayed the same IIRC. To shift all the current steps in one fell swoop adjust R1. Output current per output is specified as ~ 12.5/R1. But >20 mA per output is pushing the limits on chip power dissipation. Individual shunt resistors can be adjusted to tailor the curve. The higher value shunts could probably be omitted, as they only affect the total current insignificanty (as you noted).
2) Check out the datasheet for the LM3914. It shows how to cascade 2 or more chips.
 
1) I can't tell from your screenshot whether the resistor values had changed (I assumed they hadn't), but the output current levels on the plot are different than before.

2) I'm looking at the datasheet now; thanks. Obviously haven't had time to absorb the whole thing yet, but it can't be too difficult. Further bench testing of the battery monitor (salvaged from a forklift) makes it look like its output is actually ~30 discrete steps, so if I can fit it all on one of my 2" x 3" PCBs, I'm tempted to try three chips cascaded together.
 
Mmm, I must have tinkered with the resistor values then and forgotten I had.:)
 
Are the reduced current levels not symptomatic of the corrected R15 configuration? I know you said the chip is designed to sink constant current, but is the system behavior really totally unaffected by the change to R15?
 
Status
Not open for further replies.

New Articles From Microcontroller Tips

Back
Top