Continue to Site

Welcome to our site!

Electro Tech is an online community (with over 170,000 members) who enjoy talking about and building electronic circuits, projects and gadgets. To participate you need to register. Registration is free. Click here to register now.

  • Welcome to our site! Electro Tech is an online community (with over 170,000 members) who enjoy talking about and building electronic circuits, projects and gadgets. To participate you need to register. Registration is free. Click here to register now.

Circuit component removal Problem

Status
Not open for further replies.

Dixxshah

New Member
I'm trying to repair my first circuit component ( in my life) and run into a problem. The component I'm trying to replace seems to be attached to a plate and not just soldered through a hole. What is this and how can I remove? See pics...
 

Attachments

  • image.jpg
    image.jpg
    1 MB · Views: 225
  • image.jpg
    image.jpg
    1 MB · Views: 233
Do you know why you want to remove the thermistor? Is it actually damaged?

Anyway, the large area of the pads will make it harder to heat up the solder joint. If you add leaded solder, you will lower the melting point and the extra solder on your iron will make it easier to transfer heat into the joint. If you use a larger tip on your iron (and a decent iron), it will stay hotter for longer when you try to melt the joint.
 
I agree with dougy83 that you need a larger soldering iron. (Probably about 100 watt) I do not understand how you have diagnosed the fault to that component (Inrush current limiter / NTC thermistor) if you did not know what it is and what its function is in the circuit.

Les.
 
An alternative to adding leaded solder is to add an alloy containing bismuth and indium.* Chip Quik (https://www.chipquik.com/store/index.php?cPath=200) sells a variety of such low-melting solders to aid component removal. Note that the lead-free version has a broad melting point range (71-91°C) which might also help removal .

John

*Even Wood's metal might work, but I have never tried it. The Chip Quick solders are more malleable.
 
Thanks. I figured it was this component by the way the system behaved. I found several other people who had same symptoms online and pointed to the thermistor. When I examined it I saw it was brittle/cracked...
But what is that large plate where it attaches? With right iron I'm supposed to solder through it?
 
Thanks. I figured it was this component by the way the system behaved. I found several other people who had same symptoms online and pointed to the thermistor. When I examined it I saw it was brittle/cracked...

If it's cracked then it's faulty, but that wasn't apparent in the picture.

But what is that large plate where it attaches? With right iron I'm supposed to solder through it?

It's not a 'plate', just a large PCB track - used as a heat sink. As already suggested you just need a decent sized soldering iron (and bit) to remove it - a 50W temperature controlled iron with a large bit fitted should do it no problem. Heat one side up, and apply fresh solder (this helps everything flow better) - once the pin is loose lever that side up as far as you can (you probably won't be able to get it out with one operation). Repeat on the other side, and keep alternating sides until it's out - then use a solder sucker to clear the holes.
 
The good an bad news is, the large pad contains a bunch of vias which means BOTH sides the large pad are thermally connected.

When you KNOW the component is defective, CUT THE LEADS. Don't cut them too short.

You can TRY concentrating the heat on the wire itself.

The idea that it will require more heat is valid. You might be able to avoid the hassle altogether by splicing the new component into the cut leads. That will save you a lot of grief. Cut, make a J type hook on both components and solder together.

Since this if your FIRST removal, I think we should be answering as a total Newbie.

Some of the de-soldering techniques include:
1) Heat and pull
2) Cut the leads and remove one at a time - This is good for DIP packages.
3) Solder wick (It's a braid with solder flux available in different sizes
**broken link removed**
4) The Sodapult or hand vacuum solder remover (solder sucker)
4a. Solder or an alloy to lower the melting temperature is sometimes applied after a good portion of the solder is removed and also removed. This allows better heat transfer using the molten solder.
5) You may have to heat both sides, that why I'm suggesting cut and splice. IR heaters and hot air soldering is also used.
6) You can buy an inexpensive bulb desoldering iron: **broken link removed**
7) An expensive temperature controlled solder/desolder station.

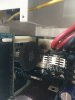
6) A commercial desoldering system which contains a vacuum pump

The first 3 items I used here. Solder sucker, bulb, iron attached to bulb. I don't recommend the bulb and the solder sucker attached to an iron will probably be better.
 
Status
Not open for further replies.

Latest threads

Back
Top