Hello everyone,
these days i have been making this circuit shown below,
**broken link removed**
since i dont have a solenoid right now, i am using an LED on pin 3 actually. Today i tried fitting in the variable resistor as shown in the schematic above. Actually i am using a trimpot as a variable resistor but unfortunately no luck! the variable resistor doesn't seem to work as it is supposed to do so! the LED lights up only as if the 1K ohm resistor is connected to it!
here i have posted the pictures as well as a small video showing the problem i am facing. Can anyone please tell me how do i connect this trimpot properly so it acts as a variable resistor! thanks!
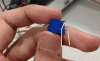
here are the pictures and video,
**broken link removed**
**broken link removed**
**broken link removed**
**broken link removed**
click on the image below to see the video otherwise click on the link at the bottom,
**broken link removed**
**broken link removed**
thanks,
waiting for replies!
these days i have been making this circuit shown below,
**broken link removed**
since i dont have a solenoid right now, i am using an LED on pin 3 actually. Today i tried fitting in the variable resistor as shown in the schematic above. Actually i am using a trimpot as a variable resistor but unfortunately no luck! the variable resistor doesn't seem to work as it is supposed to do so! the LED lights up only as if the 1K ohm resistor is connected to it!
here i have posted the pictures as well as a small video showing the problem i am facing. Can anyone please tell me how do i connect this trimpot properly so it acts as a variable resistor! thanks!
here are the pictures and video,
**broken link removed**
**broken link removed**
**broken link removed**
**broken link removed**
click on the image below to see the video otherwise click on the link at the bottom,
**broken link removed**
**broken link removed**
thanks,
waiting for replies!