Yes that was repeatable, wasnt expecting that.
You used to be able to get high Remanence or square ferrite, it was used for data memory a long time ago, you can get low Remanence factor ferrite especially for current transformers, something I've not played with, yet.
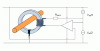
Would your application lend itself to a degaussing circuit like in old Tv's?
Hi,
As you know, when you apply a current to a winding that goes through a magnetically active core, the field is the ampere turns times a constant, so we have:
B=N*Idc*K
where N is the number of turns and Idc is the DC current.
After we remove the current, we end up with an equivalent B which we can call simply B1:
B1=N*Idc1*K
where B1 is the remanence flux and Idc1 is an 'equivalent' DC current that can be thought of as still flowing.
In order to get that flux back down to zero, we would apply a negative current -Idc1, and we would think that would lead to zero:
0=N*(Idc1-Idc1)*K=N*0*K=0
but it actually doesnt work because there is time involved too, so we end up with a different level:
B2=N*(Idc1(t1)-Idc1(t2))*K
and this level may be slightly less than the previous level, although perhaps negative.
It turns out it's not that easy to determine the exact level or time, so what we do is just apply a sine wave that starts out at some higher level and gradually dies down to zero. So the current then would look something like:
I=k(t)*sin(w*t)
where k(t) could be something like e^(-a*t) which would cause the sine wave to tend to zero over time.
So the idea then is to run a current in a winding that is sinusoidal, and gradually decrease the value. That's the basic way to degauss a magnetic core. It may in fact work with square waves too but i've never tried that, nor with triangle waves.
But hey, we already have a device that can sense static fields inside the core, so why not use that? What we could do is apply a reverse current and see if we could get the field down to zero with that. If it went past zero, we could always reverse again. The core would be degaussed when the sensor read zero again.
However, when in the feedback loop, this should happen automatically because the circuit will not rest until the flux is again zero. So probably all we need is a 'rest' period between measurements. Once it is zeroed, it should stay that way because it will be forced back down to zero again anyway. There might be some stabilization mechanism required too though, so this wuold have to be tried out.
")