Continue to Site

Welcome to our site!

Electro Tech is an online community (with over 170,000 members) who enjoy talking about and building electronic circuits, projects and gadgets. To participate you need to register. Registration is free. Click here to register now.

  • Welcome to our site! Electro Tech is an online community (with over 170,000 members) who enjoy talking about and building electronic circuits, projects and gadgets. To participate you need to register. Registration is free. Click here to register now.

Replace a Var Resistor with a fixed

ThomsCircuit

Well-Known Member
What would i need to to to this PCB to make this work with just a fixed resistor?
Meaning i want to remove the variable resistor and insert a single fixed resistor in its place.

Thank you in advance
samplePCB.png


This is my current resistor (225k)
Wanting to replace it with a 100k 1/4 watt
In this circuit the resistor adjusts frequency.
203-variable-resistor.jpg
 
Last edited:
You need two resistors, no?
Im still pretty green but i thought i was doing this right before i posted but no matter what pins i placed the resistor across i could not reproduce what the pot was doing. Turns out i mis-read the resistor value. instead of 100k i was using a 1k. Well, it works now. As it should.
 
seems logical and i did choose 1 to 2 but there is a trace from 3 to 2. so would that still leave an open circuit?
Post #7 was perfectly correct, 1 and 2, OR 1 and 3, as 2 and 3 are the same point.

I just can't believe two members, who have both been here over ten years, post completely wrong suggestions, obviously neither of them ever bothered looking at the VERY clear PCB layout?.
 
AnalogKid spent days and writing what could have been a personal book explaining to me how a circuit worked. I still read it. thank you sir for never giving up on me.
 
Post #7 was perfectly correct, 1 and 2, OR 1 and 3, as 2 and 3 are the same point.

I just can't believe two members, who have both been here over ten years, post completely wrong suggestions, obviously neither of them ever bothered looking at the VERY clear PCB layout?.

Actually, while the part of post #7 that I **quoted from RJ** is correct, the part that I actually wrote is in fact incorrect. I'm not sure where this leaves Nigel.

I thought about deleting #7, but I'm leaving it up because Nigel is right - sometimes my fingers get ahead of my eyeballs. I'd love to say that I can't believe it either, but one of the joys of aging is that being stupid in public is not as upsetting to me as it used to be.

ak
 
It makes no difference, but from a purely cosmetic point of view (and if it will fit) then place it between 1 and 2 (so it's aligned with the other components). I'd also like to see the tolerance band at the same end as R1 and R3 (assuming they are both the same way round).

If it won't fit (neatly) between 1 and 2, then it may fit better between 1 and 3, as that spacing looks to slightly be wider.
The 30x40mm circuit will be placed inside the housing of a fan. The kind of fan that tall and narrow. instead of blades it has a long squirrel cage to move the air.
Original fan switch.jpg


It had push buttons to control the speeds and i ruined them while cleaning with brake cleaner. I never seen anything like it. within seconds the plastic buttons and housing began to crumble in my hands. Research proved that that product does indeed do this. since that incident i now have tuner cleaner on hand.

The new switch is a this 4p4t rotary style
4p4tsw.jpg

I need this switch to not only control the fan speed but to monitor the fans sway feature as it can only be engages if the fan is running. here is the schematic for the switch.

FanSW - Project-1.png

Pole 1 (AC) is the fans speed. Pole 2 (AC) monitors the sway feature. Pole 3 (DC) are feedback LEDs for the fans speed. And pole 4 (DC) is also feedback for the fans speed where the knight rider circuit will progressively increase / decrease based on the fans speed. Now the resistors will be located on the switch and pins 1 & 2 OR 1 & 3 will be replaced with a plug or header pin.

All the holes have beed drilled for the new switchs, feedback leds, and the 6 leds for the knight rider effect. just waiting on the circuit board.
 
Last edited:
and dont forget the noob who mistook a 1k for a 100k then spent 30 minutes figuring it out.
Back in the day, when thru hole components ruled the electronics world, I installed a 1 megohm resistor (brown, black, green, gold) instead of a 15 ohm resistor (brown, green, black, gold)… and spent a whole afternoon figuring out the malfunction.
Mind you, this was when I still had perfect eyesight.
Funny you should say that :D

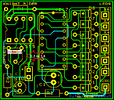
I was building a number of products at work today, and during the first testing (with a plugged in LCD display, before soldering the final one in place) one of them didn't work :banghead: :banghead: :banghead:

So I finished the rest totally, and went back to check this one to see what was wrong - on closer examination I noticed that the backlight was coming ON, and you could switch the unit ON and OFF, so the processor was running fine. So I thought 'check the LCD contrast, which is set via PWM' - got the scope on it, at the input of the lo-pass filter I'd got a nice 5V pulse, but at the output it was 5V DC (it should be under 1V). So I checked round visually, looking for any silly shorts or whatever, couldn't spot anything - so I checked in and out on the 1K resistor in the simple filter (1K and 10uF), actually on the resistor wires - nice pulse one side, 5V the other.

So, I unplugged the display, and the 5V vanished? - strange I thought?. So I checked the resistor on ohms, to find out it was 27K - looked closely - it WAS a 27K resistor, not a 1K. So I changed it for a 1K, tried again - it worked :D - continued my normal testing routine, to find the opto-coupled output wasn't working. But now I was on top of it - checked the 1K resistor feeding the opto-coupler, to find that was 27K as well. So changed that, everything was good then :D

Thinking back, I realised where I'd gone wrong - I fit the components a few values at a time, and keep them in 'really useful boxes', labelled with the values. The first three values are 180 x 1, 1K x 2, and 27K x 2 - so as I was assembling PCB's in pairs, I took out two 180 ohms, closed the box, fitted them, then opened the 1K box, took out two 1K resistors, closed the box, fitted them - then realised I should have taken out four, not two. So I opened the box again, and took out two more, closed the box, and fitted them - then opened the 27K box, took out four, closed the box, and fitted them.

Obviously the second time I took out the 1K resistors I'd missed, I opened the wrong box, and used 27K instead - dumb stupid mistake, but at least it was easily found and cured.

It doesn't help with these 1% resistors, silly colours, quite small, and not very legible colours either.
 
Nigel;
At least the colors are different, it was a distraction as you said.
But the 15 and 1 meg ohm have the same colors but in different order.
There are other color combinations that could cause confusion: 24 and 200k, for instance.
 

Latest threads

New Articles From Microcontroller Tips

Back
Top