Continue to Site

Welcome to our site!

Electro Tech is an online community (with over 170,000 members) who enjoy talking about and building electronic circuits, projects and gadgets. To participate you need to register. Registration is free. Click here to register now.

  • Welcome to our site! Electro Tech is an online community (with over 170,000 members) who enjoy talking about and building electronic circuits, projects and gadgets. To participate you need to register. Registration is free. Click here to register now.

How do I place a push-button on the enclosure?

Status
Not open for further replies.

hkBattousai

Member
I have designed PCB many times before. But I have never designed an overall product with its enclosure. At the moment what I'm trying to do is enclosing a PCB with an enclosure. However, I have no experience nor idea to do this.

I have an enclosure like this:
**broken link removed**

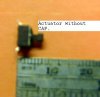
And have a push buttons like this:
**broken link removed**

I want the buttons to look like this on the enclosure:
**broken link removed**

How do I do this design? Should I design a second PCB which will only be containing the buttons on it, and paste it just under the front side of the enclosure? Is there any tutorial on the web which explains this enclosure design procedures?

Any help will be appreciated.

(Note: The components in the images are not the ones I'm using in my project. But I think they gives the main idea what my problem is.)
 
hi,
One option is use a small pcb that has the switches mounted on it, align the push buttons with front on the case, make suitable holes and mount the pcb on the inside face of the enclosure
 
Hi,

just use a piece of PCB material and mount one of your push buttons on it. Place it in the lower half of the enclosure and measure the distance between the push button and the buttons delivered with the enclosure. There should be no or a small gap between both. When pushing the upper button the movement will be transferred to the lower button.

If the gap is too large glue some plastic material onto the upper button (to avoid conctact between glue and the switching part of the push button).

The dimensional drawing of the enclosure is pretty poor (BOPLA) and you have to measure and experiment for the proper position of the buttons.

Boncuk
 
Unless you can design your first (main) PCB so that switches mounted on it are aligned exactly with the push-buttons you will have to mount the switches instead on a second PCB as has been suggested above.
 
For small quantities, you may have to settle for something else. I'm working on a project right now that requires buttons. After considerable amount of research, this https://www.onlinecomponents.com/grayhill_95c06f3gwrt.html?p=11462802 looks suitable. The pic is not the product. Look at the datasheet for the Grayhill 95C06F3...

These have colored keycaps available, but only black and yellow are listed on this website and only black is stocked.

I'm planning to go a local Fast Signs and have the label made. Black printing on a white label. Not that I like it. They will cut the label by hand. I need an odd shaped label. Estimated cost is about $13 per label.

For production, the manufacturer of my enclosure will customize the case by drilling and stamping the label. Drilling is accomplished with a single milling cutter, not tool changes.

I plan to cut the holes initially with a pilot point bit and then enlarge and finally ream the hole to the finale size. At this point, I'm thinking 0.020" over the size of the cap. I haven't tried the hole cutting yet. Just ordered the bits, ream and cap. I have a sample of the label
material.

There are companies that will make a label with the holes cut into the label.

The keys on a typical remote control are of a conductive elastomer variety, Your PC pattern contains gold plated contacts for the elastomer to hit. Quantity is the issue.

Another option is the membrane keyboard, but I don't like the feel of the switches. They are made with an adhesive and a ribbon cable attached. But, again this is custom.

The switches you have are made to be operated with custom actuators. Some manufactures provide actuators in various odd shapes, such as ovals and various colors.
 
^ Thank you for your long explanation about your project. I'm planning to use the very same buttons in your link. My problem is how to place those small plastic pieces between the buttons and the case/enclosure. Those plastic pieces must fit to the space between buttons and the case with a very small tolerance. I don't know how to work with those small tolerances. I started this topic to learn if there is a method or easy way to do this.
 
THE PICTURE OF THE COMPONENT IS NOT THE RIGHT ONE. That part number is depicted on page 1 of the datasheet, the second box on the page. There is a photo and the last drawing is Actuator style "F". which says "for use with decorative caps". If you have trouble visualizing, I can take a pic of real part. I did and it's attached.

The last page shows caps which can be round or square. The 0.177" diameter caps fit on a 0.138" diameter squareish stud.

The height of the switch from the board with the cap is 0.287-(0.217-0.110). I get 0.180" The travel is 0.010" You have 0.217" of button to leave 0.010" inches of travel.

Actuator style F can be had as a thru-hole part as well. There is NO PHOTO of the button version of the part in the datasheet.

PS: I need to figure out how to use my Macro Lens. The pic is without it.
 

Attachments

  • Actuator without cap.jpg
    Actuator without cap.jpg
    39.3 KB · Views: 630
Last edited:
@KeepItSimpleStupid have you considered using from PulsarProFx. In short it is a method of transferring a color laser printed design to your enclosure with no additional backing. The transfer process is not simple but there in no cutting, you get what you print.
 
Nope, but looks expensive. Bet the price of the system would cost as much as 200 labels commercially made in bulk.

Right now, the case is black with a depression for the label but the case can be bought without the depression. The buttons are also black. I haven't entertained the ability to get other color buttons. They are made in other colors.

So, a white label with black buttons doesn't seem to be bad. Cost will be about $13 each at qty 1.
 
Status
Not open for further replies.

Latest threads

New Articles From Microcontroller Tips

Back
Top