Continue to Site

Welcome to our site!

Electro Tech is an online community (with over 170,000 members) who enjoy talking about and building electronic circuits, projects and gadgets. To participate you need to register. Registration is free. Click here to register now.

  • Welcome to our site! Electro Tech is an online community (with over 170,000 members) who enjoy talking about and building electronic circuits, projects and gadgets. To participate you need to register. Registration is free. Click here to register now.

High Currents On PCB

Status
Not open for further replies.

dknguyen

Well-Known Member
Most Helpful Member
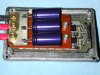
I was wondering something about the PCBs in motor controllers, especially those around 70-180A or so. How do they route all that current on the PCB? Like the trace width calulators seems to say you need an 8cm wide trace, and that's when you have 6oz copper.

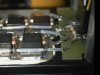
Like those TO-247, Super 247 TO-220 packages seem like they are meant to be mounted on a PCB. But at the same time some of them are rated past 100A.

Thanks.
 
You generally don't run PCB traces for currents that high, you place the component as close as possible to a terminal block and use real wire. Just because it's mounted on a PCB doesn't mean it needs PCB traces to connect it to things.
 
That's what I was thinking but to connect to the terminal block and the component lead it still has to pass through the PCB doesn't it? Even if it's the smallest trace? UNless you are talking about getting really long terminal block leads and soldering them directly to each other.
 
I don't know, I've never really seen the inside of a motor controller built to handle that much current. They probably skip PCB traces and do the linking with large pieces of copper jumper wire. A hole can be easily made to fit both the lead of the part and one end of the jumper. Any leads on the PCB carrying that much current are going get off the PCB as soon as possible and keep the leads and short as possible until you can get it to really high gauge wire. Most really high powered devices like that often have simple screw terminals on them as PCB leads are pretty pointless.
 
Last edited:
I was thinking about buying strips of copper bar from the hardware store and maybe screwing them down to the PCB and having the leads go through those and solder it to those isntead. Can you solder pure copper with regular electronics soldeirng?
 
You can solder to pure copper with electronics solder, so long as your iron is powerful enough. . . take into account that it's a much larger piece of copper you have to heat. I have soldered wire to copper plate about 1/2 mm thick using a 30W iron.

Oh, just a thought. . . If you're soldering components to copper plate, I would 'tin' the plate first so you're less likely to overheat the component
 
Last edited:
Here's a picture of a motor controller I have been using for several years. It runs on 12V at well over 100A when under load. I used 4oz copper and kept everything short. The FET drains are soldered flat on the board, and the board is on a heatsink. I have had no problems with that arrangement for intermittant duty. As pointed out above, the full capability of the MOSFET may be limited by the lead size of inexpensicve packages, such as TO-220 or DPak, and one would have to go to a more expensive package to get screw terminals.

Let me add that for even greater power in an earlier design, I cut traces from 0.025 inch copper plate, which was obtained from the local hobby shop. The traces essentially duplicated the PC traces in outline and were attached to a heatsink with a thermally conductive adhesive and insulated screws. Heavier copper than that is much more difficult to work and to solder. I have not compared the two designs for maximum current capacity. I have added a picture of the board made in that way. The thicker copper conductor is shown in the closs-up.
 

Attachments

  • Power board 1.jpg
    Power board 1.jpg
    51.7 KB · Views: 643
  • Power brd original1reduced.jpg
    Power brd original1reduced.jpg
    38.8 KB · Views: 527
Last edited:
High Current on PCB

I have a similar requirement to this. I'm designing a 64-channel solenoid driver board. The ground rail needs to take 30A for a few seconds, and 16A continuous. I don't have enough space for a track wide enough to take this current, so I was thinking of adding some kind of copper busbar, possibly as shown in the attachment. This could be soldered onto the PCB every 20mm or so.

I could have something like this made custom by laser cutting or chemical etching, but it's expensive for a small volume. Does anything like this exist off the shelf? Or do you know of someone who would make this is small volumes cheaply? Or can you suggest a better solution? Just soldering tinned copper wire on top of the track is a possibility, but it would be difficult and time consuming to do neatly - not really production-friendly.

Thanks - Rowan
 

Attachments

  • Busbar.pdf
    7.5 KB · Views: 304
Here's a good link on how one guy does it; **broken link removed**

Buy eliminating any insulating components from the mosfet 'tab' when you mount them you can screw them right to a bus bar, that will eliminate the lead for the drain. Because the tab is the drain on most mosfets. Then you would electrically insulate the bus bar from the heat sink.
 
These copper strips, normally tin plated, are used in a number of hi-power amplifiers. They work well. As the pins do not carry current just use a flat rectangular piece and solder an 18 gauge wire to where the mounting holes are.
A neat free program (PCBTemp) for PCB traces can be found on the Ultracad website. E
 
Hi,

Another trick that is used in high power power supplies is to bolt the active part body right to the heat sink. Holes are then drilled in the heat sink somewhere to connect heavy current lead wires. The end terminals of the connecting wires that are bolted to the heat sink for external connects are crimped, not soldered, for higher reliability. This takes some decent crimping tool that can handle the large gauge wire.

This makes the whole heat sink live, where then the heat sink is mounted to an insulting board like thick phenolic or similar, and the board is mounted to the inside of the product case. The case with plenty of ventilation and fans keeps hands away from the live heat sinks.
 
Thanks shortbus,

That's a very interesting blog. It's a bit more extreme than what I need though. I'm actually trying to do this without modifying the PCB, and since this has 64 MOSFET drivers in two rows of 32 in the wrong orientation to screw to a heatsink, I can't easily do this. Currently the MOSFET drivers have no heat sink at all, and are very close together (almost touching) but in normal circumstances they don't get perceptibly warm. If the load is short circuited they very rapidly heat up, but have an internal thermal shutdown, so are reasonably well protected.

Thanks for your and the other inputs in this thread. Interesting ideas...

Rowan
 
Remove silk screen form top and bottom and build up solder in high current areas will help a little.
I am working on a project now with 4 layers of 2 oz. copper and for the high current areas, I run the current in all 4 layers in parallel.
In past projects I used 'bus bars' made of copper that soldered to the PCB every inch. (0.1" x 0.5" copper that runs in parallel to the PCB)
 
Hi,

this arrangement is used by Siemens for high current traces. The copper bar needs to be mounted for free air circulation.

**broken link removed**

Boncuk
 
Status
Not open for further replies.

Latest threads

New Articles From Microcontroller Tips

Back
Top