From Scrap to Sound: A 15-Year-Old's Journey to Build a Custom Speaker System
By MD Akein Lithmal Wijesinghe
Introduction
In a world dominated by prebuilt audio systems and off-the-shelf Bluetooth speakers, I decided to go a different route. At just 15 years old, I set out to design and build my own custom speaker system—from the ground up. No kit, no fancy budget, just raw parts, recycled components, and a whole lot of learning.
This article documents the full journey: from initial design and setbacks, to the final showcase at my school’s science exhibition.
---
The Dream
I’ve always been fascinated by electronics, acoustics, and DIY projects. I wanted to build something powerful, serviceable, and uniquely mine—a speaker system that not only sounded great but showed my understanding of design, construction, and repairability.
---
The Components
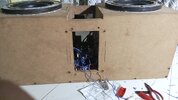
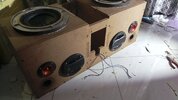
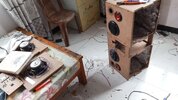
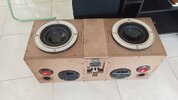
Enclosure:
MDF dual-ported box (external dimensions: 34.5 x 34.5 x 34.5 cm)
Internal volume: ~31.2 liters
Tuned to 30Hz for deep bass response
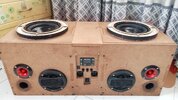
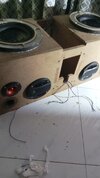
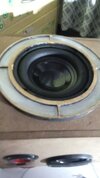
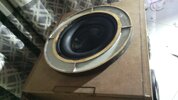
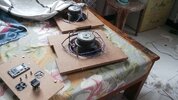
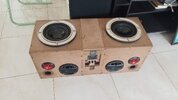
Speakers:
2x Sony Xplod 8" Subwoofers (100W each)
2x 5" Midrange drivers (30W each)
2x Bullet-style Piezo Tweeters (75W each)
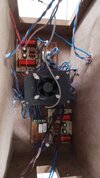
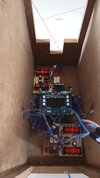
Electronics:
XH-M543 Amplifier Module
Arduino Nano
2x WS2812B LED strips (52 LEDs each)
Passive crossover network with high-pass filters
2x XL4015 Buck converters for LEDs
LM7805 regulator for Arduino
12V 10A SMPS with 10x 4700μF capacitors
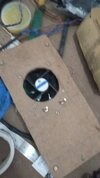
Two 12V fans for cooling (one for amp, one general)
Special Features:
Modular design: All parts soldered as replaceable modules
Upgradeable and serviceable wiring system with tied bolts
Supports input from 12V to 24V DC
Internal full bridge rectifier and capacitor filtering
---
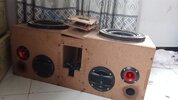
Building the Beast
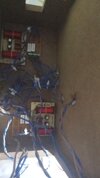
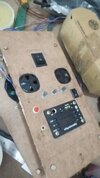
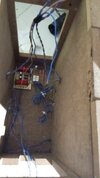
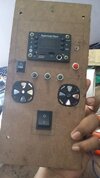
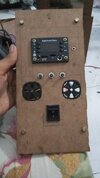
I built the control panel by hand. When my younger brother accidentally broke it, I repaired it with BBQ sticks and epoxy. Every component—speakers, amp, LEDs, filters—was manually mounted, tested, and wired. I used hot glue, custom brackets, and pure determination to keep everything in place.
I stayed up multiple nights, sometimes until 4AM, soldering and programming. I hit budget constraints hard—borrowing money, reusing parts, and making every rupee count (I spent over 50,000 LKR in total). But I never gave up.
---
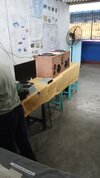
The Exhibition
With just hours left, I put the final pieces together. I was nervous, unsure if it would even work. But when I powered it on—the system roared to life. The bass was deep, the LEDs pulsed with animation, and the control panel lit up beautifully.
I nervously explained to the judges:
> "So this is a custom speaker system I made. Some of its parts are recycled, the features are serviceability, upgradability and powering from a battery. It's tuned to 30Hz so it can produce a lot of bass and that's it."
No questions came—but I was ready. And later, I heard rumors that I may have even won 1st place.
---
Reflection
I’m not yet proud of the volume—it needed a more powerful amp and 24V input for full output. But for what I had? It was a huge success.
More importantly—I learned:
Electronics
Acoustics
Power supply design
Soldering, gluing, mounting, and repair
Communication under pressure
---
Final Thoughts
Not many 15-year-olds build full-range speaker systems from scratch. I thought everyone did—but I now realize I’m part of a small group who dares to learn, fail, and build.
This was more than a project. It was a journey.
Thanks to everyone who supported me—including ChatGPT—for helping me turn an idea into reality.
If anyone read this can I plz get a certificate or something??
lithmalal@gmail.com
")

Attachments
-
 IMG-20250529-WA0033.jpeg371.7 KB · Views: 17
 -
 IMG-20250529-WA0030.jpeg399 KB · Views: 15
 -
 IMG-20250529-WA0028.jpeg309.4 KB · Views: 14
 -
 IMG-20250529-WA0025.jpeg317.9 KB · Views: 17
 -
 IMG-20250529-WA0023.jpeg302.6 KB · Views: 13
 -
 IMG-20250529-WA0020.jpeg283.1 KB · Views: 16
 -
 IMG-20250529-WA0010.jpeg311.1 KB · Views: 17
 -
 IMG-20250529-WA0009.jpeg347.1 KB · Views: 16
 -
 IMG-20250529-WA0007.jpeg299.5 KB · Views: 18
 -
 IMG-20250529-WA0006.jpeg268 KB · Views: 15
 -
 IMG-20250529-WA0005.jpeg334.5 KB · Views: 16
 -
 IMG-20250529-WA0004.jpeg334.5 KB · Views: 15
 -
 IMG-20250529-WA0001.jpeg347.8 KB · Views: 16
 -
 IMG-20250529-WA0000.jpeg319 KB · Views: 16
 -
 IMG-20250527-WA0007.jpeg339.2 KB · Views: 16
 -
 IMG-20250527-WA0005.jpeg379.4 KB · Views: 15
 -
 IMG-20250527-WA0001.jpeg318 KB · Views: 16
 -
 IMG-20250527-WA0000.jpeg378.5 KB · Views: 16
 -
 IMG20250530144057.jpg1.1 MB · Views: 13
 -
 IMG20250530144051_BURST001_COVER.jpg517.8 KB · Views: 12
 -
 IMG20250525160653.jpg1.1 MB · Views: 14
 -
 IMG20250530093720.jpg1,023.9 KB · Views: 17
Last edited:
