Continue to Site

Welcome to our site!

Electro Tech is an online community (with over 170,000 members) who enjoy talking about and building electronic circuits, projects and gadgets. To participate you need to register. Registration is free. Click here to register now.

  • Welcome to our site! Electro Tech is an online community (with over 170,000 members) who enjoy talking about and building electronic circuits, projects and gadgets. To participate you need to register. Registration is free. Click here to register now.

computer interfaced based mechatronics

Status
Not open for further replies.

OtaromECE

New Member
is there someone here that can give me an idea on building my first mechatronics project?? i really need help guys...:)
 
Hi,
you gotta give more than that. Computer interfaced? Wireless, or physically connected to the PC? What kind of mechanism are you building? using which actuators?

Cheers.
 
thanks bro... actually i am required to interface a mechatronic system via parallel port.. honestly bro i dont have any idea of what to do.. i know eletronics well but i dont know programing.. thanks bro
 
Read up on how ports are addressed and used on a PC. They all have address, including the parallel port. This page leads to lots of tutorials:
PC Parallel port and Serial port interfacing related links: ElectroSofts.com

Basically, you have 8 data bits and four control lines. The early ports did only output on the data bits. Later boards were bidirectional. These are (IIRC) EPP and ECP mode ready. You have to use the control panel sometimes to set these cards accordingly. Some BIOS let you set them up this way. And that's all I remember. You'll probably have to use one or two control bits for handshaking, that is, let the parallel prt and the device it's talking to control when to send/recieve data. You'll also have to figure how to use a single data bit to act like a serial port, unless you want to use an entire processor port to send and receive data to and from the PC a byte at a time. This is the fastest and easiest way to do this.
Have fun with your project.
kenjj
 
thanks kenji.. it really helps.. i have a favor to ask kenji??/ do you have programs that can drive a dc motor via parallel ports or even serial ports?? i really need help here cause im just a newbie here.. hoping for kindness
 
if you want something more rugged but quite simple you can look at this page : UBW (USB Bit Whacker) Project
This project describes the interface between external devices and PC using a USB-connected PIC. The schematics, firmware, and so on are all at the page. You'll take some time to read through the page which is pretty juggled up but you'll get to it eventually, God-willing.

Cheers.
 
You changed from "parallel port project" to "parallel or serial port".
OK, you have to nail this down some. What _EXACTLY_ are looking to do here? Mechatronics is a very wide category. Obviously you have to (want to?) use a PC in the project. Is this a school project? Personal?
When you program it, you have to decide if it's standalone (independent of the PC) or works with another computer.

You could literally have the PC's parallel port drive transistors or a driver chip like the ULN2803 to control DC motors (or servos or steppers), thus eliminating the need for an extra microcontroller. You can do this in Visual BASIC, or any number of BASICs, old and new.

If the PC works with a microcontroller, then you must first program the MCU with the PC. This is after you select the MCU model to use. That determines which compiler you write the MCU's program in and, in most cases, which programming method you use: low-voltage-versus high-voltage, supported models of device programmers, onboard vs offboard... the list of considerations is long.

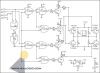
There is a motor driver board available that does a lot with motors of all kinds:
**broken link removed**
You name it, it drives it. All the way up to 9 Amps per channel, if needed! Cost is $25. You have to buy a small USB programmer dongle, which is another $15, so $40 total. The programmer can be used for serial comms after programming is finished. The page above can take you to demo code that controls several kinds of motors. It has servo headers on board that can be used with offboard sensors. Get the data sheet and read up on it.
It has a BASIC that is free for the download. It's quite powerful, and real easy to write programs in.

So, get back to us with what you want to do.
kenjj
 
thanks kjennejohn, actually it is a school project, i would prefer to do of what you said about using parallel port drive transistor to control a dc motor with visual basic program. i would really appreciate if you can share some of your stuffs related to my project for me to based on??.. it will be a big help for me.
 
I supply a simple schematic. Get a pinout diagram for a typical parallel port to follow along.

This circuit as drawn controls one motor and has one input, the switch.
The ULN2803 is an 8-channel driver chip. It can supply up to 500 mA per output, but not all eight at once for very long as the chip would overheat and burn up. I am using the eight data lines out of the parallel port to control these driver pins. A high at the input pin produces a low out the output pin. A low to the motor starts it running. This particular motor is connected to a +12V supply specifically meant just for the motor. I don't think you should use the PC's +12V, but you can give it a try. I have a 100uF/16V electrolytic capacitor in this 12V motor power supply. I can't say how big this capacitor should be in the final design. Start with one motor and this cap size. If it works OK to start the motor smoothly, consider placing a cap in the circuit that is 100uF times the number of motors you want to use. Thus, if you plan to use four motors, that is four times 100uF, or a 400uF or larger capacitor. Install this capacitor right at the connector J2, across Vin and GND. You are supplying a burst of current to the ULN2803 to power up the motor when you switch the output pin on. Some experimentation is called for. One of the real pluses of this chip is the fact that it has the backlash diodes built into it. These diodes are needed for motors or relays. These devices produce a huge back voltage when power is removed. These diodes are usually added seperately across the motor or relay to redirect this back EMF back into the device itself, thus preventing damage to the drive transistor itself. This is why you need to connect the 12V to the Vin connection of J2. It must see the motor supply's positive voltage.
The grounds of the PC and motor supply must be connected in common at J2.

Pin 1 and pin 11 allows you to have a control input of some kind. Pin 1 (an output) of the DB25 connector of the parallel port is usually pulled high as a rule. We are using this 5V to make the resistor R1 (10 KOhm) a pullup resistor. This keeps pin 11 (an input) high until the switch is pressed close, which makes pin 11 go low. Your software must watch this switch and wait for this to happen, then go off and do something when it does. This switch could be off this circuit board. Just bring pin 11 out to a screw head terminal or pin that you can wire a remote switch or sensor to. Perhaps a limit switch to keep the motor from going over limits? Or an emergency kill switch.

That is it in a nut shell.
Have a nice project.
kenjj
 

Attachments

  • Parallel Port Motor Control Ckt.PNG
    Parallel Port Motor Control Ckt.PNG
    33.8 KB · Views: 776
thanks, the circuit that you gave me is very practical and easy to follow. i have a question, is it possible for me to interface a 5A-hbridge motor control via parallel port. if its possible. can you teach me how?? thanks a lot bro...
 
Last edited:
Basically I just Googled using "5A Half Bridge" and found this right off:
**broken link removed**

I pasted the schematic from the article here so I could discuss it.
You'll see the four "W" connections on the left top. W1 and W2 will be connected to D0 (W1) and D1 (W2) outputs of the parallel port. The W3 and W4 are power inputs. The article has a chart showing the logic levels ("0" and "1", low and high) to be applied and how to use them to control the motor's direction, and brake it. If you plan to use a seperate 12V supply from the PC's 12V, be sure to connect its ground and the PC's ground to W4.

Notice the 7805 regulator "floating" at the bottom. This regulates the 12V in at W3 down to 5V for the logic ICs. It doesn't show the capacitors you need at both the input and output of the regulator. You don't have much circuitry so you can use two 1uF to 4.7uF (say, 16 WVDC) electrolytic capacitors, at both the input and output pins. That, and a 0.01uF ceramic or poly cap at both the input and output.

So, read the article, build the circuit, and have a nice project.
kenjj
 

Attachments

  • 5A Half Bridge Schem.PNG
    5A Half Bridge Schem.PNG
    109.4 KB · Views: 410
thanks a lot master,.. i already read the article of the 5A h-bridge motor controller., i think i can easily construct the circuit that you gave me master. but my problem is the actual program that would give the needed pulse to the h-bridge via parallel port.. i know a little bit of visual basic master.. hoping for your kindness master kjennejohn...
 
Can't help you. Programming PCs is not my thing. Try Googling on "parallel port control" and look for VB, QBASIC or Liberty BASIC articles to use for reference. All you're doing is setting the D0 and D1 bits of the data out register, and that's just an address.
Hey, it's YOUR class project! Apply yourself! Avanti!
Ciao!
kenjj

PS, almost forgot, be sure to heat sink those driver transistors (Q5 to Q8) connected to the motor.
 
Last edited:
is there someone that can give me programing codes for my parallel port interfaced 5A H-bridge motor controller.?? badly needed masters
 
Status
Not open for further replies.

Latest threads

New Articles From Microcontroller Tips

Back
Top