Continue to Site

Welcome to our site!

Electro Tech is an online community (with over 170,000 members) who enjoy talking about and building electronic circuits, projects and gadgets. To participate you need to register. Registration is free. Click here to register now.

  • Welcome to our site! Electro Tech is an online community (with over 170,000 members) who enjoy talking about and building electronic circuits, projects and gadgets. To participate you need to register. Registration is free. Click here to register now.

xmas lights driver

Status
Not open for further replies.

Dr_Doggy

Well-Known Member
remember the good old days when things were held together by screws

well I got this controller for my xmas lights that has 5 twinkle settings, I enjoy the solid color settings to light my kitchen, but recently it has been switching modes on its own, i am suspecting a faulty button or capacitor, but i cant get it open. I peeled all the stickers off but no screws, I have tried melting around the seal to loosen it up but not getting it to budge either. My next plan is to go at it with hammer and screwdriver but worried that i will damage the circuits so plan b is cutting open with dremmel.
Is there anything else i can try before this last resort?

I'd replace if i could but there are 2 pins on output which reveals it is using 30v ac transients to drive the 2 separate strings of lights.
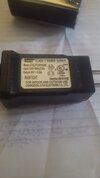
20220212_102230.jpg 20220212_102253.jpg

any ideas? since a fail here will cost me 100$ for new lights.
 
My normal method for opening such things is a normal cutlery knife (as in knife and fork), that has a smooth and not particularly sharp edge.

Put the edge in the joint and tap the back of the blade with eg. a screwdriver handle.
Keep working around the joint and progressively increasing the force until something gives...

Often, the seam will start to split apart at the original joint; otherwise the plastic can crack - but if you have no other option, it's worth a try!
 
ya, the glue was just too strong , so its been sawed off, and sadly its not the button, based on the issue ima assume that the caps on the right are the power circuits, so im going to replace the first 3 starting from the left,
but both the blue ones say 102, i forget the details but doesnt 102 mean 1000pf? I am skeptical since cy1 is significantly thicker than the other. so i thought i should double check this.?


20220213_112606.jpg
 
The bigger one is labelled CY1 - I'd think that means it is a "Class Y" safety-rated suppression capacitor, rather than a conventional cap like the other blue one. The double capacitor symbol also implies it's something out of the ordinary.

That is unlikely to be a cause of any problem, so probably best left in place.
 
Yes, the blue capacitors are almost certainly not the problem - if they do ever fail they would be visibly damaged, either cracked or burnt up. The electrolytics don't 'look' to be faulty either - although they could still be faulty with no visible signs, that's what ESR meters are for :D

As for splitting the case apart - I've done hundreds over many, many years - as they are glued together, I've found the best way is to gently saw round the join with a junior hacksaw. You could use a Dremel and cutting wheel, but you've got more chance of going too deep and damaging something. Epoxy the case back together afterwards.
 
well , i know with cell phone, your suppose to heat a magic bag for it .. or throw the phone in the oven or something like that.
I could have tried that , also not enough gap for the screwdriver today, and after seeing it , there was alot of waterproof glue to get around, anyway , Dremel today.

glad to hear about the blue ones, the rest i just so happen to have in the junk box.

but i think this one is going to finish off with duct tape, just so its easier to reopen later
A cell phone is intended to be able to take apart (with some difficulty), the PSU's aren't and the glue is solvent based so heating it won't help.

As I mentioned, I've done hundreds over the years, and carefully sawing round seems the best option. I tend to use a junior hacksaw rather than a Dremel, as it allows you to make a nice straight cut along each of the four sides.
 
Status
Not open for further replies.

Latest threads

New Articles From Microcontroller Tips

Back
Top