Continue to Site

Welcome to our site!

Electro Tech is an online community (with over 170,000 members) who enjoy talking about and building electronic circuits, projects and gadgets. To participate you need to register. Registration is free. Click here to register now.

  • Welcome to our site! Electro Tech is an online community (with over 170,000 members) who enjoy talking about and building electronic circuits, projects and gadgets. To participate you need to register. Registration is free. Click here to register now.

When resistors limit current/voltage.

Status
Not open for further replies.

Taymo

New Member
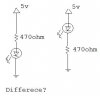
This has always kinda bugged me. Sometimes books/online tutos ect... will say "Use a blah resistor to limit the voltage" and then say "Use a blah resistor to limit the current". I was wondering when you are limiting the volltage with a resistor and when you are limiting current. I believe you do both at the same time but can anyone clarify for a beginner?
 
Yes you are right to think that.

Basically resistors reduce the flow of current and due to ohms law will therefore drop a certain voltage across that resistor.


Use the old water flow analogy if it helps.

Water flowing through a pipe is the same as current through a resistor.

hope it helps, i am sure you will get lots of replies from the likes of nigel and audio with a more technical answer

andy
 
Thanks that clarifies it up pretty good. I would like a more technical answer and andother one:

What is the difference between putting a resistor in front or behind the component. In front meaning POWERSOURCE->Resistor->Component->Ground.
Behind meaning POWERSOURCE->Component->Resistor->Ground.

And is there a better way to word that! :p
 
Taymo said:
Thanks that clarifies it up pretty good. I would like a more technical answer and andother one:

What is the difference between putting a resistor in front or behind the component. In front meaning POWERSOURCE->Resistor->Component->Ground.
Behind meaning POWERSOURCE->Component->Resistor->Ground.

And is there a better way to word that! :p

If it's ONLY those two components?, with no other connections?, and the unknown one only has two connections?, then it makes no difference.

But you would be better drawing it than trying to explain it.
 
In this setup will there be any different voltage/current to the LED? Also how could you decrease voltage but keep the current the same or decrease the current and keep the voltage the same? Or would this never need to happen?
 

Attachments

  • yea.jpg
    yea.jpg
    9 KB · Views: 758
with led's there is no difference.
 
here is one difference (in the case of LEDs); although it is not an electrical reason, but a thermal reason.

resistors should be placed on the anode lead of the LED (the high side) to keep heat from the resistor from migrating into the junction of the LED. the anode lead is joined to the junction by a very thin bond wire, in comparison, the cathode lead is directly connected to the substrate / die-cup.

this really only applies when you're designing a printed circuit board and wish to cover all your bases in terms of thermal design.

reference: Lumileds "Recommended Design Practices for Proper Thermal Management"
 
Thanks for the info. And thanks for the tip justDIY. I will apply that in my design from now on.
 
justDIY said:
There is one difference (in the case of LEDs); although it is not an electrical reason, but a thermal reason.

resistors should be placed on the anode lead of the LED (the high side) to keep heat from the resistor from migrating into the junction of the LED.
Very good. :lol: :lol:
 
justDIY said:
here is one difference (in the case of LEDs); although it is not an electrical reason, but a thermal reason.

resistors should be placed on the anode lead of the LED (the high side) to keep heat from the resistor from migrating into the junction of the LED. the anode lead is joined to the junction by a very thin bond wire, in comparison, the cathode lead is directly connected to the substrate / die-cup.

this really only applies when you're designing a printed circuit board and wish to cover all your bases in terms of thermal design.

reference: Lumileds "Recommended Design Practices for Proper Thermal Management"
Is it "very good"?
Could there maybe be a slight mix-up here?
Cheers,
Grant
 
Grant Fleming said:
justDIY said:
here is one difference (in the case of LEDs); although it is not an electrical reason, but a thermal reason.

resistors should be placed on the anode lead of the LED (the high side) to keep heat from the resistor from migrating into the junction of the LED. the anode lead is joined to the junction by a very thin bond wire, in comparison, the cathode lead is directly connected to the substrate / die-cup.

this really only applies when you're designing a printed circuit board and wish to cover all your bases in terms of thermal design.

reference: Lumileds "Recommended Design Practices for Proper Thermal Management"
Is it "very good"?
Could there maybe be a slight mix-up here?

Strikes me as mostly a complete waste of time?, certainly in 99.99...% of cases - however, IF you are generating a LOT of heat in the resistor, IF you are pushing the LED right to it's limits, IF the PCB is badly designed to put the resistor close to the LED, then it 'might' be worth doing?.

However, better design in the first place would seem to be the order of the day?.

Also, bear in mind, this isn't for standard LED's, but for the stupidly bright ones that probably won't have a long life anyway?.
 
apparently the engineering team at Phillips-Lumileds thought it important enough to write about, and they're not alone ... Nichia, Lamina, Cree, HP all have similar documents

if your resistor is dissipating 150mw ((5v - 2v) / 0.05a), why would you want that heat conducted into the LED junction, which is already having to deal with a dissipation of 100 mw (2 Vf * 0.05 If)... if your design calls for ten resistors, each dissipating 100mw, that is an extra watt of heat that has to go somewhere... designing your board so that the heat is channeled elsewhere instead of into the junction of heat-sensitive LEDs makes "very good" sense to me.
 
Tamyo, Those two circuits that you have drawn have the exact same functionality.

You could even swap the pins of the resistor if you want, and there would still be no difference.

To start, you can say that the 5V source is delivering 10.6mA of current to the LED through the resistor.

Use ohms law: Current = voltage / resistance
 
It seems like the stupidly bright LEDs are already phasing out stupidly inefficient incandescent bulbs in many applications - its no surprise that thermal considerations are important with them as they are with any component.

I dont see any "slight mix up" in DIY's post.... anode - bond wire: cathode - die cup.
 
Status
Not open for further replies.

Latest threads

Back
Top