Continue to Site

Welcome to our site!

Electro Tech is an online community (with over 170,000 members) who enjoy talking about and building electronic circuits, projects and gadgets. To participate you need to register. Registration is free. Click here to register now.

  • Welcome to our site! Electro Tech is an online community (with over 170,000 members) who enjoy talking about and building electronic circuits, projects and gadgets. To participate you need to register. Registration is free. Click here to register now.

UBW (USB Bit Whacker)

Status
Not open for further replies.

Arkham00

Member
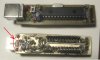
I've seen the famous UBW project (**broken link removed**), a simple development environment for 18F PICs. The site has 5 different versions of the board/schematic with an easy-to-use 28 pin DIP package.

Do you know if (and where) it's possible to buy just the PCBs of some of the 5 versions? The only way I know is to buy a complete kit, assembled or not, from SparkFun (here).

I'd like to build some boards but most of the board revisions need double face PCB with holes metallization ... to complex for DIY.
 
Thank you, 3V0. You are very kind and I'll contact you directly to arrange the thing.
But ... don't you really know anyone who builds and sells boards (maybe on eBay or similar) for this interesting project apart from the sparkfun kit?
Did you build all your UBWs "by hand" in single side?
 
I have only built ones that had application specific changes.

I enjoy this sort of thing and so making this for you is not a big deal.

This is a rough layout. The red top layer is to be replaced with jumpes. If you feel you can etch and build it I will clean it up and fix the clearances. There are a few lines between traces and one jumper under the PIC.

EDIT: uploaded better image.
 

Attachments

  • 28DIPA_1.pdf
    22.4 KB · Views: 278
Last edited:
Another option. The required PCB files can be downloaded from the UBW website. You could have a professional PCB board house make them for you.

I would be happy to finish the SS layout if you wish (no charge :) ) if you want to etch them yourself.

3v0
 
Thank you, 3V0. I'd be glad to try etching your SS board, when you'll finish it.
I never tried toner transfer technique but this is the right moment to try it :).

Have a nice 2009.
 
Agian if you are etching this board to save money you would be better off flipping burgers for a week. It would be faster and in the end you would have a few dollars left over. The right reason for doing this is because you want to learn to do toner transfer. :)

Three files are attached.
The .zip contains Eagle files. Only the .brd file is modifed, the rest are as Brian provided them.
28DIPA_SS.pdf shows the layers in color, jumpers in red
28DIPA_SS_PRINT_ME.pdf is the actual image you need to print if you do not use Eagle.

I increased the size of pads and spacings to make it easy to drill and solder. The pads on the USB jack are close together. After etching check to be sure they have not been joined. Note that I have not constructed a UBW from this exact layout but the schematic is unchanged and there are no unrouted wires etc so it should be OK. :) (cover my butt)

You are in for a bit of an adventure. Feel free to ask questions.

3v0
 

Attachments

  • 28DIPA_SS_PRINT_ME.pdf
    21.3 KB · Views: 222
  • 28DIPA_SS.pdf
    37.1 KB · Views: 236
  • 28DIPA_SS.zip
    23.1 KB · Views: 146
Last edited:
Sounds very interesting.

3V0 is very kindly sharing his work.

I want to know if Arkham00 has built one and if there are any change. I am about to build one, with a PIC18F2450 (it will work with this pic, right?),

A BIG thank you!
 
Hi Nibble,
I got my first batch of 5 circuits a couple of days ago and I'll mount and test them in the next few days. I'll let you know.
Thanks again to 3v0!
 
At last!

Hi 3v0.
Here is the UBW done with your PCB (as you can see).
It's working perfectly.

Thank you again.

ubw-3v0-jpg.26307
 

Attachments

  • UBW-3v0.jpg
    UBW-3v0.jpg
    56 KB · Views: 551
Status
Not open for further replies.

Latest threads

New Articles From Microcontroller Tips

Back
Top