Continue to Site

Welcome to our site!

Electro Tech is an online community (with over 170,000 members) who enjoy talking about and building electronic circuits, projects and gadgets. To participate you need to register. Registration is free. Click here to register now.

  • Welcome to our site! Electro Tech is an online community (with over 170,000 members) who enjoy talking about and building electronic circuits, projects and gadgets. To participate you need to register. Registration is free. Click here to register now.

SOIC usage help

Status
Not open for further replies.

Ashford

New Member
hey all,
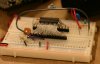
I've just purchased an IC, online, however, it is smaller than I expected and I was actually expecting a DIP package, turns out its actually a SOIC package. Because of this I can't start my project since I've never worked with a SOIC IC, in other words I have no idea how to solder this thing to the circuit. The problem is not that it doesn't fit or anything, in fact I haven't started assembling anything as yet, the problem is that I don't know how to solder it to the circuit, and I don't want to "try" anything as yet, because if I damage this I don't know where I'm going to get a replacement. I know SOICs are usually soldered to circuits by robots but i really want to get this thing to work so if anyone could tell me how to solder this IC to the circuit myself I would realy appreciate it.
P.S. All I have is normal solder and a soldering gun(no other sophisticated equipment) if thats relevant
 
Does the part exist in DIP? Which part is it?
You can buy SOIC to DIP adapter PCBs. Google Schmartboards.
 
Last edited:
If you have a soldering gun you should go out and get a soldering iron. Soldering guns don't have good tips, are too high heat, and present shock hazards to electronic components. Assuming you have a PCB with the proper footprint on it, you have two approaches, neither of which is hard:

Use a fine tipped iron with fine solder and simply solder the pins one by one.
-You don't have three hands to hold the IC in alignment as you bring a soldering iron to heat up the pin and then bring in another hand to apply solder so you have to tack the IC into place first using just two hands. One to hold the IC in place and another to apply heat and solder.
-You first tack the IC down to hold itself in place as you solder the rest of the pins. You just dab a tiny bead of solder on your iron tip and apply it directly to two diagonally-opposite corner pins. Between each of these pins check the alignment and correct if necessary. THe easiest time to correct is when only one pin has been tacked down though it's doable if you're late catching the misalignment and have two pins tacking the IC down. It's really hard after 3 pins have been soldered. Don't apply side forces until the second pin has been tacked down or you can just twist the first tacked pin maybe ripping it off and/or misaligning the IC. Tacking down the second pin is to holds it in alignment without needing to still use tweezers to hold the IC in place (I prefer to actually put slight pressure on the top of the package rather than actually hold it between the tweezers tips).
-From here on just solder all the pins normally using the iron to pin, then solder to pin method. It is recommended to sequentually spread out the pins you solder to spread heat so one part of the IC doesn not get overheated.
-After you have solder enough pins around the IC to properly distribute the forces to hold it in place, go back to the first two "tack pins" and solder them correctly since you just dabbed them with a solder bead on the tip of the iron the first time around. DO NOT try to do this until you have at least 3 or 4 other pins soldered that are SPREAD around the IC to properly hold it in place, because the IC will be moved out of alignment when the solder is melted on the initial two tack pins.
**broken link removed**

Drag Solder by using liquid flux and a not necessarily tiny iron tip
**broken link removed**
What the video does't show is the same tack procedure on the two pins before you apply the liquid flux and drag solder. Make sure to start the drag from the proper direction so that the tack pins on either side is the last to be resoldered to prevent misalignments due to solder-remelt. You can use special tips with a little indent in them, but a regular tip works just fine and the tip can actually be several times larger than the pin size and it will work just fine. The trick is to not make physical contact between tip and pin, but just let the bead of solder float over the pins. Too much solder in the bead will cause bridging and too little will not make a good joint. It's not too hard to figure out though err on the side of a little less if you're not sure since you can always make another drag run at pins lacking solder which is easier than removing solder. And YOU NEED plenty of flux. FLux is the key.
**broken link removed**

ANd in case you haven't figured it out, don't try using a vacuum to remove solder on SMD parts or fix bridging. You need solder braid.
 
Last edited:
ok, the soldering method sound good, especially the drag soldering method. It seems faster than the other methods. Not that it's really necessary, but how come the solder doesn't form solder bridges when you use the drag soldering method?
 
Ribbon cable has the right spacing for deadbugging SOIC. I did this many years ago.
 

Attachments

  • mid-air-smd.jpg
    mid-air-smd.jpg
    70.3 KB · Views: 159
Status
Not open for further replies.

New Articles From Microcontroller Tips

Back
Top