Electro Tech is an online community (with over 170,000 members) who enjoy talking about and building electronic circuits, projects and gadgets. To participate you need to register. Registration is free. Click here to register now.
Welcome to our site! Electro Tech is an online community (with over 170,000 members) who enjoy talking about and building electronic circuits, projects and gadgets. To participate you need to register. Registration is free. Click here to register now.
I dont know how to manually route wires that switch layers with Via's.
When i add a via and try to route to it, the software does not allow the alternate layers to meet, insead it likes to stick to which ever layer i started with,
You need to name the via the same as the net name you want it to be connected to.
It's much easier to switch sides while you are routing and a via will be dropped automatically. You can switch sides while you are routing by selecting the other layer from the drop box at the top without dropping your route, or you can simply press the scroll wheel button on your mouse while you are routing and the route will swap to the other side.
To rename the via to match the net name of the trace...select & right click the via and use the NAME option to rename the net. Some times when I am doing a pour for a ground plane I need to 'add' a trace or two to improve the ground grid. By default I set the DRC to force a 16 mil clearance between the fill and traces/pads which causes the fill to leave some gaps sometimes. Adding traces and connecting them to the ground plane requires the rgt-click 'NAME' the net procedure.
vias have no name! They are just there to connect traces while you route them.
When switching from bottom to top layer and vice versa just don't drop the trace.
Instead switch layers and as soon as it is changed the via will automatically be inserted by Eagle.
Placing a via on two traces - one on the bottom layer and the other one on the top layer you might not hit their "meeting point".
Using Eagle generated vias has the advantage of fast routing. If you ripup a trace the vias will be gone as well.
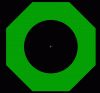
To avoid the ripup of the entire trace you might create solder pads as vias, just a "dot shaped" pin as a symbol. From the symbol create a "device" by connecting it properly (using a package you'll have to design as a single solder pad, defining pad diameter and drill size, e.g. diameter 1.6mm, shape octagon, drill size 0.8mm) Enable the show (pin, pad) function and insert the "via" at any place needed in the schematic making the pins visible. (You need two vias for one layer change and back!)
The via will then be a device which only can be removed by removing the associated pin in the schematic.
You need to name the via the same as the net name you want it to be connected to.
It's much easier to switch sides while you are routing and a via will be dropped automatically. You can switch sides while you are routing by selecting the other layer from the drop box at the top without dropping your route, or you can simply press the scroll wheel button on your mouse while you are routing and the route will swap to the other side.
Connecting two traces on different layers the via will never have a name. Using the "Show" function you will see if the net name has changed (e.g. from VCC to N$1) which will be the case if you place a via on two different traces, not having hit the exact coordinate.
Renaming the false net into the original one you'll see an air wire, very often just a dot in the center of the via, indicating that the traces are not connected properly. Use manual routing to connect traces properly. Eagle also generates a sound signal when both traces are connected.
It works exactly like I said. Select draw->via and drop a via on the board in an empty spot and it will be given a net name of its own, like what the original poster did. Name it the same as your net name and you can then use it to jump sides with that net.
I don't think anyone actually uses it this way, but that's the way it works. If you drop it on a trace or drop it while tracing then it will take the name of the trace.
It works exactly like I said. Select draw->via and drop a via on the board in an empty spot and it will be given a net name of its own, like what the original poster did. Name it the same as your net name and you can then use it to jump sides with that net.
A via can never have a net name, e.g. N$1. You name the net! That's all.
Continuing routing on a different layer after you dropped the via might result in two different net names, not logically being connected (although they might look connected when printing the PCB layout).
After renaming the remainder of the trace the entire trace (including the via) will be highlighted. "Naming" the via is nothing else than naming the net it should connect to.
Try it yourself: Ripup a double layer trace and place a via somewhere on the layout. The via will be in the middle of nowhere not being connected to any net. Click on the via and give it a name. If it's not the same as the net name you want it to connect to "ratsnest" has no result. If it has the net name (being part of the net) you want it to connect to "ratsnest" puts an air wire from the part pin to the via.
Again, only nets have names starting with "N$" followed by a number (automatically generated). A via is neither a net nor a component and therefor can't have a name.
Again, only nets have names starting with "N$" followed by a number (automatically generated). A via is neither a net nor a component and therefor can't have a name.
Ah, I see. This is simply a semantics thing. Your issue is with the term naming, when it's actually being assigned a net name. Then you go and use the same semantic you are complaining about.
I'm using the term naming, because that's the command name. Edit->Name. Just like you do in your response.
Click on the via and give it a name. If it's not the same as the net name you want it to connect to "ratsnest" has no result. If it has the net name (being part of the net) you want it to connect to "ratsnest" puts an air wire from the part pin to the via.
This site uses cookies to help personalise content, tailor your experience and to keep you logged in if you register.
By continuing to use this site, you are consenting to our use of cookies.