Continue to Site

Welcome to our site!

Electro Tech is an online community (with over 170,000 members) who enjoy talking about and building electronic circuits, projects and gadgets. To participate you need to register. Registration is free. Click here to register now.

  • Welcome to our site! Electro Tech is an online community (with over 170,000 members) who enjoy talking about and building electronic circuits, projects and gadgets. To participate you need to register. Registration is free. Click here to register now.

Need help with a Heating Element and LCD display

Status
Not open for further replies.
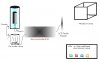
I am completely new to circutry and am trying to find out what I need to know to connect this **broken link removed** to a LCD display like this one . I plan on using it for a box size tobacco vaporiser and need it to be able to have variable/controlled heat settings. I would appreciate any help on this. To be specific, I need to know the following:

-What type of modules would be best for this type of project?
-What type of soldering or circutry would I need to connect the necessary parts?
-I would also like to have lights and a small PC fan connected to the LCD controls; could anyone tell me how to go about doing that as well?
 
What temperature range will the sensor be subject to? How close do you need to hold the temperature? How much do you want so spend? (The reason I ask is because there are lots of ready made solutions out there).
 
I need the element to controlled by a minimum of 50 degrees at a time and hold that temperature as long as long as the LCD is set to it. It would be best if I could control it by one degree at a time; if you could send me a link to some of the ready made solutions, I'd really appreciate it.
 
I need the element to controlled by a minimum of 50 degrees at a time and hold that temperature as long as long as the LCD is set to it. It would be best if I could control it by one degree at a time; if you could send me a link to some of the ready made solutions, I'd really appreciate it.

First, do you have a budget in mind?

What you are looking to do isn't all that difficult. First thing would be to find a temperature sensor that will work within your temperature range desired. Could be a PRT, maybe a thermocouple. Regardless of chosen sensor they all have an uncertainty. The sensor would connect to your controller. You can build or buy the controller. How the controller responds and controls will effect the temperature uncertainty too. Additionally you are heating a box (that is my take) like a small oven. How well that oven maintains temperature uniformity figures into things as to uncertainty. The controller itself may use on/off control or maybe PID (Proportional Integral Derivative) control. The more accurate you want things the more expensive the project becomes.

Case in point a cheap household oven controller using a capillary tube as a sensor will typically control abn over + / - 25 degrees F. of set point. Not very good but fine for a roast beef. A good PID controller can hold +/- 2 degrees with a good calibrated thermocouple and tuning. A good controller can also provide an analog output of the actual temperature. Depends on what you want to do.

If you choose to go home brew and the PIC route you will need to get the parts and write a programn for your PIC.

I can suggest commercially available solutions that would meet your accuracy (or close to it) but they aren't cheap. You also need to derive a final wattage for the element?

No single link, that I know of, will provide a simple turn key operation.

Ron
 
Last edited:
need more info but here

are two links that use a pic w/ code. a simple relay could be used to turn the heating element off/on.
temperature range is perhaps a concern as the sensor used may not be hight enought in range?
Swordfish Tutorial: DS18B20 Actual Use | Swordfish Compiler Code Examples

Swordfish Program - DS18B20 Temperature Sensor | Swordfish Compiler Code Examples
am sure members here could program a pic for you.
as for display and sensor,, SURE ELECTRONICS on ebay. if purchasing be sure to get the enclosed sensor all wired up.
 
I've decided to use these parts:

**broken link removed**Touch Screen

I need to know what other parts I will need to systematically control the temperature and lighting as well as a fan. Any links and descriptions to the parts would be greatly appreciated.

This is what I have in mind as to what needs to be set up; the LCD screen needs to be hooked up to the microcontroller (the website offers another part to it called a 'carrier board', is that the controller or part that I program to specifically function the screen?). The microcontroller needs to be able to read the touch screen's input and output it to a temperature controller/power supply for the heating element. The screen also needs to be coded to turn 4 LEDS on or off interchangebly as well as a fan. Thanks in advance for any further help, I really appreciate all that you guys have done so far.

EDIT: I have come up with a rough design of the end product. Here it is:

EDIT EDIT: I came across this video and think I may use this method of heating instead of ceramics. Do I need any special items such as a heat sink or high power LED to reach vaporising temperatures? I have chosen this method to integrate my lighting and efficient vaporsing method into one while promoting the intended nostalgic look and feel of the 'Glow Stick' (all rights reserved)

https://www.youtube.com/watch?v=d8Ogjl7zeCY&playnext=1&list=PLD641DB92A5FAD433&index=6
 

Attachments

  • The Glow Stick.jpg
    The Glow Stick.jpg
    44.4 KB · Views: 192
Last edited:
Really cool update

Hey everyone. I'm back with an design update. I have decided to stick with the LED vaporising method and made up this video to try and get a better basis to work with.


So far, I know the LEDs will need to be attached to a heat sync in order to channel the photon energy. I would appreciate any links to information that will teach me how to program the previously listed touch screen with a microcontroller to turn the LEDs on and off. I am probably going to have 3 10w RGB-White LEDs that need to be turned on and off, as well as have their spectrum changed. Here are the bulbs I am looking at using.

Again, I really need some directive towards connecting my screen with a PIC and programming it to turn on the lights. As of right now, I only have my material list down.

Before all else THC vaporizes at about 392 degrees F. when in a powdered form. Most vaporizers I have managed to read about have a temperature range of about 266 degrees F. to 446 degrees F. I have no clue where you are going with this LED Photon Energy theory? I also have no clue how you plan to change the LED light spectrum. However, I don't see the use of LEDs as a viable solution to heat a small chamber to almost 400 degrees F. The model in your link looks good on the screen but at this point really doesn't do anything. I would suggest you rethink the entire heating element concept. I may well be wrong on this whole thing but I don't see it working well using heat generated from LEDs.

As to the programming and use of a PIC with a touch panel. These forums have a very good section dedicated to PICs and their programming.

Ron
 
Status
Not open for further replies.

New Articles From Microcontroller Tips

Back
Top