Continue to Site

Welcome to our site!

Electro Tech is an online community (with over 170,000 members) who enjoy talking about and building electronic circuits, projects and gadgets. To participate you need to register. Registration is free. Click here to register now.

  • Welcome to our site! Electro Tech is an online community (with over 170,000 members) who enjoy talking about and building electronic circuits, projects and gadgets. To participate you need to register. Registration is free. Click here to register now.

Electronic Load Tester

Status
Not open for further replies.
I don't see a schematic, but I suspect it is a push pull arrangement like this:

Here is a read on the way to do it. See the part under electronic load.

**broken link removed**
 

Attachments

  • linear amp.png
    linear amp.png
    91.2 KB · Views: 191
Last edited:
Nice read. It makes me feel better that I'm on the right path. I started another re-design, this time providing a separate op-amp/feedback for each MOSFET. I switched op-amps again to the LM224. It is a cheap quad chip that has a good range of power supply and a common mode that includes ground. They can be had for 18 to 25 cents each so I got a bunch of them.

I know I don't really need that 2nd op-amp in the feedback, but I want to keep the current sense resistance low and boost it with the op-amp. The side-benefit of that is that my current adjust pot range will not have to be some insignificant range of 0.0 to 100mV or something. The outputs are going to have to run at around 4-5 volts. I should be able to just brute-force my way around little offset currents and voltages, and keep the thermal drift of the chips under control. I'm counting on them being fast enough to handle the feedback loop ok.

I also ditched the 5V zener regulator for the fans, and power them from the +17V unregulated supply. Wha? Notice I wrote "fans" plural. I decided to use three fans since I have a whole box of tiny 5V fans. I'll use three in parallel to drop the 15 volts, and depending on the final unregulated DC value, I may adjust them down with a resistor. I thought I could use two of the fans to help cool the load resistors also, rather than just drop the 17 volts using more heat-generating resistors.

But the big news is that I tested the IRF820s on the bench, all four of them connected to the heatsink. I ran up to 2 amps thru the '820 and found that yes it does require about 4 up to 10 volts on the gate to really turn on.

More importantly I found that with 1.2 amps they only got to about 120 degrees F ( or 50C ). I intend to run them up to that amount of current each thru 4 transistors for 5 amps load. Next I drove them up to 2 amps each (they are DC rated for 4A). They were getting a bit hot but then I put the little fan on the heatsink and they settled in at 108 degrees F, comfortable to touch and safely below even 50 degrees C. I don't expect any trouble as long as I keep the MOSFETs at about 30% rated current and below 50C.

With most of my attention on those prima-donna transistors, I almost didn't notice my power resistors were starting to cook pretty good. That's when I decided I could use those extra 5V fans to cool the resistors also. I was 2X rating all the resistor wattage's, but I think I could save a bit of space and virtual $ by running them closer to 100% rating and keeping them in the breeze. Maybe I'll go to 1.5X rating on the load resistors, pushing them to 67%. Having never really played with fans much, I'm still amazed at how effective even small fans are at cooling heatsinks. Meanwhile all my older projects generally just cook these massive heatsinks with no airflow.

I'll post a new schematic after calculating all those currents and voltages again.
 
Mostly done with rev 1.6 but I think I want to lower the 33k on Rt to give me a bit higher ADJUST voltage, in case I want to drive the load a little harder than normal.
 
OK forget rev 1.6
here is rev 1.7
I fixed the gain problem on the op-amps (it wasn't enough), recalculated resistor watts and tweaked the control voltage range.
 
oops
 

Attachments

  • Electronic_Load_Tester_page1_r1p7.pdf
    29.9 KB · Views: 206
  • Electronic_Load_Tester_page2_r1p7.pdf
    26.8 KB · Views: 179
I did some digging about paralleling FETS and I found this explanation of Switching (Vertical) vs Linear (lateral) MOSFETS to be the most understandable.
**broken link removed**

Basically, it says that Vth has a neg. thermal coeff which outweighs the RDsOn PTC until a fairly high Drain current. Thus modern HEXFETS with low RdsOn values are bad for linear use without some kind of bias servo or thermistor compensation.
This is why HEXFETS can be used for switching high currents well as parallel devices since the PTC of the RDsOn takes priority at high currents.

Insofar as audio amps go, you're gonna want to use lateral FETS, not HEXFETs.
 
I did a bit of testing with parallel PFET HEXFETs using a pair of IRF5305 (60mohm RDSon) and a pair of FQP17P06 (120mohm RDSon) in a 36V linear load controller.

Without a heatsink and relatively low currents of < 500mA in the linear region I found that the temp difference with the 5305s to be upwards of 20C (one cool, one hot). With the FQP17P06 that reduced to about 5C indicating much better load sharing. Also the peak temps of the 17P06 were 10C cooler even though the RDSon is dbl that of the 5305. The 5305's had a Vth drop of about 2.5V due to the load imbalance. The gates were tied together.

In order to achieve reasonably slow linear mode control I had to use a 470uF cap with a 39K gate resistor. My particular app used RC filters to convert PWM to V which is used to drive the FETS. A smaller gate capacitor caused control loop oscillations. A 1M source/gate neg. FB resistor helped.

It's useful to common heatsink the FETS so that their temperatures are held close together to prevent Vth drift and load imbalances. A high RDsOn is better for linear mode, this leans towards PFETs rather than NFETS.

EDIT: That large Vth swing due to temperature may make HEXFETS useful for temp compensation duties in other circuits.
 
Last edited:
Thanks for that bit of info there Mosaic and ronv. My instinct was along the lines of "Wot? of course you can parallel MOSFETS", but that, of course, refers to the lateral FETs that you might find in audio amps. As Mosaic reminded me, it's that "turnover" point in the combined tempco that's crucial - you need that to be at a current you're happy for your FET to run at.
Latteral FETs are getting hard to come by as they've fallen out of favour for audio, although you could probably scavange a good few from scrap amps...
 
Today I built the circuit and tested it - one quarter of it. I wanted to test out the MOSFET with the feedback servo and see if it would regulate the load from about 0 to 1.25 Amps. All appeared to work OK, so I will now expand it to all four MOSFETs and that should get me up to 5 amps.

Here is a picture of the test. On the bottom the current meter shows 1A. It was actually 1.25 amp, and I have to zero the meter and tweak the shunt resistance to get that to read correctly. On top is the DMM set to show degrees F. The thermocouple is pressing against the heatsink tab. Here with 1.25 A flowing through it, it stayed below 90 F, I pushed it up to 2A, and it was just a bit over 100 - and that was without any fan blowing on it. With the AC meter I didn't read any AC on the MOSFET's source or gate. I'll scope it when I get the other three wired up.

As far as current control, the pot seemed to give me a good and linear range from 0 to 1.25A, but it wasn't through the full range of control. Upon closer inspection I found my "oops". The 0.25 ohm current sense resistor was mistakenly 0.1 ohms, so by not sensing the full actual current on the MOSFET, the op amp would "go to the rail" trying to turn on the MOSFET more, but it wasn't to be. That would happen at about 1/2 travel of the pot, and anything higher would not get me any more load current.
Load Circuit Test v900 S2000002.JPG


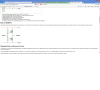
The 2nd picture shows the circuit built but not wired-up for testing, the 15V supply is on the lower edge of the board.
Load Circuit v600 S1990001.JPG


The 3rd picture shows the actual current the load circuit was handling. I trust the power supply reading much more than the new $5 surplus "ArcherKit" meter I got for the project.

Load Circuit Actual Current v300 S2000003.JPG


As for the discussion about MOSFETs, this particular MOSFET was primarily designed for switching although I don't know if it is vertical or horizontal or what...the spec sheet doesn't say.

At least it falls into the recommendation towards the end of the article that it should be higher voltage but not high current. Since the IRF840 is only rated for 4A (at 25*C), and at 100*C only rated for 2.5 Amps, I am running these a bit close to the DC current edge, but I hope to keep them running much cooler than 100*C. Of course, we will see...
 
Done! And working too! Thanks to those who provided feedback and suggestions for improvements!
Here are the latest schematics as built, which included a few more changes improvised while building to improve or simplify the build (I do that a lot.)

Here are a few pix of the finished product, assembled in a oak box:
Finished Load Tester v500 S2020016.JPG

First is the "Formal Portrait, then the front panel opened up, then the back door opened up. The FET loads are on the left of the circuit board mounted to the floor, with a small fan blowing right on the back of them. The two other fans are on the rear panel and blowing up across the load resistors.

Front Door v500 S2020008.JPG


Here is the back door opened up showing a better view of the load resistors and fans.
Back Door v500 S2020015.JPG


The next two show that at 5 volts and 5 amps, the temp of the heatsink holding the four MOSFETs stabilized at 119 degrees F.
I couldn't hit 120 degrees until I pushed it beyond 5 amps.

Full Load v500 S2030011.JPG


The last picture shows 3Amps at 20 volts, and how the temp remains in the 80 degree range because the resistors are taking a lot of the load.
High Voltages v500 S2030006.JPG
 

Attachments

  • Electronic_Load_Tester_page1_r1p8.pdf
    37.1 KB · Views: 162
  • Electronic_Load_Tester_page2_r1p8.pdf
    28.7 KB · Views: 167
Last edited:
Yes, it may seem that way, but you can't argue with the results. I had to push it beyond 5 amps (25 watts) just to get the thermometer to hit 120 degrees F. When I backed it off, it settled at 119.8 degrees - warm - but tolerable to the touch.

Also note the existence of the labeled part drawers in the top of the second picture. The part drawers are not installed in the box, but are seen through the wide 1" x 9" gap in the back. That's 9 square inches of ventilation! And with three fans pushing the air around - this machine does not make a good hand-warmer.

P.S. If you are into this so much that you want to read more about it (and more pix), see my blog here: https://angeliselectronics.blogspot.com/2014/11/pictures-ill-explain-later.html
 
2 Years later, a followup:
This machine has been working great for a while. It tests various power supplies both regulated and unregulated with little problem - until one fateful day.

Testing a variable regulator output from 1/2 to 1 amp made with a LM317 regulator, it showed some instability at moderate to heavy load currents. I had a hunch the feedback frequency of the load and the feedback frequency of the LM317 were similar and it started the output supply oscillating. I proved that by inserting a large inductor in the power line between the two and it went away. I don't know the inductance, it was a transformer secondary. It worked for testing but the transformer wasn't big enough to handle the current, it got pretty darn hot. Smaller inductors didn't seem to make a difference. To otherwise verify the load cell was the problem, I tested the regulated voltage sources with plain-old dummy resistors, and the outputs were clean and quiet.

I later tried to fix it by using 10X larger capacitors in the op-amp feedback, thinking it would slow down the reaction speed of the load regulators, but that didn't work very well. I didn't pursue it more since I got done the testing I wanted to test. If I encounter this again, I might add a heavy inductor that can handle a bunch of amperes in the machine.

P.S. I could change out the cheapie op amp with a faster chip, but since I'm not a fan of chip sockets that would be pretty difficult. If I make another version of this some time I will certainly try a faster chip - maybe use a chip socket.
 
Hi RD,

I haven't read all of this long thread- only the first ten or so posts so I am assuming that the circuit has not changed since then.

If you would like to discuss the frequency stability of the circuit just ask.

spec
 
Damn, 2 years!!! I've been meaning to build a version of this since this thread... Still on my todo list :)
 
Status
Not open for further replies.

New Articles From Microcontroller Tips

Back
Top