Continue to Site

Welcome to our site!

Electro Tech is an online community (with over 170,000 members) who enjoy talking about and building electronic circuits, projects and gadgets. To participate you need to register. Registration is free. Click here to register now.

  • Welcome to our site! Electro Tech is an online community (with over 170,000 members) who enjoy talking about and building electronic circuits, projects and gadgets. To participate you need to register. Registration is free. Click here to register now.

Decoding IR Control

Status
Not open for further replies.
OK Here is the new image of the protocol. All is well here. I have a working remote and receiver and it controls my box !

twcir-jpg.59573
 

Attachments

  • TWCIR.jpg
    TWCIR.jpg
    85.9 KB · Views: 619
Last edited:
So Atomsoft great work,
I am following you on this topic And I have some doubts
I am building on IR receiver with Rc5 protocol and I was looking fir the pseudo code and much more
I wanted to know mopre about your code and can you please tell me in short about this fucntion?
----> DecodeTWC();
I really wanted to know the logic behind the fucntion
thanks. :)
 
Thank you Les Jones,
I have been through this link before..I was looking for a C code for [RC5 IR receiver with Pic microcontroller_ specifically PIC12F1572] so that I can adapt with my code..
I have done my coding and just to make ot error less I am looking for one..
If you know some good links , I will be thank ful if you share those
Thanks again..
 
Hi Garry,
I have built a camera switching unit that is based on the code that was on the website in my link. It uses a PIC16F877 (I needed quite a lot of I/O pins) It is written in assembler so it is probably np help to you as you want the code in "C". (I may even have the original code from the website.) The unit displayed the received codes on a 4 digit display and used a PIC16F84.

Les.
 
Hello there guys,

Just to be clear, we dont actually have to be able to identify the remote code protocol in order to recreate it (make our own remote) unless it is very very complicated. Most remotes are not that complicated so all we have to do is look at the pattern and try to notice what is the same about it and what is different, then try to generate it. We also have to know the carrier frequency.

For example, if you look at the pic in the attachment you'll see a set of pulses made by an IR pin diode with a remote ponited at it and pressed ONE time, one button. What is not shown off tot he left is the complete start pulse, which is 8ms long.

If you look at the pattern carefully, you'll notice that there are only five different widths we have to take into account.
1. The beginning low time, which is around 4ms.
2. A 'high' time, which is always 0.5ms (hard to see in this particular shot though, you could set your scope to a shorter horizontal time to get that).
3. A 'low' time of about 0.5ms (also hard to see without zooming with the scope)
4. A 'low' time of about 1.5ms (also hard to see without zooming the scope).
5. The fifth is the 8ms off to the left which is not shown but you would see that too.

With the above information as well as the carrier frequency, we could recreate the signal without knowing what the actual protocol 'name' is. All we have to do is generate bursts of carrier frequency for each pulse, enough cycles to fill out the pulse width we are generating, and at the right time.
We know the times because the pulses appear in groups. Each group has high pulses that are always the same width, and low pulses that are always the same width, and the groups are always separated by 1.5ms low. Thus we can call this pattern a "21512914113111" pattern. That's all we need except we also know the carrier is say 38kHz and the start pulse is 8ms high and 4ms low. If we look at other keys we'll see the same basic setup just with different pulse groups.
The catch though is that different remotes use different repeat codes. These are the codes that are sent out just after the first set of pulses. This second set has a different pulse pattern and so we have to look at that and decode it also.
For one remote i have it just sends out the same code over and over again, but for another remote i have it sends the start pulse, low time, and then a single 0.5ms burst.

So it's really just about determining what changes in the patterns and what does not change, and you can create a remote for just about any device you have, even without knowing the specific protocol name or type.

Note in the picture the pin diode does not show the carrier frequency because i use a higher value resistor in parallel so that i can see the protocol only. Once you know the carrier you really only need to study the protocol burst patterns after that.
 

Attachments

  • Protocol_2017-01-13-1.jpg
    Protocol_2017-01-13-1.jpg
    69.8 KB · Views: 189
Last edited:
Hello :),
So
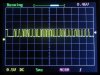
I am building an IR Receiver with PIC12F1572 with receiver module TSOP2438 My objective of this project is to receive a data by remote control and send it to PC via UART.. I have done the code and I am testing it I can send the normal value through the UART but Somewhereis wrong so that I can not receive the hex values regarding the commands of remote control Can anyone see my code and tell where I am goping wrong? Here is my code


void main(void)
{
OSCILLATOR_Initialize(); // 0x78 for Fosc = 16Mhz
PIN_MANAGER_Initialize(); //All port pins Digital and input
EUSART_Initialize();
INTCONbits.IOCIF = 0; // Interrupt on-change Flag
INTCONbits.PEIE = 1; //SEt Peripheral Interrupt
INTCONbits.GIE = 1; //Set Global Interrupt
//while(!OSCSTATbits.HFIOFS); //Check here or wait here to OSC stable/ 0.5% accuracy

TRISAbits.TRISA2 = 1; //Configure R1 as input

// uint16_t Input_buffer [20];

EUSART_Write(0x40); // 0x40 = @ some flag


while(1)
{
count = 0;
//while((IR_PIN)); //IR_PIN receives an IR signal its output pin goes from logic 1 to logic 0
//which causes the microcontroller to start reading the IR signal using the function. decode()
EUSART_Write(0x41);
//while(IR_PIN);

if(Decode()) //check if RC5 decoding- new data is arrived
{

EUSART_Write(0x42);

toggle_bit = bit_test(IR_Code, 11);
address = (IR_Code >> 6) & 0x1F;
command = IR_Code & 0x3F;

EUSART_Write(toggle_bit);
EUSART_Write(address);
EUSART_Write(command);

EUSART_Write(0x43);


}
}
}

/*----------*/
uint8_t Measure_space()
{
TMR0_Initialize();

while(IR_PIN && (count < 2000))
count = TMR0_ReadTimer(); //Read timer value and store it in count value
if((count > 1999) || (count < 700))
return 0; //0 = If width is out of range
if(count > 1200)
return 1; //1 = If width is long
else
return 2; //2 = If the width is short
}

uint8_t Decode()
{
uint8_t i = 0, check;
mid1:
check = Measure_Pulse();
if(check == 0)
return FALSE;
bit_set(IR_Code, 13 - i);
i++;

if(i > 13)
return TRUE;

if(check == 1)
goto mid0;
else
goto start1;

mid0:
check = Measure_space();
if((check == 0) && (i != 13))

return FALSE;

bit_clear(IR_Code, 13 - i);
i++;

if(i > 13) return TRUE;

if(check == 1)
goto mid1;
else
goto start0;

start1:
check = Measure_space();
if(check != 2)
return FALSE;
goto mid1;
start0:
check = Measure_Pulse();
if(check != 2)
return FALSE;
goto mid0;
}
 
Garry, you appear to be sending the values as binary. You need to convert to the ascci hex equivalent.

Mike.
 
Hi,

You should use 'code' tags as it makes your code easier to read and therefore makes it easier to help.
 
Status
Not open for further replies.

New Articles From Microcontroller Tips

Back
Top