Continue to Site

Welcome to our site!

Electro Tech is an online community (with over 170,000 members) who enjoy talking about and building electronic circuits, projects and gadgets. To participate you need to register. Registration is free. Click here to register now.

  • Welcome to our site! Electro Tech is an online community (with over 170,000 members) who enjoy talking about and building electronic circuits, projects and gadgets. To participate you need to register. Registration is free. Click here to register now.

Cutting phenolic PCB. Suggestions for square cuts?

Status
Not open for further replies.

fezder

Well-Known Member
Right. I've entered the world of making own pcb's.
The etching process isn't painful anymore so to say, but now, how to make repeatable square-shaped pcb's?
For some reason I don't have access to cnc or any fancy stuff yet. I tried basic scoring method, but that caused brittles and crack, no good.
Google didn't help that much as there Isn't any good value-quality ratio for hobbyist scale.
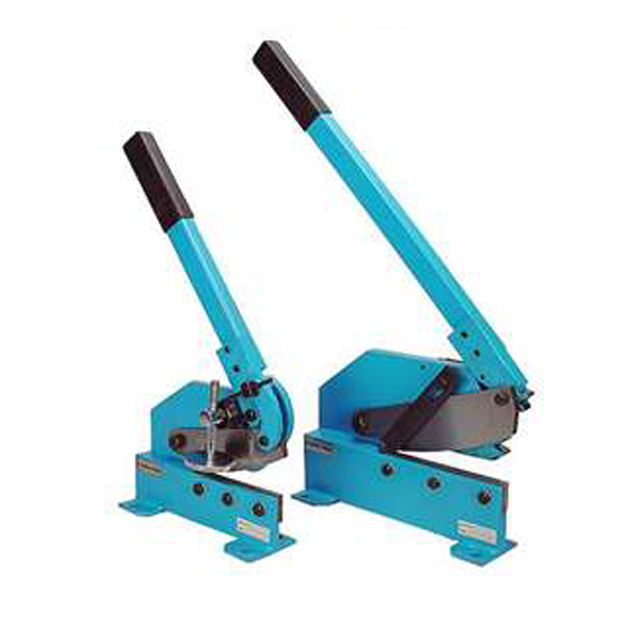
How do you guys cut phenolic pcb's? No, I don't mean stripboards, those go well with scoring method. Also I used dremel, but hard to make truly square cuts with it.

this pcb is what I use:
https://www.taydaelectronics.com/ha...ds/copper-clad-board-pcb-single-side-6x6.html
I was thinking of miter saw but with hand hacksaw.
Thoughts?
 
image.jpeg
I use a cutoff saw.
 
Hmm, what blade? :) could be worth a shot
 
I do it by hand with a hacksaw. I clamp the board in a vice then saw with the blade against the vice jaw.
 
The few I have made I used a full size hacksaw with 32 teeth per inch, following the pencil lines, then use sandpaper or file to smooth the edges and remove any burrs.
I also have a bench belt sander but have not tried that for smoothing the edges.
I have a chop saw but consider it a bit vicious for cutting circuit board, they tend not to like small cut offs, I tried a band saw but for some reason it generated sparks from the fibre glass board, both had blades suitable for wood not metal.

I am more then intrigued by your comment
The etching process isn't painful anymore so to say

I am new to this and find this the only part I really struggle with, please elaborate the details of your method.
 
I am new to this and find this the only part I really struggle with, please elaborate the details of your method.
Sure, I'll help what little I can tell from my own experience from trial and error. I use toner transfer with chemical transfer, NOT heat transfer.
1: With laser printer (no, you can't use inkjet) print pcb layout using as much toner as possible on glossy paper. Glossy because we want as much "excess" toner as possible on surface of paper instead of toner sucking in paper.

2: clean pcb surface with acetone, but before that, scratch surface bit with sandpaper. I get better results with sandpaper than steelwool/similar. IIRC I use 240 grit paper, just nought to make better contact for toner to stick. After scratching, clean copper with acetone & soap/alcohol to remove copper dust as well as any other dirt on surface.

3: Now to apply toner, apply acetone evenly on cleaned area, then place print on it. Wait while for acetone to soak paper, then apply ONLY vertical pressure to press print firmly towards copper. Acetone now has diluted toner, and when it is dried, toner has transferred to copper from paper. Now, DON't try to peel paper off when it's dry, mask is more fragile than it might look (actually you shouldn't see any toner, it looks now like you'd glued paper on copper)

4: Now to remove paper from copper but leaving mask intact. Pour very hot water, (boiling can be too hot) but what you can get from sink is enough. Let copper+paper combo be still in water for about 5 minutes, forget it you could say. Now, under water, peel paper off SLOWLY and GENTLY, no brushes, fingers are enough. Try to peel it along tracks, it tends to be better that way.

5: now you have pcb ready for etching. I use Vinegar (10%, grocery store))+hydrogen peroxide(3%, pharmacy) combo+salt (grocery, must be proper salt, nut potassium stuff)
Ratio is 50/50 vinegar and hydrogen. This is enought by it's own, salt is used to boost effect further. BUT, I highly recommend heating etching solution (40'c degrees is enough) as well as using aquarium pump to deliver fresh air as well as keep liquid on constant movement. With this method etching takes no more than 20 minutes, and no rubbing needed. This took 30-40 minutes:
2016-05-13-0090.jpg
To see how etching process goes on, look on copper side to some light. Also when you see gunky stuff on copper surface, shake pcb bit to clean surface (oxides or something form in copper surface).
when applying salt, teaspoon are mostly enought, pour it on copper surface and reaction goes like crazy, it can frighten bit, there can be very much bubbles.

After process is done, clean toner with acetone and now all there is left to do is drill holes for components.

Etching solution afterwards is hazardwaste, it contaisn copper salts (sulfate) that is poisonous. But boy it is one good electrolyte to use, it is afterall copper diluted in salt-water :p.

I think that's all.
 
Thanks very much fezder I will definitely try your method. I have just bought a secondhand laser printer hp laserjet 1320 so that I can try the toner transfer methods.

I have only tried using hydrauchloric acid + peroxide so far but it is unpredictable on how well it etches, for example I can etch a small test sample perfect and within one minute drop in my project board and nothing much happens, drives me crazy.
Thanks for the really detailed explanation, I have cut and pasted it into a word document for reference.

Incidentally, I read somewhere that mixing isopropyl alcohol with acetone in a ratio of 8/3 can be used as the alcohol has no effect on the toner but the acetone is very aggressive to the toner, this was used with photo (glossy) paper, but the guy said it does not work with all brands of photo paper.
 
Incidentally, I read somewhere that mixing isopropyl alcohol with acetone in a ratio of 8/3 can be used as the alcohol has no effect on the toner but the acetone is very aggressive to the toner, this was used with photo (glossy) paper, but the guy said it does not work with all brands of photo paper.
Yes, I tried this method also when beginning hobby of making pcb's but didn't get results that good as compared to 100% acetone.
 
I use 2 Parts 3% Hydrogen Peroxide and 1 Part HCL. (Muriatic Acid from hardware store)
Warm it up fairly hot.
Lay the PCB in the Solution with the Copper Side Up.
With some agitation, it will etch a pcb in about 2 minutes.

Even though I Don't, I Recommend you use Rubber Gloves.
And DON'T Breath the Fumes.
 
Last edited:
I use 2 Parts 3% Hydrogen Peroxide and 1 Part HCL. (Muriatic Acid from hardware store)
Warm it up fairly hot.
Lay the PCB in the Solution with the Copper Side Up.
With some agitation, it will etch a pcb in about 2 minutes.

Even though I Don't, I Recommend you use Rubber Gloves.
And DON'T Breath the Fumes.

If my chemistry is correct, you may get some chlorine gas byproduct: 2HCl + H2O2 ----> 2H2O + Cl2, I would recommend using in a well ventilated area. Then again I was not very good at chemistry :eek:
 
If my chemistry is correct, you may get some chlorine gas byproduct: 2HCl + H2O2 ----> 2H2O + Cl2, I would recommend using in a well ventilated area. Then again I was not very good at chemistry :eek:

Whatever the gas is it is horrendously corrosive and heavier than air, all the tools laid on my bench now have a coating of rust on them, a good enough reason to try a "friendlier" method.
 
Paper Shear.JPG
I Don't believe it releases Chlorine Gas.
Just the Fumes from the Hydrochloric Acid itself.

And YES, It should be done in a WELL VENTILATED AREA.

POSSIBLY OUTSIDE!

Cutting PCB, I just use this Paper Shear.
 
Last edited:
I've been using a dremel for years, but I recently saw someone in a video use these large snips. Bought one from the hardware store here and they are great. They cut through 1.6mm FR4 with a perfect clean cut. These aren't little tin snips, they are big, like bolt cutter big. They were $17 USD, so not a big investment either.

**broken link removed**

EDIT: Here's the video. You can watch him crop a board at the very last minute of the video. Skip to 23:40.
 
Last edited:
I used to use a carbide tipped laminate cutter.
LaminateCutter.jpg

But now I use a regular snap-off blade utility knife.
UtilityKnife.jpg

The trick is to score both sides of the board gently many times. Once you get a cut that's about 1/3 deep on each side, the board will break cleanly.

As for the chemicals. Chlorine is not as bad as most people think. I used to do contract work at a chemical plant that produced chlorine as its primary product. The good thing about chlorine is that the smell is so powerful that you'll be running for the exit long before it gets anywhere near a dangerous level. It only takes a concentration in air of about 4 parts/million before you start choking. The concentration has to become much much higher than that before it can do any kind of damage. So, if you can smell chlorine but have no trouble breathing, you're well below any level that you need to worry about. The PCB etching process is also likely to create airborne hydrochloric acid due to the effervescence of the reaction. This is going to be more dangerous than the chlorine, but again, hydrochloric acid occurs naturally in the human body, and the body can deal with it reasonably well. I'm not saying this to imply that you can ignore common sense and breathe deeply of the fumes. Of course not. Obviously this should be done under good ventilation. But it's important to have proper information, and keep things in perspective. There's no sense building a lab grade fume hood and wearing a hazmat suit in case you might get a faint whiff of something that smells like bleach, and then when you're done, you go and smoke a half dozen cigarettes.
 
Muriatic acid or Hydrochloric acid as we call here AKA brick acid is likely to also rust everything in your workshop! it has a high vapour pressure if its concentrated, You can get special containers with a acid resistant rubber washer like thing in the cap, but even with that at around 12C you will get fumes come out the container, I keep mine in a chemical fridge at 3C or if I have alot of it I stick the container in a bucket with a tight fitting lid and outside i have a hole with paving slabs lined, its 4 feet deep and part of an old access hatch, i keep the bucket down there as its nice and cool.
 
Look how it is solved

 
Status
Not open for further replies.

Latest threads

Back
Top