Continue to Site

Welcome to our site!

Electro Tech is an online community (with over 170,000 members) who enjoy talking about and building electronic circuits, projects and gadgets. To participate you need to register. Registration is free. Click here to register now.

  • Welcome to our site! Electro Tech is an online community (with over 170,000 members) who enjoy talking about and building electronic circuits, projects and gadgets. To participate you need to register. Registration is free. Click here to register now.

Attempt at PCB etching.

Status
Not open for further replies.

StopGo

New Member
I decided to give it a go again, using the laser toner transfer method.
First a quick trip into town to buy some materials..

- single sided copper clad PCB
- a big blue tray
- a bottle of FerricChloride
- an etch resistant pen (a bog standard stadler permanent marker)
- a polishing block for the copper
- 0.8mm drill for my dremmel
- nail polish remover (acetone)

I need a new NiCd charger, and it seemed an ideal thing for this test.

**broken link removed**

I quickly sketched out my circuit schematic in Multisim9. The general plan.. a 230v to 12v AC transformer, full bridge rectifier, a big cap, and then a Power transistor current source with integral LED charge indicator. (The transformer is not PCB mounted) Once happy with it, I tried exporting the schematic into ExpressPCB, but it didn't seem to cope with any of the obvious export formats. Perhaps if I had kept at it I would of found one. I gave up in the end.

So I started from scratch with a blank PCB in ExpressPCB. First I resized the workspace to match my PCB. In the excitement I had rushed ahead and chopped off a small 2" by 1.25" piece of board thinking I have seen so many charger circuits before, that I knew how big it should be. The polishing block, looks like a grit filled eraser. seemed to do a good job of making the copper look clean, so I just brushed the dust and grit away with a clean paint brush once I was done.

I added my various components and pads onto the PCB, then joined the dots, and added a little text too, it all seemed to fit I printed out a test on plain paper. Perfect match for size, and everything looked well within the capabilities of my little laser printer.. but then frustration sets it.

ExpressPCB won't let me print a mirror image of my circuit!! :confused:

Some head scratching, then an idea.. 5 minute google... I find some software called "Zan Image Printer". This little gem is a virtual printer driver that captures what you print as image files. I print my circuit to the "Zan Image Printer", but it comes out blocky and pixilated due to being captured actual size with only 300dpi res. More head scratching.. ExpressPCB has an option to "resize to fit page" checkbox, course this makes the PCB way too big, but photo shop soon reduces things back to wanted size, and with no loss of detail. ExpressPCB prints a thin box where the edges of the PCB are, this is an ideal guide for cropping the enlarged image before reducing it to whatever size your PCB is.

I printed the PCB design on Photo quality glossy inkjet paper, fed manually into my laser printer. Glossy paper has no fibres like normal paper, the toner seems to sit on top and even has a visible profile when viewed side on.

I put some newspaper down on the kitchen workbench, put the copper board on it, cut the print to size and laid it on the copper board, finally a single sheet of A4 over the top. Then used my clothes iron on full power for about 3-4 minutes just pressed down flat on the whole lot. It did get hot enough for the paper to brown a little. I went round the edges with the tip of the iron for good measure. The heat had made the glossy paper back stick to the single sheet of A4, it wasn't coming off.

After the ironing, I plunged the PCB into water and left it for 10 minutes. I was expecting the paper to become soft but the photo paper had a plastic backing layer and was very resistant to the water, in the end I had to just peel it off. (Epson premium glossy)

This seemed to work mostly, but some of the fine text at the side failed to stick to the copper, and one track in the middle needed touching with the pen. Without further pause, I poured the etching solution into the tray, then in went the PCB. It took 5 minutes of poking it with a kebab stick before the copper finally vanished leaving just the tracks. The etch pen had worked just as well as the laser toner.

The toner was difficult to remove, even with "scotch brite" scour pads and the acetone, but it did eventually clean up.

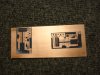
So here it is.. the finished artifact..

**broken link removed**
 
Use eagle PCB instead. Actually, if you used the Laser Jet Toner Method, you dont need to mirror it. When you apply it, it gets mirroed anyway.

Thats something I noticed, Sometimes the text comes out sometimes it doesnt.

For me, the toner comes off easy! Acetone baby! Whats sucks is when some of the paper gets stuck on the PCB, Then its a ***** to get off. I use Staples photo paper.

Not bad though. it looks like some of your tracks were penciled in.
 
That's not too bad at all.

I suggest using magazine paper, it's never let me down before. There's no need to remove all the toner, you might even be able to solder through it, I don't though, I just scratch of the toner where ever I need to solder to.
 
Acetone and a paper towel will take off the toner, just wipe on/ wipe off. No scrubbing. Maybe nail polish remover is somehow different. It really disolvese the toner quick and thoroughly, even etch pen comes off easy. I got a big can of acetone from the hardware store, its probably cheaper than nail polish romover (have never painted my nails, so don't know).
 
Nail varnish remover normally is acetone but you can buy acetone-free stuff - my sister uses it.
 
Overclocked said:
Use eagle PCB instead. Actually, if you used the Laser Jet Toner Method, you dont need to mirror it. When you apply it, it gets mirroed anyway.

Thats something I noticed, Sometimes the text comes out sometimes it doesnt.

For me, the toner comes off easy! Acetone baby! Whats sucks is when some of the paper gets stuck on the PCB, Then its a ***** to get off. I use Staples photo paper.

Not bad though. it looks like some of your tracks were penciled in.

I will check out Eagle PCB, thanks. I think I understand where you are coming from. It gets mirrored anyway, and I also poke the components through from the other "not copper" side.

I think I must of been thinking I was going to populate the coppere'd side :rolleyes: Oops!

I would of used acetone if I could find any, but the shops only had what they had so I had to make do with nail polish remover. It does contain significant quantities of acetone. I have found the toner comes off easily if its left to soak for a minute or two. Got to make a point of getting some clean acetone, I'm not sure the other ingredients are doing my PCB's any good.

Magazine paper ? Eh..
Sounds cheaper than photo paper. I'll give it a go :)
 
StopGo said:
I will check out Eagle PCB, thanks. I think I understand where you are coming from. It gets mirrored anyway, and I also poke the components through from the other "not copper" side.

I think I must of been thinking I was going to populate the coppere'd side :rolleyes: Oops!

I would of used acetone if I could find any, but the shops only had what they had so I had to make do with nail polish remover. It does contain significant quantities of acetone. I have found the toner comes off easily if its left to soak for a minute or two. Got to make a point of getting some clean acetone, I'm not sure the other ingredients are doing my PCB's any good.

Magazine paper ? Eh..
Sounds cheaper than photo paper. I'll give it a go :)

First I print on a Inket Normally. Then I feed it through the copier of the Laser Jet along with the Photo paper. It comes out normal. It gets flipped over when I transfer it to the board. Did you use the Glossy side? or the non glossy side? For some reason, I have to use the non glossy side, the matte side.

I print on Inkjet first because Im too cheap to get the cable for the laser jet. I keep spending my money on other things, like Uh...Aluminum powder for a reaction Im doing and other things.
 
You have bad acetone or special toner if it did not come right off.. I do it all the time. Eagle as recommended is the program you want.

I have to try the magazine paper though (what was that magazine again :) ), I use staples photo paper with perfect results, but a lot of work getting the film off before the ecthant.

I went to three store in the last couple days for laser transparent paper, seems to be all gone. Wanted to try that..
 
Use the bottom layer on ExpressPCB. It is already mirrored for you. I still use this software because it has a short learning curve.

Look at www.pulsar.gs for good ideas for simple board construction.

An inexpensive heat laminator makes all the difference when you decide to do surface mount components.
 
mramos1 said:
You have bad acetone or special toner if it did not come right off.. I do it all the time. Eagle as recommended is the program you want.

I have to try the magazine paper though (what was that magazine again :) ), I use staples photo paper with perfect results, but a lot of work getting the film off before the ecthant.

I went to three store in the last couple days for laser transparent paper, seems to be all gone. Wanted to try that..

I found that if you let it sit in water for about 5 minutes or so, You can peel it off. You can even peel it off Under running water, but do it slowly! However you cant peel it off right off the press, it leaves the paper on, which is hard to get off!
 
mramos1 said:
I went to three store in the last couple days for laser transparent paper, seems to be all gone. Wanted to try that..
I have also been curious to how well transparencies work. Does anyone have any experience with them? I would imagine that they would be great because the surface is less porous than photo paper.
 
Overclocked said:
I found that if you let it sit in water for about 5 minutes or so, You can peel it off. You can even peel it off Under running water, but do it slowly! However you cant peel it off right off the press, it leaves the paper on, which is hard to get off!

I do that now. 5 minutes in warm water bath with a little soap (I take such good care of my boards). That part save a lot of time. I then peel off the paper, rub the rest off with thumbs, then use a toothbrush (old soft one :) ). And it does not take the toner off long as you do not get too carried away.

But the thin close "side by side" traces, I sometime get the stuff in there, I use my finger nail or exacto up-side down. Just takes a little time as I can not see like I used to.

But the results are great.. I just want to skip that last part that takes me 15+ minutes.

If you think about it (other than more toxic fumes to inhale while you iron), the laser trasparent paper (if I could find some) sounds like a better way if the cost is not way out there.

Or Hero999's magazine paper, sounds like the best idea (will leave that photo film off all together)..

If I get time tomorrow, I will do the magazine paper and see what I get. Hopefully not a jammed laser printer :D. He said not the glossy paper, the semi-gloss looking stuff I think.
 
freeskier89 said:
I have also been curious to how well transparencies work. Does anyone have any experience with them? I would imagine that they would be great because the surface is less porous than photo paper.

I think so too. But try finding it locally (what kills a pack-rat like me, I recall throwing the stuff out years ago when we went inkjet).

And go online and you might as well get that blue press and peel.

This is gonna tick me off if Hero has the best way, for about 5 seconds. :eek:
 
I've been tempted to try a transparency, but not sure how it will handle the laser printer. They were for an inkjet printer, little concerned they might melt and get hung up in the laserjet. Then there is the laminator...

Almost forgot to mention. Got a catalog from American Science & Surplus, they have the 4" laminator I bought, for $19.95. Works great, good quality machine.
 
HarveyH42 said:
I've been tempted to try a transparency, but not sure how it will handle the laser printer. They were for an inkjet printer, little concerned they might melt and get hung up in the laserjet. Then there is the laminator...

Almost forgot to mention. Got a catalog from American Science & Surplus, they have the 4" laminator I bought, for $19.95. Works great, good quality machine.

The staples photopaper is for Inkjets, So far it hasnt melted on me. It seems like it needs high temps to fuse. But when it goes through the Laserjet, its only exposed to a heater for a short period of time, so it should be OK.
 
It did just what I thought.. JAMMED.. I had to pry it out after removing the toner and the fuser from the printer. It is to thin.

Now I must be fair, it was my wifes Christian magazine not an old EDN.. I could not find any of mine to cut up (funny how that works, but my wife was cool about it).

So far as the rag paper you need to use thick paper.

Anyway, the other day I was in Circuit City for a part and I saw "Kodak picture paper" on clearance. I thought "picture paper" I use it to make circuit boards maybe I should try theirs at 1/2 the price on clearance. Worst case print pictures on it.

Now this is in the States, clearance $4 for 25 sheets and $8 for 75.. I bought a pack of 25 to test with when I had some spare time. Funny we have no spare time, but we all meet up here.. :D

So after the magazine paper jammed I stuck a sheet of the Kodak paper in.

Guess what!? I am going to Circuit City in the morning to buy a couple 75 packs. It killed Staples picture paper.

To add to the magic of picture paper over press-and-peel (price wise) I put the sheet in upside down and printed on the wrong side (by mistake), then did it on the right side.

For fun I cut them both out and ironed them.. Did the 5 minutes in a warm bath. Both came out great and no toothbrush or exacto required. A lot less work than Staples picture paper.

See the picture, sorry for the blur, but this took 15+ minutes less to get ready for the etchant. The right side is the photo side of the paper (S in lower corner). And the (S side, the correct side) was less work that the wrong side but both were less work than the Staples paper..
 

Attachments

  • DSC01528.JPG
    DSC01528.JPG
    140.8 KB · Views: 193
Last edited:
mramos1 said:
I think so too. But try finding it locally (what kills a pack-rat like me, I recall throwing the stuff out years ago when we went inkjet).
Ill have to try it sometime. I have access to all of the transparencies I need. My dad's office's supply room is littered with boxes upon boxes of the stuff intended for laser printers :). Right in the same room there is a laminator, so Ill have to try the combo soon and let you know how it works.

Edit: Wow mramos, those turned out great. Better than mine for sure. I always get impatient with the iron and/or do not have enough space on the board to get the edges to stick well.
 
Last edited:
Are those just example? Or are you going to actually use them? You know, you coukd put them side by side to save your self some PCB material.
 
Overclocked said:
Are those just example? Or are you going to actually use them? You know, you coukd put them side by side to save your self some PCB material.

Old circuits and I just ironed them on to see how hard it was to get the film off the copper.. I will acetone them in the AM.. If you note, the vertical one (left) is not even 100% on the copper.

It was a test and I am really happy with the results. I will never use Staples picture paper again after this..

I loved the staples paper but the work to get tha white film off was a pain.
 
freeskier89 said:
Ill have to try it sometime. I have access to all of the transparencies I need. My dad's office's supply room is littered with boxes upon boxes of the stuff intended for laser printers :). Right in the same room there is a laminator, so Ill have to try the combo soon and let you know how it works.

Edit: Wow mramos, those turned out great. Better than mine for sure. I always get impatient with the iron and/or do not have enough space on the board to get the edges to stick well.

Those are the default traces, very thin in Eagle (I always forget to crank them up but you have an 18 pin chip to get an idea of the size).

Send me some of that transparent paper and I will test that :)

I never had good luck with a laminator. I have a nice one, but I think I would have to send them through too many times. Things move, etc.

I did that with my wifes iron. It was wait 2 minutes to heat up and iron for 1-2 minutes.. She has a nice iron.. Thank God she does not see what I do with it when she is not around.
 
Status
Not open for further replies.

New Articles From Microcontroller Tips

Back
Top